Watch it draw itself · tap to replay
How to Draw a Wigwam
Draw a wigwam in 12 easy steps, about 9 minutes. Free, with a printable worksheet.
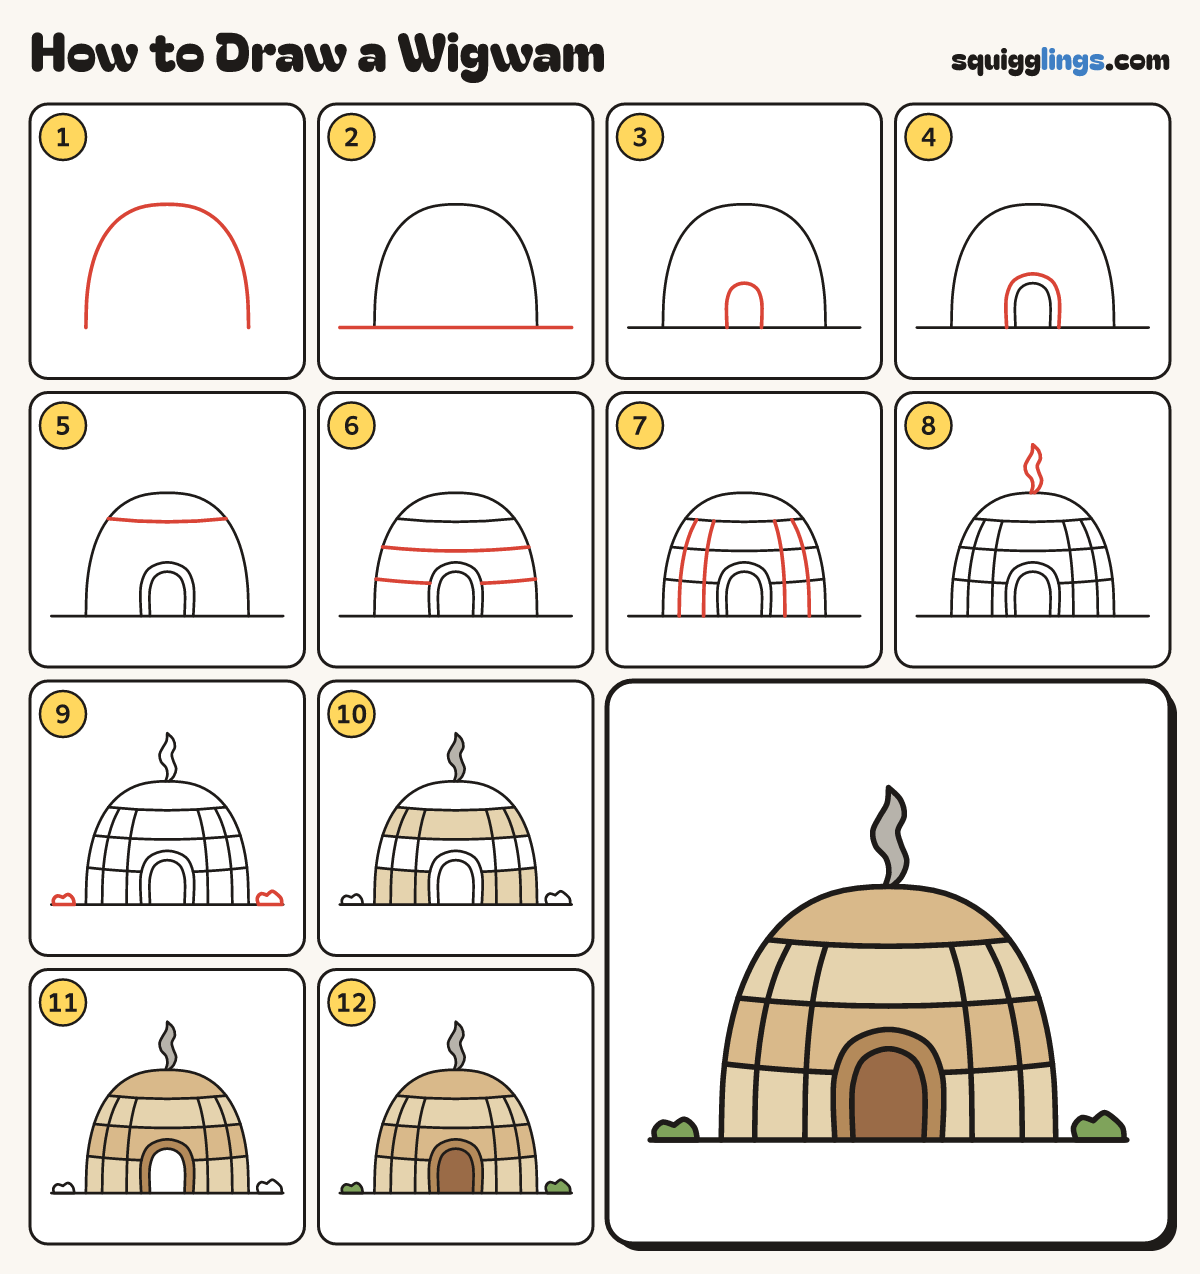
Each picture adds one red line. Draw that line, then scroll to the next picture. Rub out any dashed helper lines at the end. First up: the dome.
Step 1: The dome
Start low on the left. Draw a big round dome up, over the top and down to the right.
Tip Make it wider than it is tall, with steep sides.
Step 2: The ground
Draw a long ground line under the dome, from one side of the paper to the other.
Step 3: The doorway
In the middle draw a low arch for the doorway. Start on the ground, stop on the ground.
Step 4: Door frame
Draw a bigger arch around the doorway, from the ground up, over and back to the ground.
Tip The frame is made of bent young trees.
Step 5: Top hoop
Near the top draw a dipping line across the dome. Start on one edge, stop on the other.
Step 6: Two more hoops
Draw 2 more dipping lines lower down, from edge to edge. The lowest one stops at the door frame.
Tip The hoops hold the sheets of bark in rows.
Step 7: Bent poles
From the top hoop draw 2 bent poles on each side, down to the ground, curving like the dome.
Tip The poles lean in at the top and stand apart at the ground.
Step 8: Smoke
From the very top draw a wavy wisp of smoke up to a point, then back down to the dome.
Tip A little fire inside keeps the wigwam warm.
Step 9: Two bushes
Draw a small bumpy bush on the ground at each side of the wigwam.
Step 10: Sand rows, grey smoke
Colour the second row down and the bottom row sand. Colour the smoke grey.
Step 11: Tan rows, brown frame
Colour the top and the third row tan. Colour the door frame light brown.
Tip Tan is a bit darker than sand.
Step 12: Dark doorway, green bushes
Colour the doorway dark brown and the 2 bushes green. Your wigwam is done!
Your finished drawing
Follow the steps above and this is where you end up: a wigwam, drawn by you.
Every step in one picture