Watch it draw itself · tap to replay
How to Draw a Bat Hanging Upside Down
Draw a bat hanging upside down in 10 easy steps, about 8 minutes. Free, with a printable worksheet.
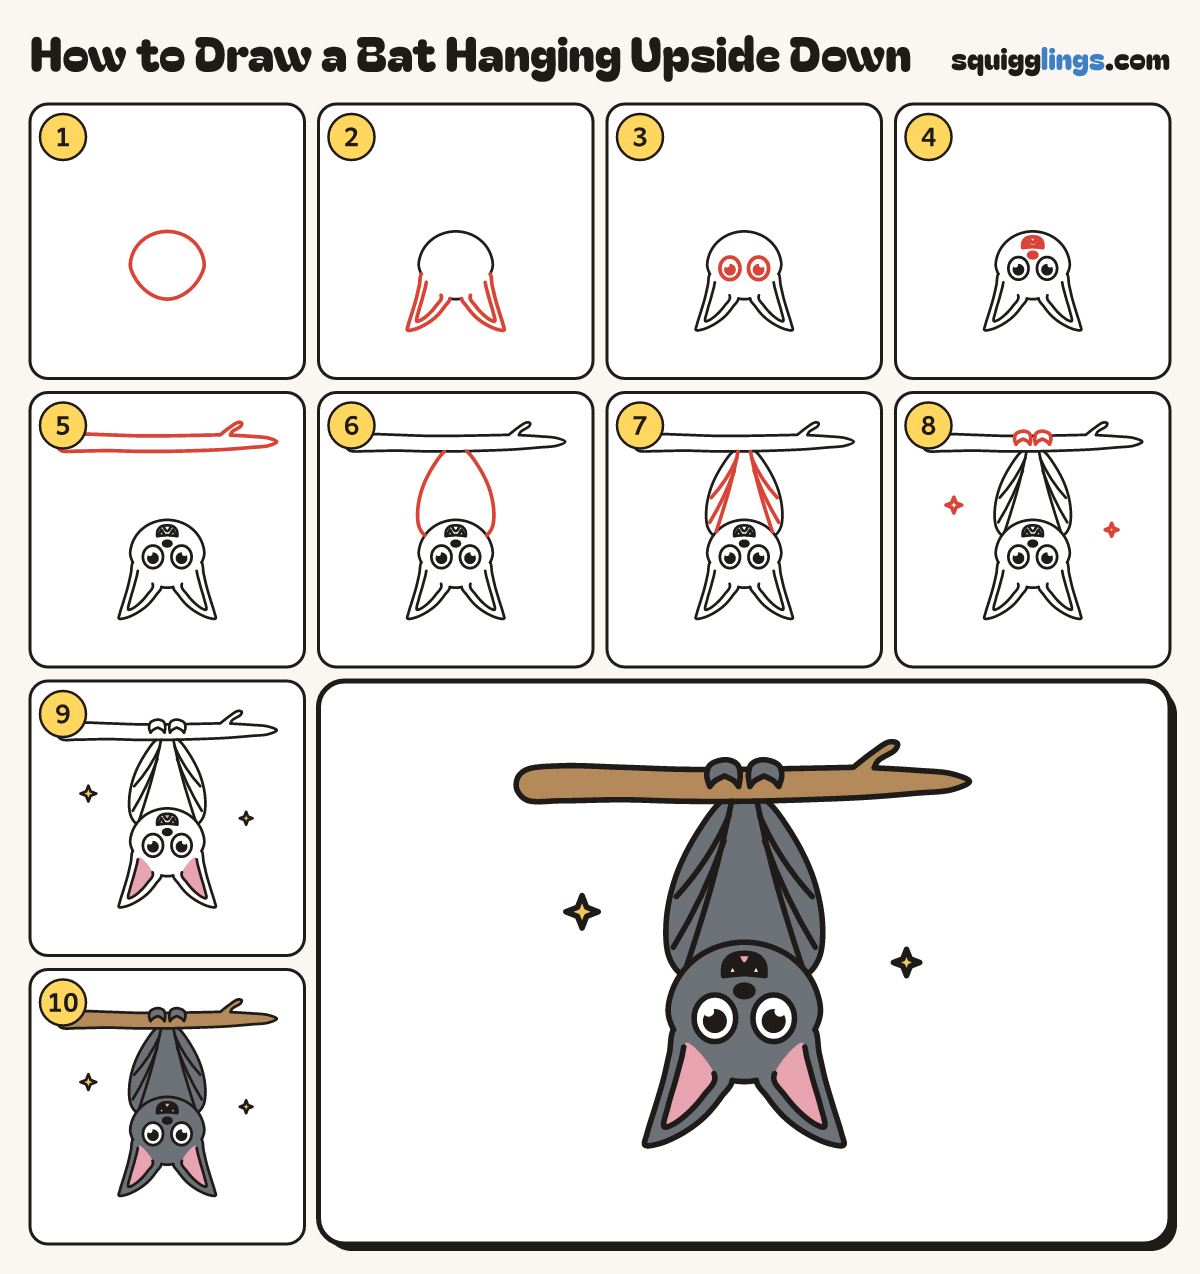
Each picture adds one red line. Draw that line, then scroll to the next picture. Rub out any dashed helper lines at the end. First up: upside-down face.
Step 1: Upside-down face
In the lower middle of your paper, draw a wide egg face, chin on top. Leave lots of room above.
Tip Turn your paper round if it helps: it is a bat face, flipped.
Step 2: Pointy ears
Start on each bottom corner of the head. Draw a tall pointy ear down and out, back to the head.
Step 3: Big eyes
In the middle of the head, draw 2 big egg eyes close together. Add a black dot and shine.
Step 4: Nose, smile and fangs
Above the eyes, draw a small black nose. Above it, a round smile with a tongue and 2 fangs.
Step 5: The branch
Across the top of your paper, draw a long branch with round ends, thinner on the right, and a twig.
Step 6: Wrapped wings
Start top left of the head. Draw up to a narrow neck under the branch, then down to the right.
Tip Narrow at the top where the feet hold the branch.
Step 7: Wing edges and fingers
Start under the branch. Draw a line down to each head corner, like a narrow V. Add finger lines.
Step 8: Feet on the branch
On top of the branch, draw 2 little feet with their toes curling over the front. Add 2 twinkle stars.
Step 9: Pink ears, yellow stars
Colour the inside of the ears and the tongue pink, and the stars yellow. Leave the eyes white.
Step 10: Grey bat, brown branch
Colour the bat grey and the mouth black, around the pink and fangs. Colour the branch brown. Your bat is done!
Your finished drawing
Follow the steps above and this is where you end up: a bat hanging upside down, drawn by you.
Every step in one picture