Watch it draw itself · tap to replay
How to Draw a Basilisk Lizard
Draw a basilisk lizard in 13 easy steps, about 10 minutes. Free, with a printable worksheet.
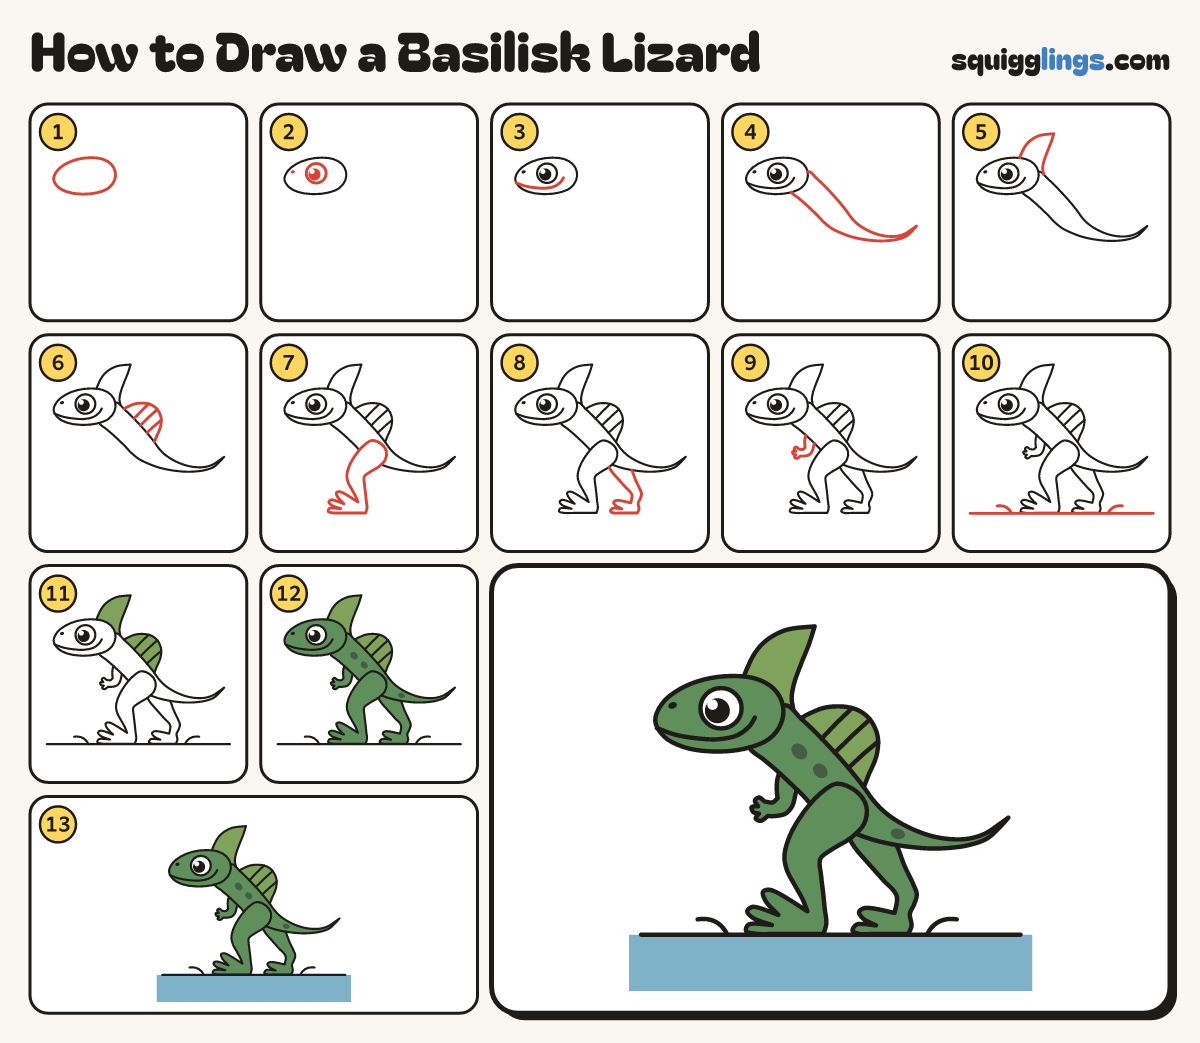
Each picture adds one red line. Draw that line, then scroll to the next picture. Rub out any dashed helper lines at the end. First up: long head.
Step 1: Long head
Near the top left, draw a long rounded head lying on its side, with a round snout on the left.
Step 2: Big eye
High on the head, draw a big round eye with a black dot and a white shine. Dot a nostril.
Step 3: Long smile
Start at the snout tip. Draw a long smile along the jaw, curling up behind the eye.
Step 4: Body and whip tail
From behind the head, draw the back to a long pointy tail, then the tummy back to the chin.
Tip Make the tail thin as a whip and longer than the body.
Step 5: Pointed crest
From the top of the head, draw a tall pointed crest leaning back, down to the neck.
Step 6: Back sail
Start on the back, just behind the head. Draw a round sail down to the hips. Add 3 rib lines.
Step 7: Front leg
Over the hip, draw a round thigh, a bent knee, a thin shin and a long foot with 3 toes.
Tip Rub out the tummy line inside the thigh.
Step 8: Back leg
From under the thigh, draw the other thin leg stepping back, with a bend, a long foot and 2 toes.
Step 9: Tiny arm
Start on the chest. Draw a tiny arm down to a hand with 3 fingers, and back to the chest.
Step 10: Water and splashes
Draw a water line right across the page under the feet. Add a splash in front and behind.
Tip A basilisk runs so fast it can run on top of water!
Step 11: Leaf green fins
Colour the crest and the back sail leaf green first.
Step 12: Green lizard
Colour the head, body, tail, legs and arm green. Leave the eye white. Press harder for 3 spots.
Step 13: Blue water
Colour the water blue, right down to the bottom of the page. Your basilisk is done!
Your finished drawing
Follow the steps above and this is where you end up: a basilisk lizard, drawn by you.
Every step in one picture