Watch it draw itself · tap to replay
How to Draw a Banana Tree
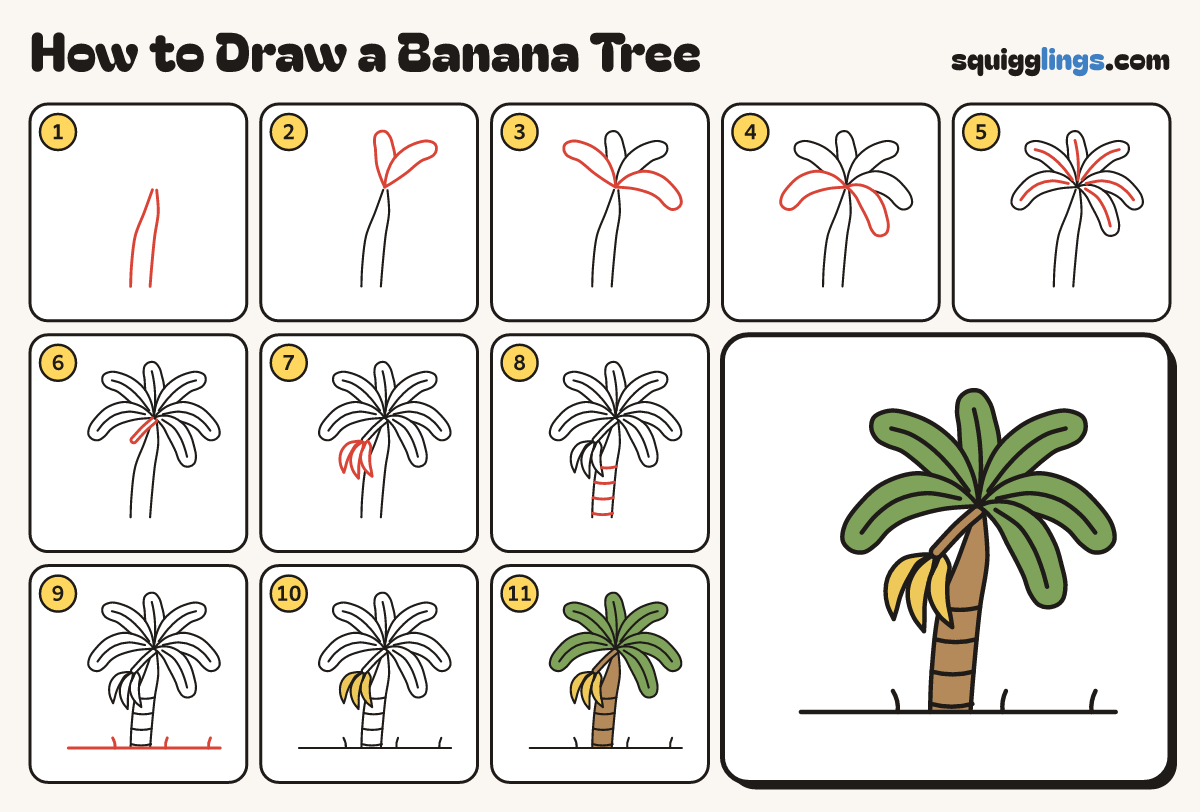
Draw a banana tree in 11 easy steps, about 8 minutes. Free, with a printable worksheet.
Each picture adds one red line. Draw that line, then scroll to the next picture. Rub out any dashed helper lines at the end. First up: the trunk.
Step 1: The trunk
Start near the bottom. Draw 2 trunk lines leaning up to the right, getting closer, and stop above the middle.
Step 2: Two back leaves
From the trunk top draw 2 paddle leaves with round tips, 1 straight up and 1 up to the right.
Tip Banana leaves are big and wide like paddles.
Step 3: Two more leaves
From the trunk top draw 1 paddle leaf up to the left, and 1 arching right and drooping down.
Step 4: The front leaves
Last, draw a paddle leaf arching left and drooping down, and 1 hanging down to the right.
Step 5: Midribs
Inside each leaf draw 1 gently curved line down the middle, from near the base almost to the tip.
Step 6: A hanging stalk
From under the leaves draw a short fat stalk curving down and left, like a bent finger.
Tip The bananas will hang from its low end.
Step 7: A bunch of bananas
From the low end of the stalk draw 3 fat bananas hanging down side by side, like thick curved fingers.
Tip Draw only the parts you can see of the ones behind.
Step 8: Trunk rings
Across the trunk draw short sagging curves from the left line to the right line, every finger-width up.
Step 9: Ground and grass
Draw a long ground line through the bottom of the trunk. Along it flick up 3 grass blades.
Step 10: Yellow bananas
Colour the 3 bananas yellow.
Step 11: Green leaves, wood trunk
Colour the leaves green, and the trunk and stalk wood brown around the bananas. Go over your lines!
Your finished drawing
Follow the steps above and this is where you end up: a banana tree, drawn by you.
Every step in one picture