Watch it draw itself · tap to replay
How to Draw a Babirusa
Draw a babirusa in 12 easy steps, about 9 minutes. Free, with a printable worksheet.
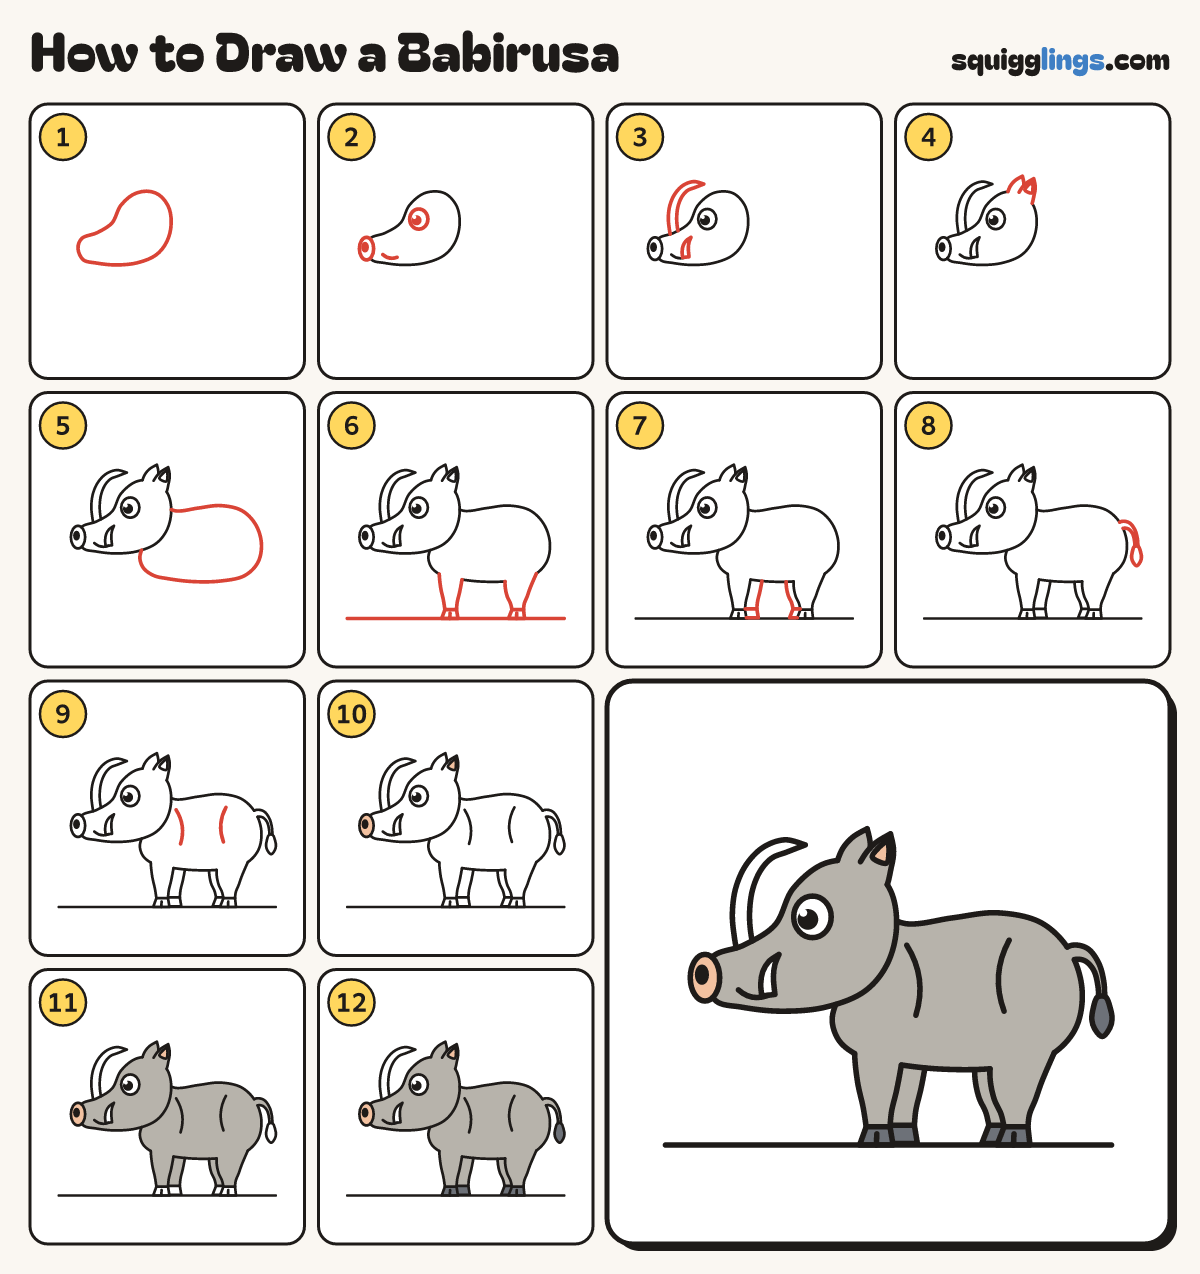
Each picture adds one red line. Draw that line, then scroll to the next picture. Rub out any dashed helper lines at the end. First up: the head.
Step 1: The head
Near the top left draw a long head: a round top that slopes down into a long snout.
Tip The snout gets thinner toward the front.
Step 2: Eye and nose
Draw a big eye high on the head. Add an oval nose at the tip, a nostril and a smile.
Step 3: Curly tusks
From the top of the snout grow a long tusk curling back. Add a short tusk at the mouth.
Tip The tip curls back toward the eye but never touches the head.
Step 4: Two pointy ears
Draw 2 small pointy ears leaning back on the back of the head. Add an inside to the front ear.
Step 5: The body
From behind the head draw a big bean body: a round chest, a gently arched back and a round bottom.
Tip No long neck: the head sits right on the shoulders.
Step 6: Two legs
Draw a ground line. Add a slim front leg under the chest and a back leg under the bottom.
Tip Each leg gets thinner down to a little split hoof.
Step 7: The far legs
Draw the 2 far legs peeking out: one just behind the front leg, one in front of the back leg.
Step 8: The tail
From the top corner of the bottom draw a thin tail curving out and down to a small tuft.
Step 9: Skin folds
Behind the shoulder draw a fold from under the back to above the belly. Add one before the back leg.
Step 10: Peach nose and ear
Go over your lines. Colour the nose and the ear inside peach. Leave the tusks white.
Step 11: Colour it grey
Colour the rest grey, around the peach, but not the hooves or tuft. Leave the eye and tusks white.
Step 12: Slate hooves
Colour the hooves and the tail tuft slate grey.
Your finished drawing
Follow the steps above and this is where you end up: a babirusa, drawn by you.
Every step in one picture