Watch it draw itself · tap to replay
How to Draw an Awareness Ribbon
Draw an awareness ribbon in 10 easy steps, about 8 minutes. Free, with a printable worksheet.
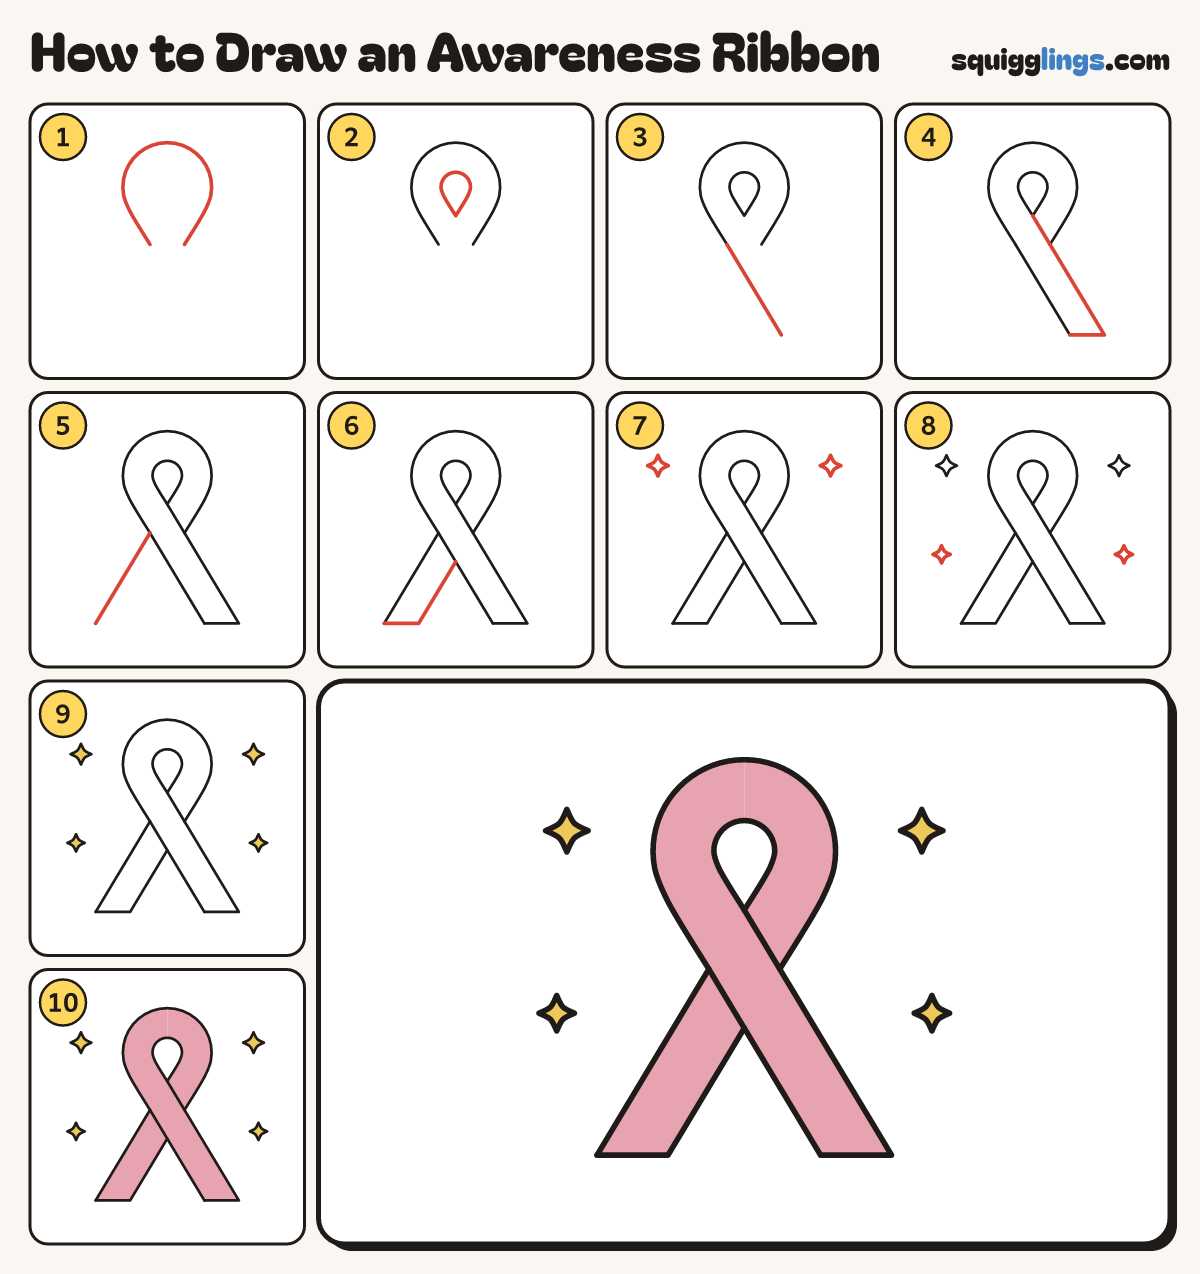
Each picture adds one red line. Draw that line, then scroll to the next picture. Rub out any dashed helper lines at the end. First up: loop top.
Step 1: Loop top
Start on the left, halfway down your paper. Draw a tall upside-down U and stop level on the right.
Tip Keep both sides the same. The ends lean in a little.
Step 2: Teardrop hole
Inside the loop draw an upside-down teardrop: round at the top, with its point at the bottom, in the middle.
Tip Keep the gap round the teardrop the same all the way. That gap is the ribbon.
Step 3: Front tail
Start at the loop's left end. Draw a long straight line slanting down to the right. Stop near the bottom.
Tip This line carries on from the loop, so the ribbon looks like one strip.
Step 4: Front tail end
From the teardrop's point, draw a matching line beside the first. Join the 2 ends with a flat line.
Step 5: Back tail
Start at the loop's left end again. Slant a line down to the left. Stop level with the other tail.
Step 6: Back tail end
Draw a flat line in from its end. Then slant back up and stop at the front tail.
Tip The back tail hides behind the front one, so its lines stop when they touch it.
Step 7: Two sparkles
Draw a sparkle star on each side of the loop, up high.
Step 8: Two more sparkles
Draw a smaller sparkle star on each side, lower down, outside the tails.
Step 9: Yellow sparkles
Colour the 4 sparkles yellow.
Step 10: Pink ribbon
Colour the loop and both tails pink. Leave the teardrop hole white. Your ribbon is done!
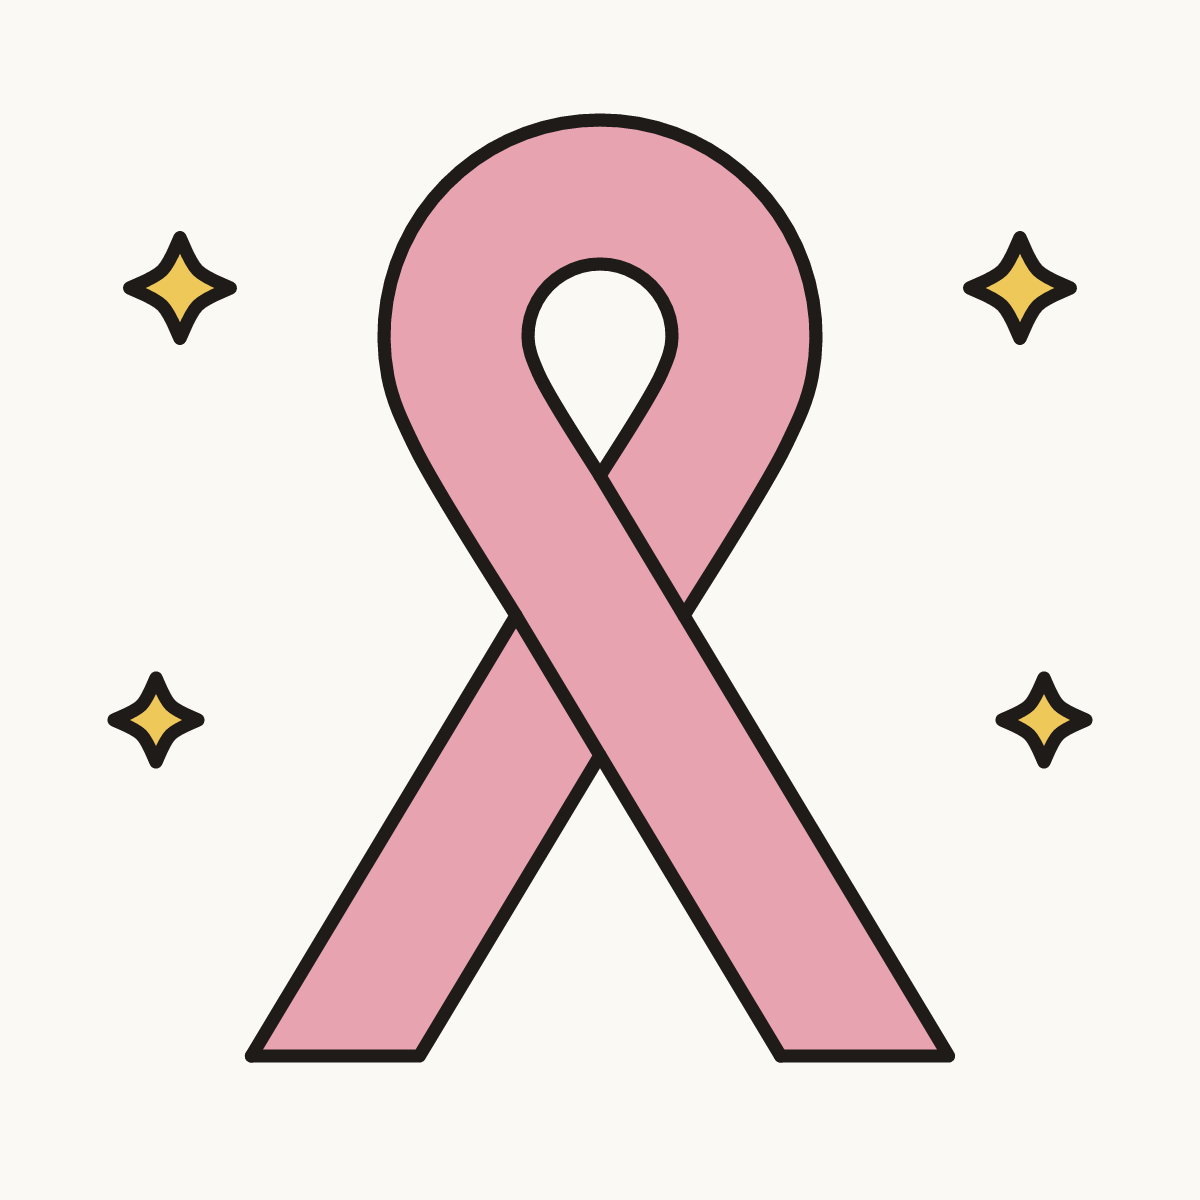
Your finished drawing
Follow the steps above and this is where you end up: an awareness ribbon, drawn by you.
Every step in one picture