Watch it draw itself · tap to replay
How to Draw an At Sign
Draw an at sign in 11 easy steps, about 8 minutes. Free, with a printable worksheet.
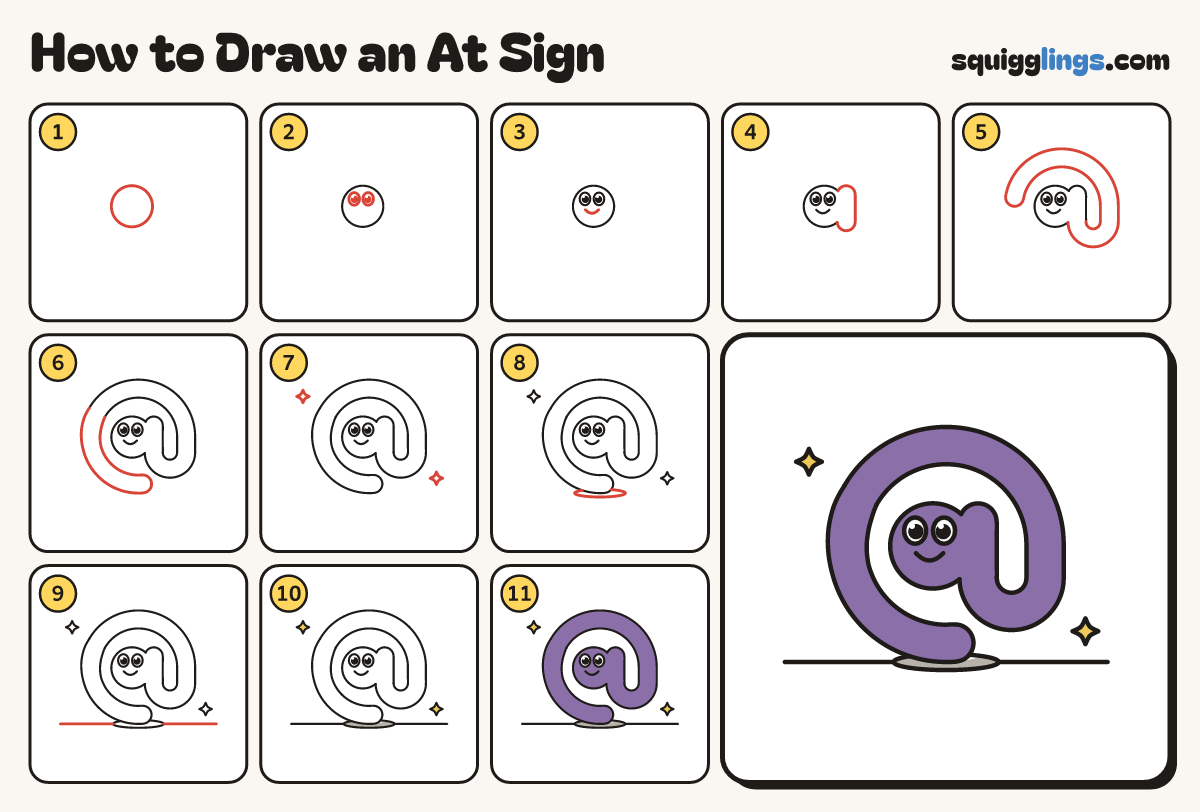
Each picture adds one red line. Draw that line, then scroll to the next picture. Rub out any dashed helper lines at the end. First up: round ball.
Step 1: Round ball
Left of the middle draw a big round ball, like a bouncy ball. It's the middle of the at sign.
Tip An at sign is a little a with a tail swinging round it.
Step 2: 2 big eyes
On the ball draw 2 round eyes close together. Colour a big black dot in each, leaving a shine.
Step 3: A smile
Under the eyes draw a small U smile, starting under the left eye and stopping under the right eye.
Step 4: The stem
On the ball's right side draw a fat short bar standing up, with rounded ends, overlapping the edge.
Step 5: Big sweep
From the stem's bottom curl a fat band right, up over the ball and down its left side, stopping halfway.
Tip Keep the gap round the ball and stem the same width all the way.
Step 6: The tail
From the sweep's end curl a fat tail down under the ball. Stop before the stem, pointing right.
Step 7: Sparkles
Draw 2 small sparkle stars, one high on the left and one low on the right.
Step 8: A shadow
Across the bottom of the tail, draw a thin flat oval for its shadow.
Step 9: The floor
From each side of the shadow, draw a straight floor line out, stopping a thumb from the edge.
Step 10: Yellow sparkles, grey shadow
Colour the 2 sparkles yellow and the shadow grey.
Step 11: Purple at sign
Colour the whole at sign purple, around the eyes. Leave the eyes white. Your at sign is done!
Your finished drawing
Follow the steps above and this is where you end up: an at sign, drawn by you.
Every step in one picture