Watch it draw itself · tap to replay
How to Draw Astronaut Ice Cream
Draw astronaut ice cream in 11 easy steps, about 8 minutes. Free, with a printable worksheet.
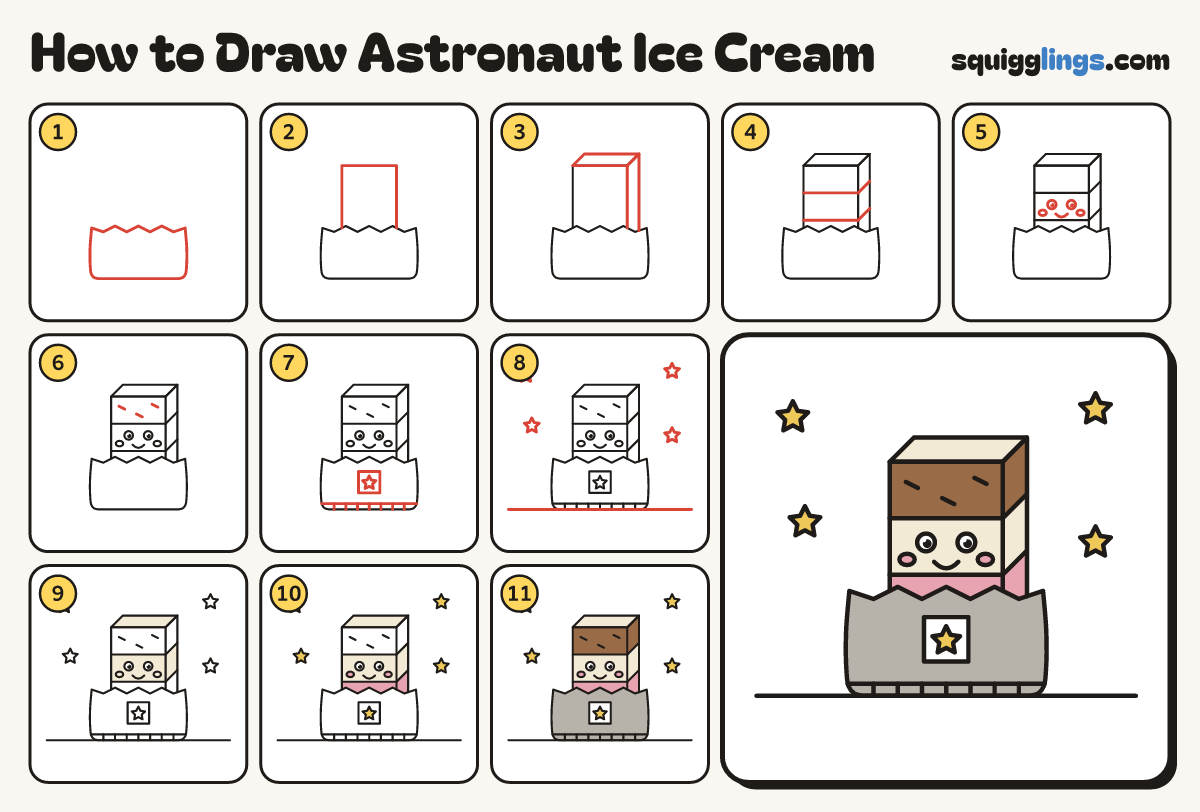
Each picture adds one red line. Draw that line, then scroll to the next picture. Rub out any dashed helper lines at the end. First up: foil packet.
Step 1: Foil packet
Draw a soft packet in the middle, with bulgy sides, round bottom corners and a torn zigzag top.
Tip The ice cream comes in a foil pouch you tear open.
Step 2: The block
Draw a tall block poking up out of the packet. Its top is well above the torn edge.
Step 3: Top and side
Draw a slanted top going back from the block's top edge, and a thin side on the right.
Step 4: Three layers
Start on the left edge of the block. Draw 2 level lines across and stop on the right edge.
Step 5: Happy face
On the middle layer draw 2 round eyes with a dot and a shine, a smile and 2 oval cheeks.
Step 6: Chalky flecks
Scatter 3 tiny dashes on the top layer.
Tip Freeze-dried ice cream is dry and crumbly like chalk, not drippy.
Step 7: Label and band
On the packet draw a square label with a star. Add a stripy band along the bottom, side to side.
Step 8: Table and stars
Draw the table line under the packet from edge to edge. Scatter 4 little stars around the packet.
Step 9: Cream layer
Go over your lines. Colour the block top and middle layer cream around the cheeks. Leave the eyes white.
Step 10: Yellow and pink
Colour the stars yellow, then the bottom layer and the cheeks pink.
Step 11: Grey and brown
Colour the packet grey around the label, then the top layer brown. Your astronaut ice cream is ready!
Your finished drawing
Follow the steps above and this is where you end up: astronaut ice cream, drawn by you.
Every step in one picture