Watch it draw itself · tap to replay
How to Draw a Blackberry
Draw a blackberry in 11 easy steps, about 8 minutes. Free, with a printable worksheet.
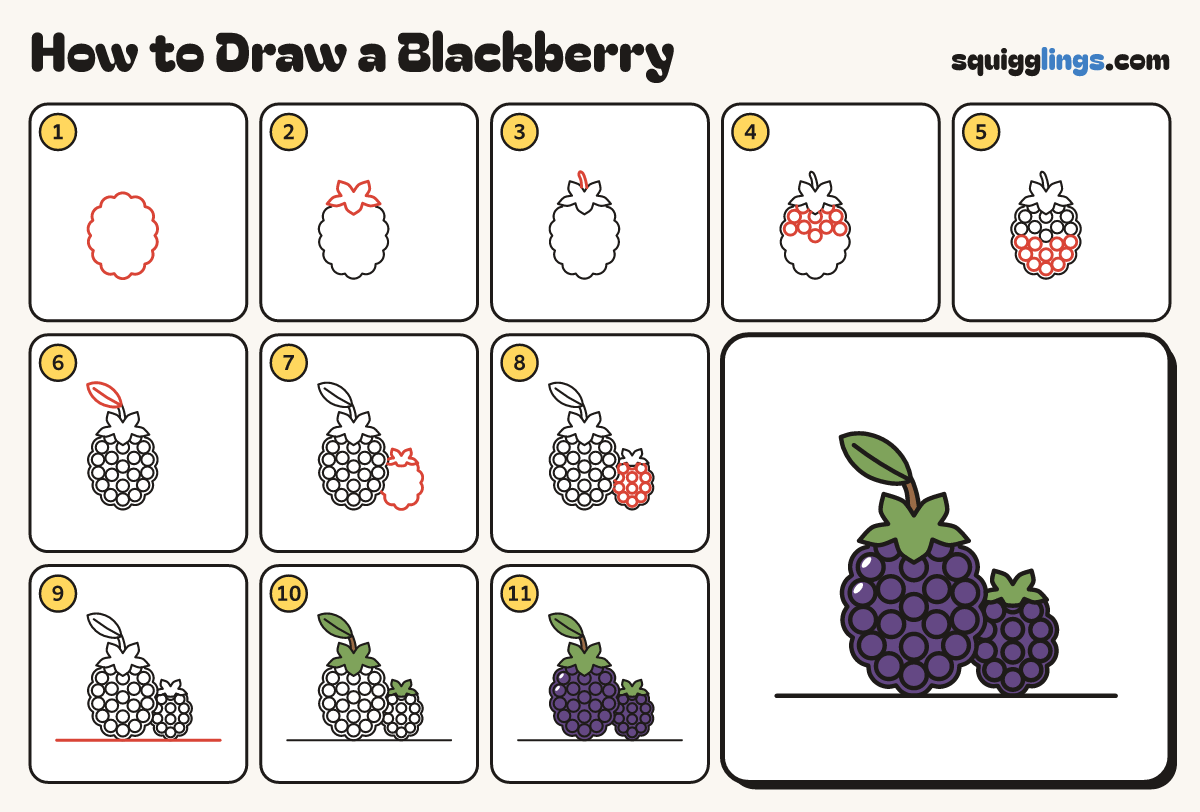
Each picture adds one red line. Draw that line, then scroll to the next picture. Rub out any dashed helper lines at the end. First up: the berry.
Step 1: The berry
Draw a big bumpy egg, a little taller than wide, with round bumps all the way round like a cloud.
Tip Keep the bottom round, not pointy.
Step 2: The leafy cap
On top of the berry, draw a star of 5 pointy leaves. Rub out the berry line under them.
Step 3: The stem
From the middle of the star, draw a short stem going up and bending a little to the left.
Step 4: Top bumps
In the top half, draw little touching circles, one in each bump and more in the middle.
Step 5: Bottom bumps
Fill the bottom half the same way, with a circle in every bump and more in the middle.
Step 6: A leaf
At the stem's top, draw a pointed leaf going up left. Add a middle line almost to the tip.
Step 7: A little one behind
Behind the lower right of the big berry, draw a smaller bumpy egg with a little star of leaves.
Step 8: Little bumps
Fill the little berry with small circles the same way, stopping at the big berry's edge.
Step 9: The ground
Draw a long straight ground line from left to right, just touching the bottom of both berries.
Step 10: Green leaves, brown stem
Go over your lines. Colour the leaf and both leafy caps green, and the stem brown.
Step 11: Dark purple berries
Colour both berries dark purple, around the leafy caps. Leave 2 little white shines on the top left bumps.
Your finished drawing
Follow the steps above and this is where you end up: a blackberry, drawn by you.
Every step in one picture