Watch it draw itself · tap to replay
How to Draw an Arrow
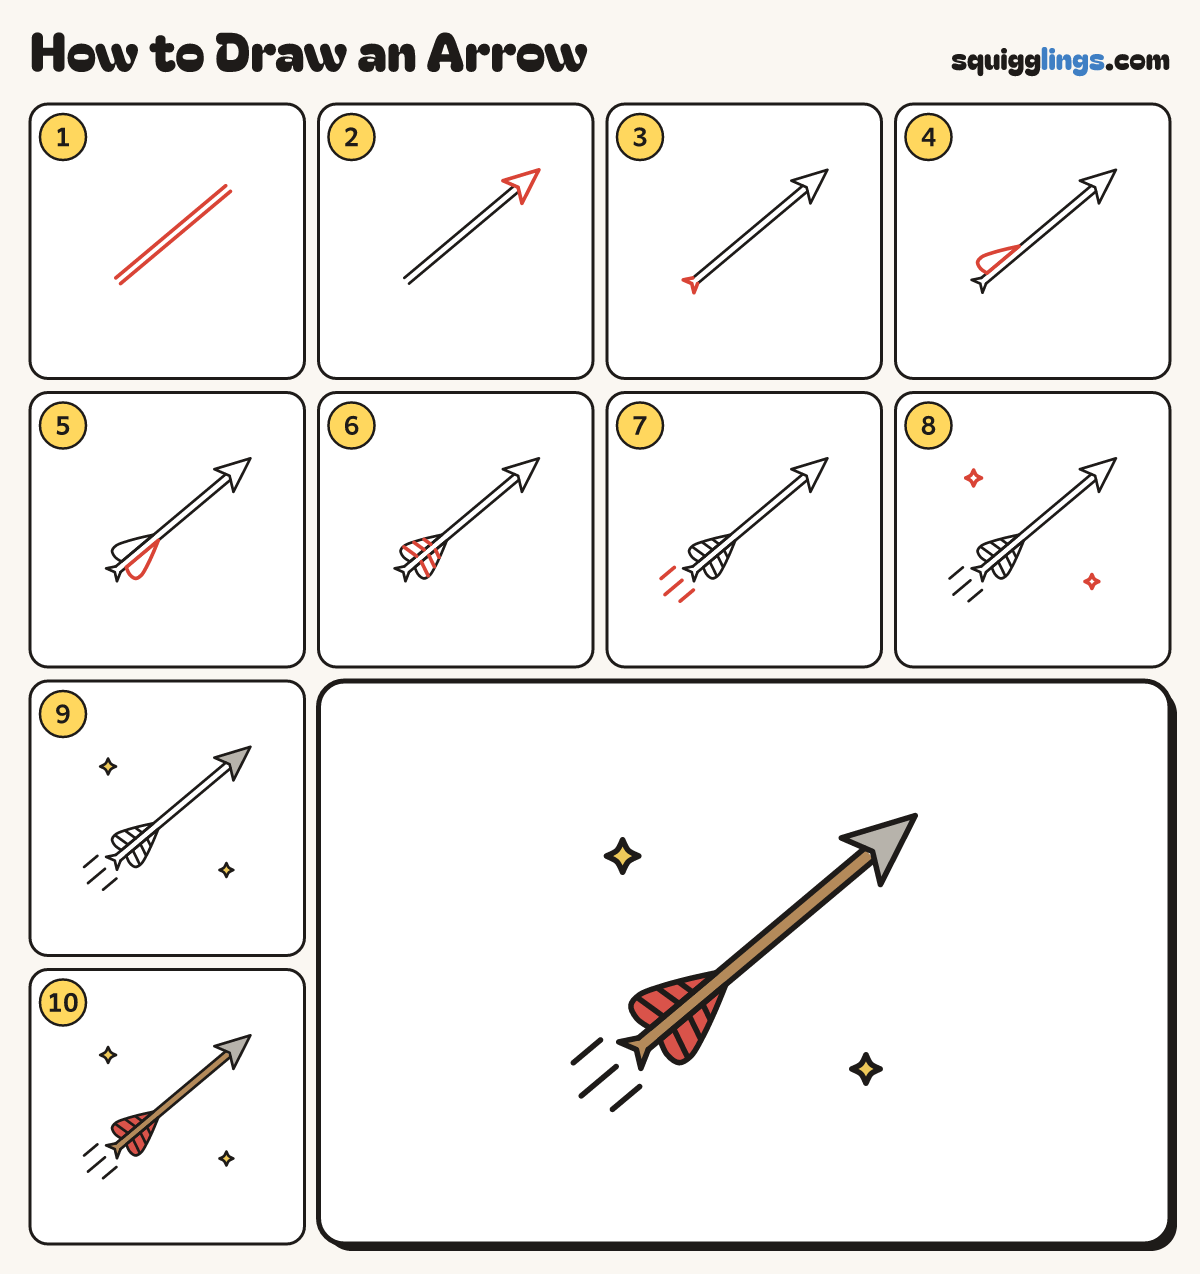
Draw an arrow in 10 easy steps, about 8 minutes. Free, with a printable worksheet.
Each picture adds one red line. Draw that line, then scroll to the next picture. Rub out any dashed helper lines at the end. First up: the shaft.
Step 1: The shaft
Draw 2 long lines close together for the shaft, from the bottom left up to the top right.
Step 2: The arrowhead
On the top right end draw a pointed head, from the top line out to a sharp point and back.
Step 3: The notch
On the bottom left end draw a little notch with 2 points, from the top line to the bottom line.
Step 4: Top feather
In front of the notch draw a feather on the top side, low at the front, tall at the back.
Step 5: Bottom feather
Draw the same feather on the bottom side, a mirror of the first.
Step 6: Feather lines
Inside each feather draw 3 short slanted lines from the outer edge in to the shaft.
Step 7: Whoosh lines
Behind the notch draw 3 short lines trailing back, to show the arrow flying.
Step 8: Sparkles
Draw 2 small sparkle stars, one above the arrow and one below, like plus signs with curvy arms.
Step 9: Yellow stars, grey head
Go over your lines, then colour the sparkles yellow and the arrowhead grey.
Step 10: Red feathers, wood shaft
Colour the feathers red, then the shaft and the notch wood brown. Your arrow is done!
Your finished drawing
Follow the steps above and this is where you end up: an arrow, drawn by you.
Every step in one picture