Watch it draw itself · tap to replay
How to Draw Raised Arms
Draw raised arms in 12 easy steps, about 9 minutes. Free, with a printable worksheet.
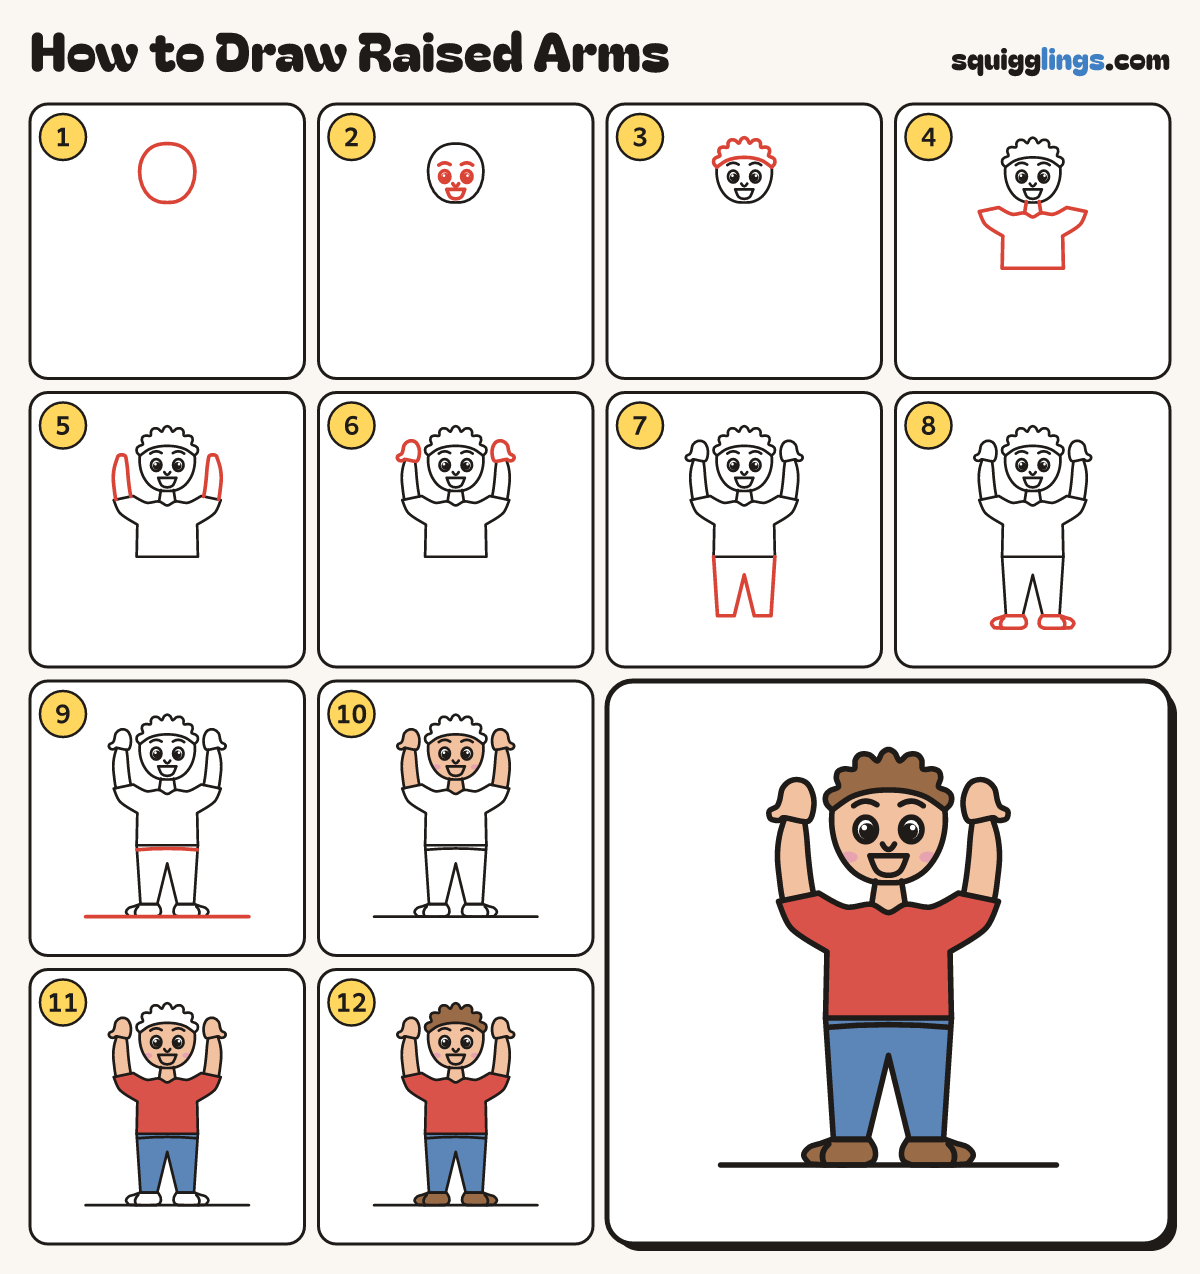
Each picture adds one red line. Draw that line, then scroll to the next picture. Rub out any dashed helper lines at the end. First up: the head.
Step 1: The head
Near the top, in the middle, draw a big egg for the head, a little narrower at the chin.
Tip Leave room on both sides for the arms.
Step 2: The face
Draw 2 big shiny eyes, a tiny nose and eyebrows. Add a big open half-moon mouth.
Step 3: Tufty hair
Start on the left of the head. Draw round tufts over the top, down to the right. Add a hairline.
Tip Soft round bumps, the middle ones tallest.
Step 4: Neck and T-shirt
Draw 2 neck lines. From the left one draw a T-shirt with sleeves pointing up, ending at the right one.
Step 5: Arms up
From each sleeve draw an arm up and out, bending a little at the elbow, thinner at the wrist.
Tip Start inside the sleeve opening, so the sleeve wraps round the arm.
Step 6: Open hands
From each wrist draw a round mitten up and over, a thumb bump by the head, back to the wrist.
Step 7: Shorts
Start at the T-shirt's bottom left corner. Draw short shorts with 2 legs, ending at the bottom right corner.
Step 8: Legs and socks
From each shorts leg draw 2 lines, closer at the ankle, stopping near the bottom. Add a sock curve.
Step 9: Shoes and ground
Under each leg draw a shoe with the toe pointing out. Draw a ground line under the shoes.
Step 10: Peach skin, pink cheeks
Colour the cheeks and mouth pink, then all the skin peach around them. Leave the eyes white.
Step 11: Red shirt, blue shorts
Colour the T-shirt red and the shorts blue.
Step 12: Brown hair and shoes
Colour the hair and the shoes brown. Leave the socks white. Go over your lines and you are done.
Your finished drawing
Follow the steps above and this is where you end up: raised arms, drawn by you.
Every step in one picture