Watch it draw itself · tap to replay
How to Draw an Archelon
Draw an archelon in 13 easy steps, about 10 minutes. Free, with a printable worksheet.
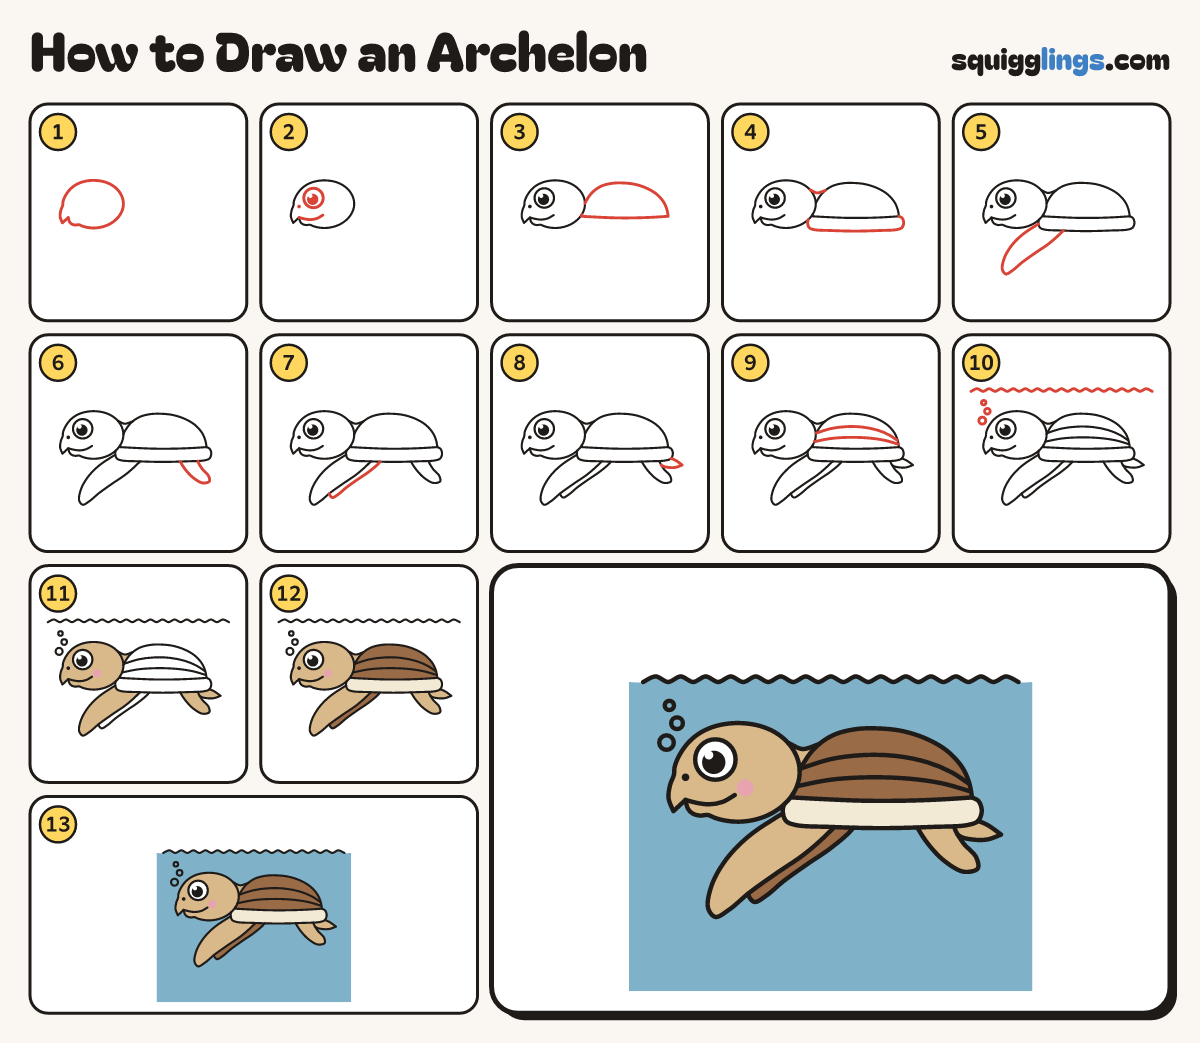
Each picture adds one red line. Draw that line, then scroll to the next picture. Rub out any dashed helper lines at the end. First up: egg head with beak.
Step 1: Egg head with beak
On the left draw a big egg lying on its side. Give the front a small hooked beak.
Tip Leave the right side empty for the shell.
Step 2: Eye and smile
Draw a big round eye in the front half. Draw a smile from the beak notch back under the eye.
Tip Give the eye a shine. Dot a nostril near the front.
Step 3: Flat shell
Just behind the head draw a low smooth hump for the shell, like an upside-down dish with a flat bottom.
Tip Keep the shell low and smooth. It was as long as a car!
Step 4: Rim and neck
Start at the front corner of the shell. Draw a sagging band under it, over to the back corner.
Tip Add a short neck line, dipping from the back of the head to the shell.
Step 5: Huge front flipper
Start on the rim under the front of the shell. Draw a very long paddle down and forward, and back.
Tip The front flipper is as long as the shell, like a wing.
Step 6: Back flipper
Start on the rim near the back. Draw a small paddle pointing backward, and come back to the rim.
Tip The back flipper is half the size and points the other way.
Step 7: Far flipper
Start on the rim behind the front flipper. Draw a shorter paddle behind it and stop on the front flipper.
Tip Only a sliver of the far flipper shows.
Step 8: Pointed tail
Start behind the back flipper. Draw a short tail poking out to a point, and back to the rim.
Step 9: Shell ridges
Start behind the head. Draw 2 long curved lines along the shell, stopping at the back end.
Tip No plates! Its shell was smooth and leathery, with long ridges.
Step 10: Water and bubbles
Above the turtle, draw a wavy water line right across the paper. Add 3 bubbles above the nose.
Tip Make the bubbles smaller as they go up.
Step 11: Tan skin
Dab a pink cheek. Colour the head, neck, tail and the 3 near flippers tan, around the cheek.
Tip Leave the eye white.
Step 12: Brown shell, cream rim
Go over your lines. Colour the shell and the far flipper brown. Colour the rim cream.
Step 13: Blue water
Colour the water blue down to the bottom of the paper, around the turtle.
Tip Leave the paper white above the wavy line.
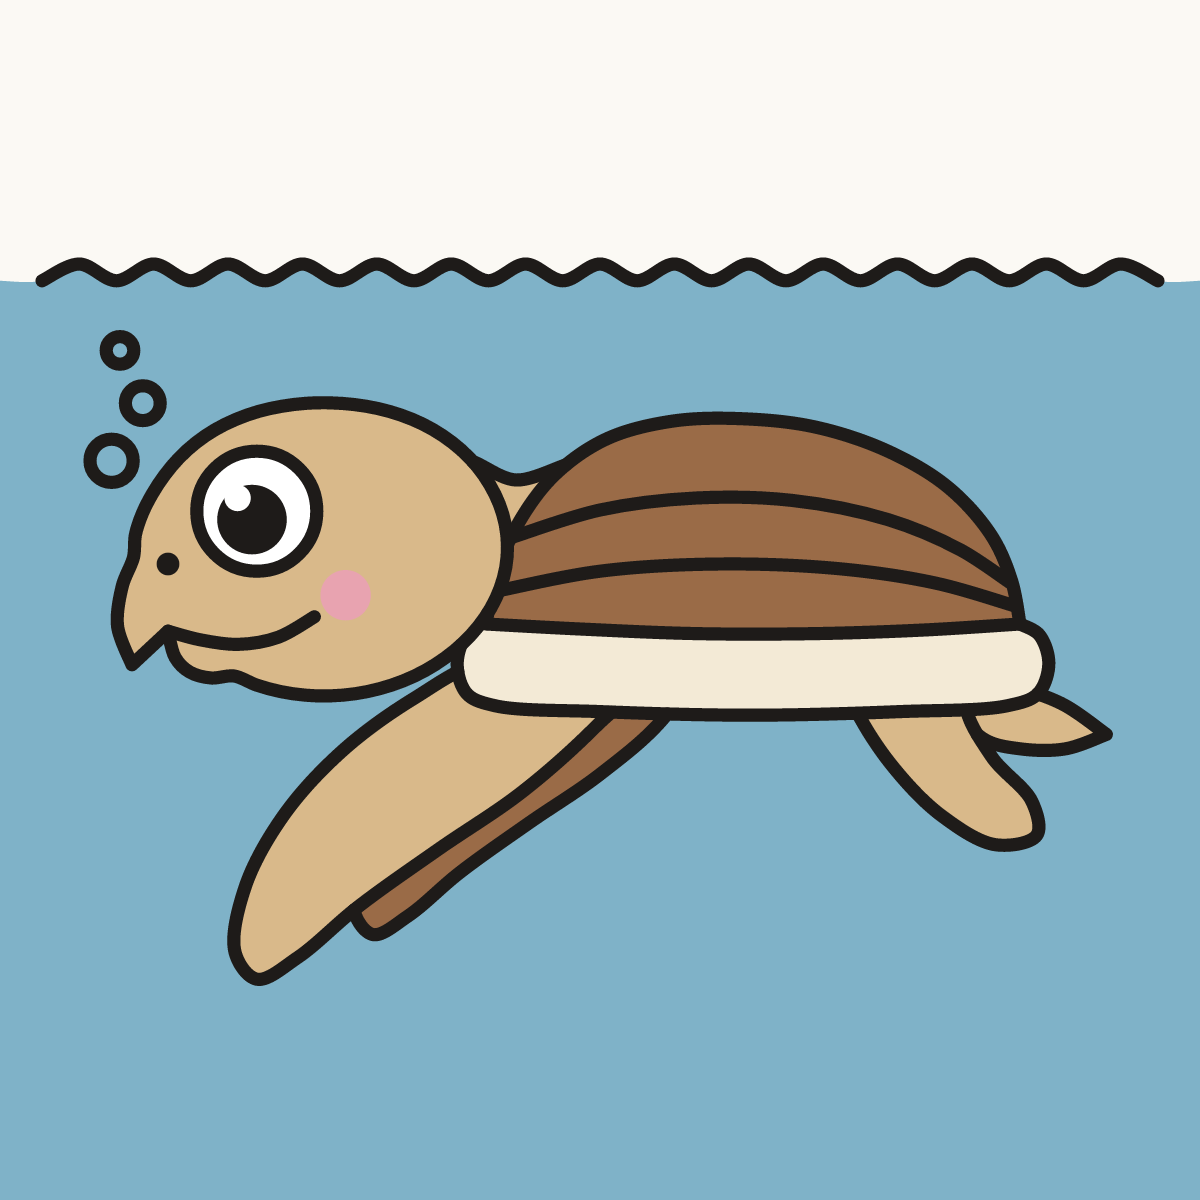
Your finished drawing
Follow the steps above and this is where you end up: an archelon, drawn by you.
Every step in one picture