Watch it draw itself · tap to replay
How to Draw an Aqueduct
Draw an aqueduct in 13 easy steps, about 10 minutes. Free, with a printable worksheet.
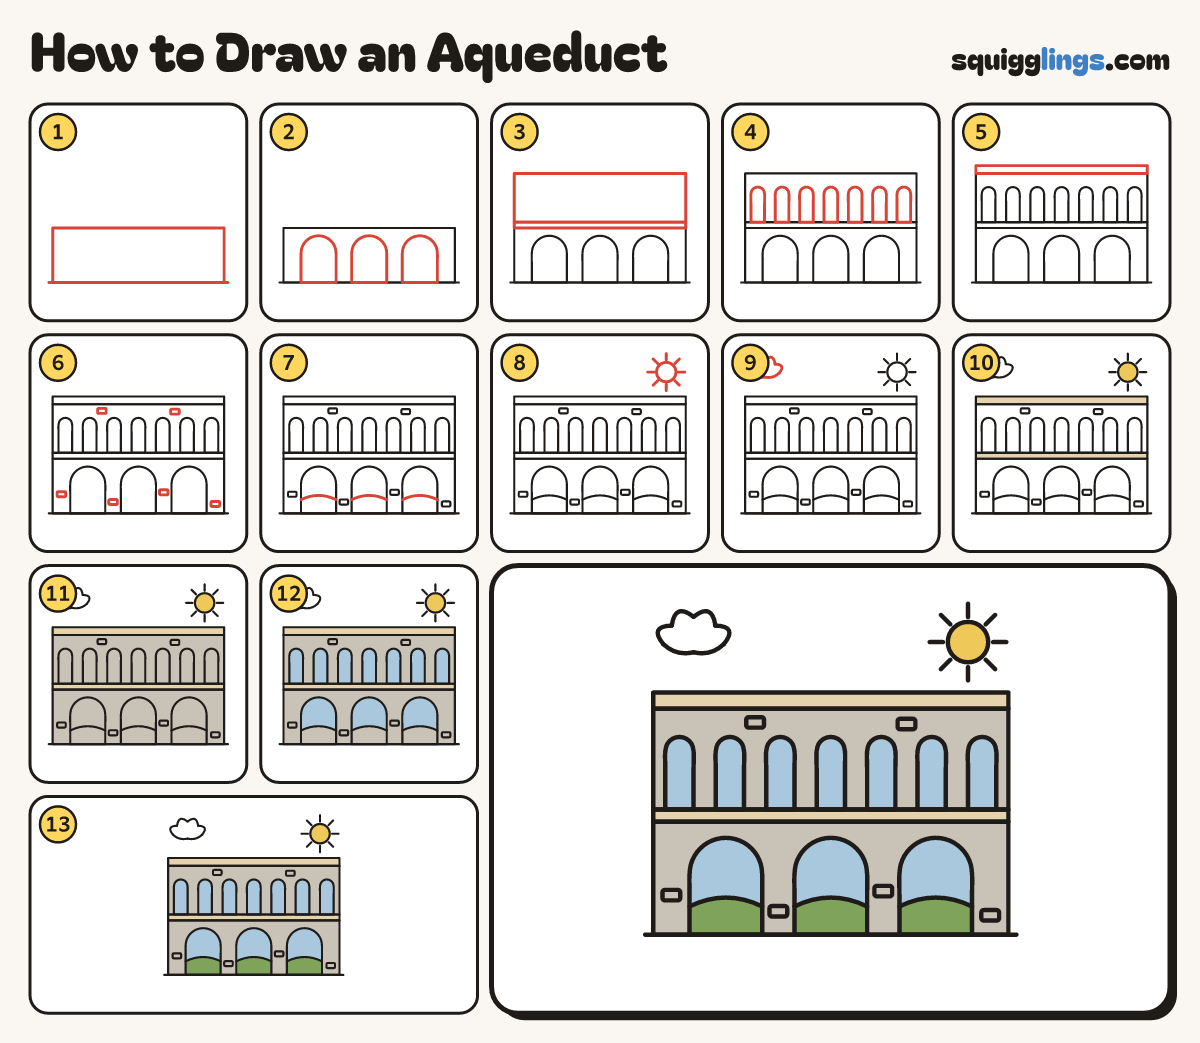
Each picture adds one red line. Draw that line, then scroll to the next picture. Rub out any dashed helper lines at the end. First up: bottom wall and ground.
Step 1: Bottom wall and ground
Low on your paper draw a long flat box. Draw a ground line under it, just wider than the box.
Step 2: Three big arches
Inside the bottom wall draw 3 big rainbow arches standing on the ground, evenly spaced, like legs.
Tip An aqueduct is a bridge that carries water: arches on arches.
Step 3: Ledge and upper wall
On top of the wall draw a thin flat ledge right across. On the ledge draw a second, taller box.
Step 4: Seven small arches
Inside the upper wall draw 7 smaller arches standing on the ledge, evenly spaced.
Step 5: The water channel
On top of the upper wall draw a thin flat box right across for the channel where the water runs.
Step 6: Stone blocks
Scatter a few small stone blocks on the flat parts of the walls, between the arches, not in a row.
Step 7: Low hills
In each big arch draw a gentle low hill, from the left side across to the right side.
Step 8: The sun
Draw a sun with short rays in the top right corner.
Step 9: A cloud
Draw a puffy cloud in the top left: little bumps over the top and a flatter line underneath.
Step 10: Sandy ledges, yellow sun
Colour the middle ledge and the top channel sandy, the sun yellow and the cloud white.
Step 11: Stone walls
Colour the 2 walls stone grey, going round every arch.
Step 12: Sky through the arches
Colour the sky in every arch blue, above the hills.
Step 13: Green hills
Colour the low hills under the big arches leaf green. Go over all your lines and your aqueduct is done!
Your finished drawing
Follow the steps above and this is where you end up: an aqueduct, drawn by you.
Every step in one picture