Watch it draw itself · tap to replay
How to Draw an Anaconda
Draw an anaconda in 12 easy steps, about 9 minutes. Free, with a printable worksheet.
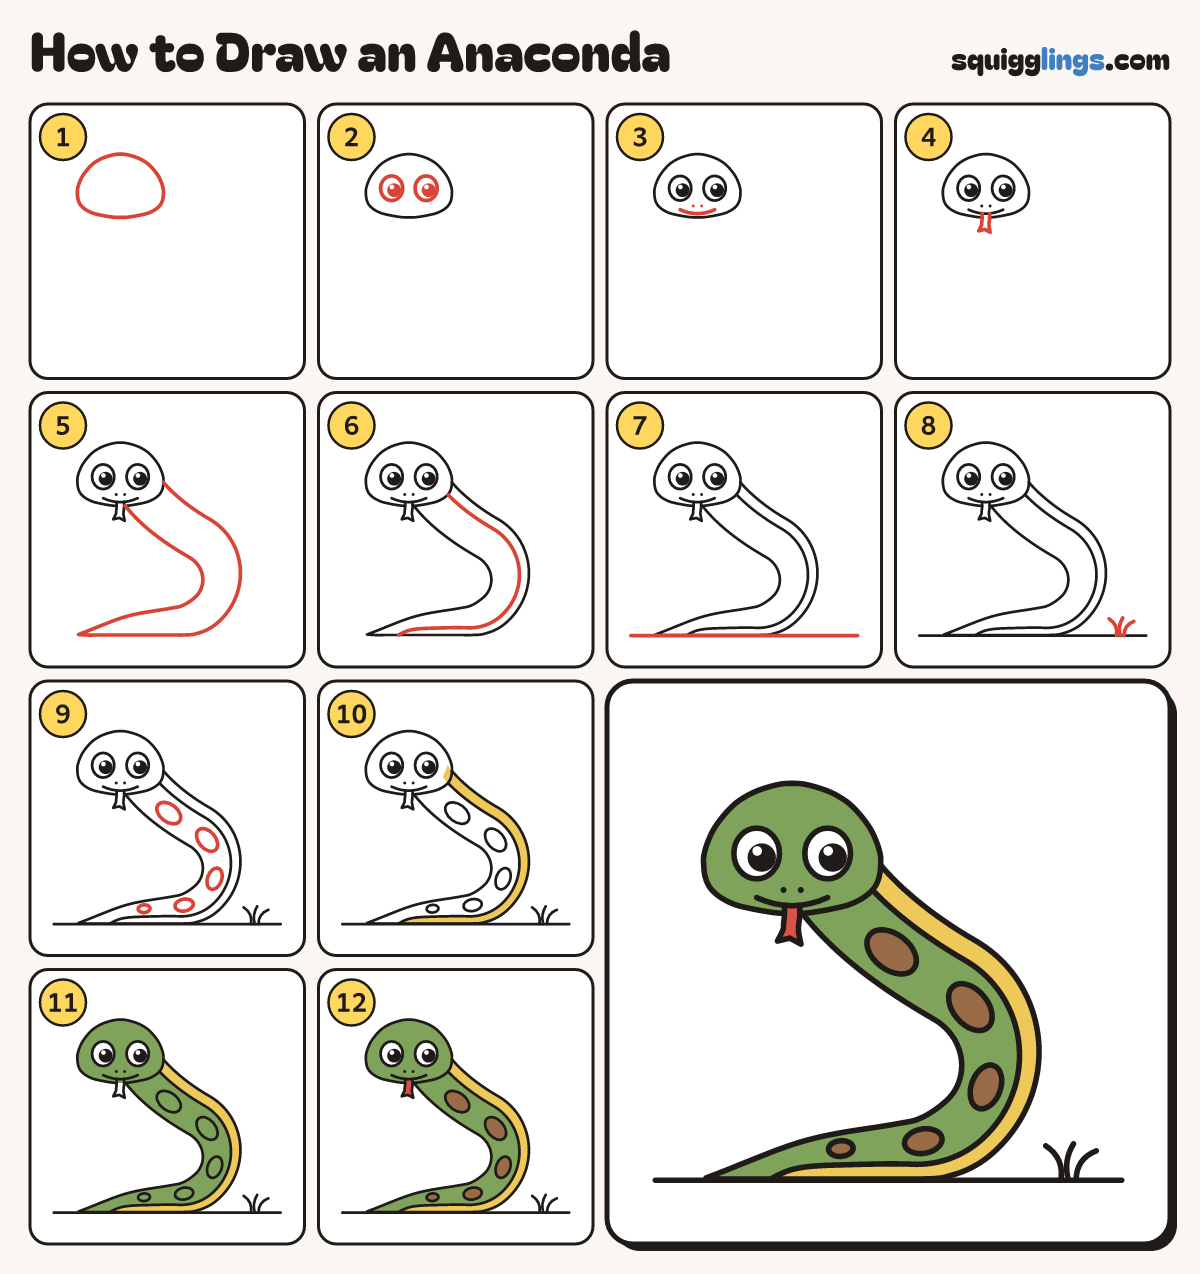
Each picture adds one red line. Draw that line, then scroll to the next picture. Rub out any dashed helper lines at the end. First up: big round head.
Step 1: Big round head
In the top left, draw a big round head like an egg on its side. Leave room for the body.
Step 2: Two big eyes
In the middle of the head, draw 2 big eggy eyes with black dots and shines.
Step 3: Nostrils and smile
Under the eyes, dot 2 tiny nostrils. Start under the left eye, draw a wide smile, stop under the right.
Step 4: Forked tongue
Start on the smile. Draw a short fat tongue over the chin with 2 points. Stop back on the smile.
Step 5: Long body
Start on the chin. Draw one long smooth tube looping right, then left along the ground to a fine point.
Step 6: Belly line
Start under the head. Draw a long line beside the outside edge, stopping on the bottom before the tip.
Step 7: The ground
Under the snake, start at the left edge. Draw one straight line across to the right edge, touching the body.
Step 8: Grass tuft
Near the right end of the ground, start on the line. Draw 3 grass blades up, stopping in the air.
Step 9: Big spots
Along the top of the body, draw 5 big oval spots, getting smaller toward the tail.
Step 10: Yellow belly
Colour the belly strip yellow.
Step 11: Light green anaconda
Colour the head and body light green, around the belly strip and the spots. Leave the eyes white.
Step 12: Red tongue, brown spots
Colour the tongue red and the spots brown.
Your finished drawing
Follow the steps above and this is where you end up: an anaconda, drawn by you.
Every step in one picture