Watch it draw itself · tap to replay
How to Draw a 3D Hole
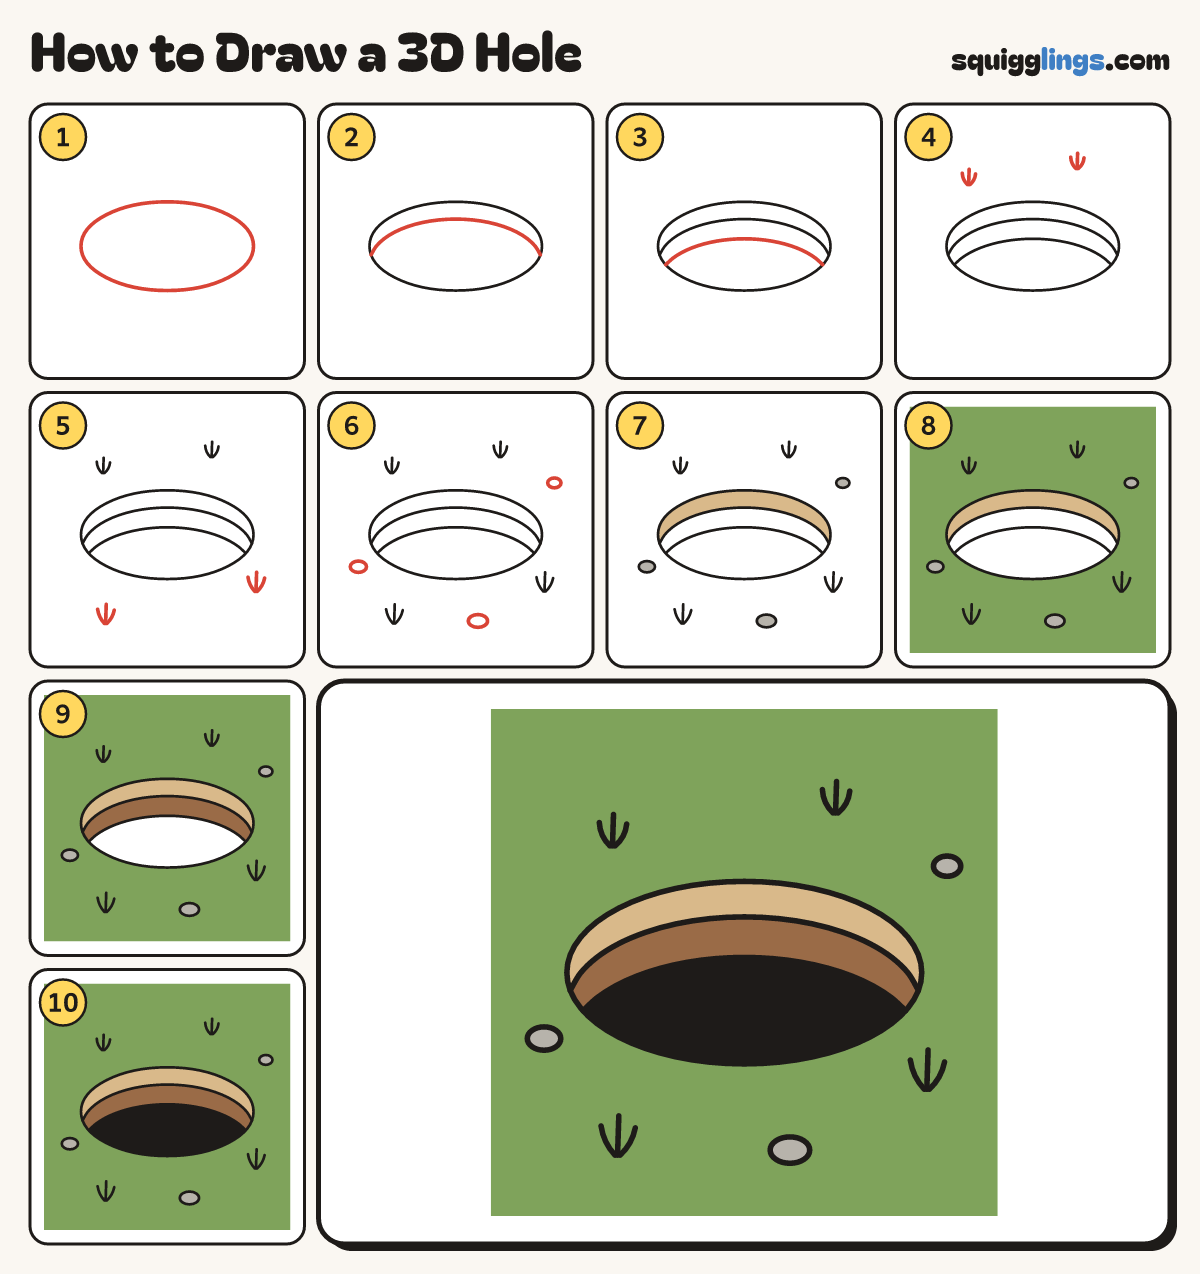
Draw a 3D hole in 10 easy steps, about 8 minutes. Free, with a printable worksheet.
Each picture adds one red line. Draw that line, then scroll to the next picture. Rub out any dashed helper lines at the end. First up: the opening.
Step 1: The opening
In the middle of your paper, draw a big wide oval, much wider than it is tall.
Tip A round hole looks like a squashed oval when you see it from the side.
Step 2: The soil wall
Start on the oval's left side, just below the middle. Draw a big rainbow arch across to the right side.
Tip The arch copies the top of the oval, a finger lower.
Step 3: Deeper down
Start a little lower on the left side. Draw another arch under the first, across to the right side.
Tip The big space under this arch is the dark bottom of the hole.
Step 4: Grass behind
Above the hole draw 2 grass tufts. Each tuft is 3 short blades that start together and fan out.
Step 5: Grass in front
Below the hole draw 2 more grass tufts, a little bigger because they are closer to you.
Tip Near things look bigger than far things.
Step 6: Three stones
Draw 3 small oval stones on the grass: one on the left, one at the top right, one in front.
Step 7: Light soil, grey stones
Colour the top band inside the hole light brown. Colour the 3 stones grey.
Step 8: Green grass
Colour the grass green all around the hole and the stones, out to the edges of your paper.
Step 9: Dark soil
Colour the next band down dark brown. Darker soil looks deeper.
Step 10: The black bottom
Colour the bottom of the hole black. Go over your lines and your 3D hole is done!
Your finished drawing
Follow the steps above and this is where you end up: a 3D hole, drawn by you.
Every step in one picture