Watch it draw itself · tap to replay
How to Draw a Witch House
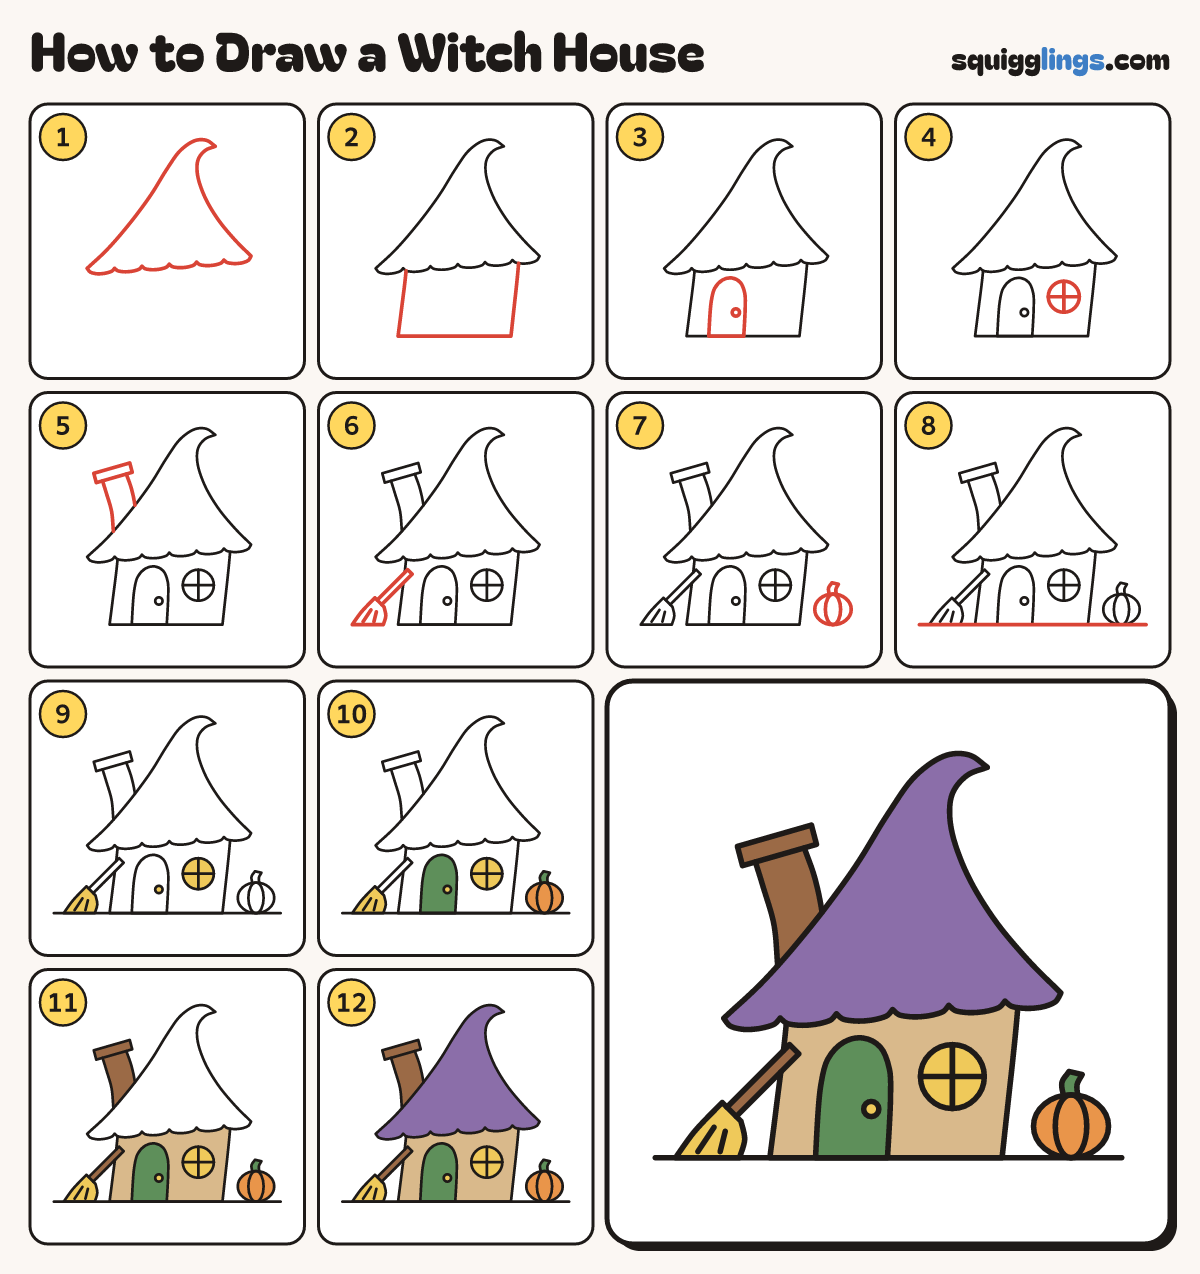
Draw a witch house in 12 easy steps, about 9 minutes. Free, with a printable worksheet.
Each picture adds one red line. Draw that line, then scroll to the next picture. Rub out any dashed helper lines at the end. First up: pointed roof.
Step 1: Pointed roof
Draw a tall roof like a witch's hat: 2 curved sides, a bent tip and a wavy bottom edge.
Tip Bend the tip over to the right. A crooked roof is just right here.
Step 2: Leaning walls
Start under the roof's left side. Draw down, across the bottom and up, and stop under the roof.
Tip Both walls lean a little. Nothing on this house is straight.
Step 3: Arched door
On the left of the wall, draw a tall door with a round top. Add a round knob.
Tip The door stands on the bottom line.
Step 4: Round window
Beside the door, draw a round window. Draw a cross inside it, from edge to edge.
Step 5: Bent chimney
On the roof's left side, draw a chimney that leans left. Put a slanted block on its top.
Tip The chimney's bottom hides behind the roof.
Step 6: Witch's broom
Lean a broomstick on the left wall. Draw its bristles as a wide skirt down to the ground.
Tip Draw 2 short lines in the bristles for straw.
Step 7: Pumpkin
On the right, draw a wide round pumpkin. Draw a tall oval inside it and a stem on top.
Tip The oval touches the pumpkin's top and bottom.
Step 8: The ground
Start at the left edge. Draw a line along the bottom of the house and stop at the right.
Step 9: Yellow glow
Colour the window, the door knob and the broom's bristles yellow.
Step 10: Orange and green
Colour the pumpkin orange. Colour the door and the pumpkin's stem green, around the knob.
Step 11: Tan and brown
Colour the walls tan, around the door and window. Colour the chimney and broomstick brown.
Step 12: Purple roof
Colour the roof purple.
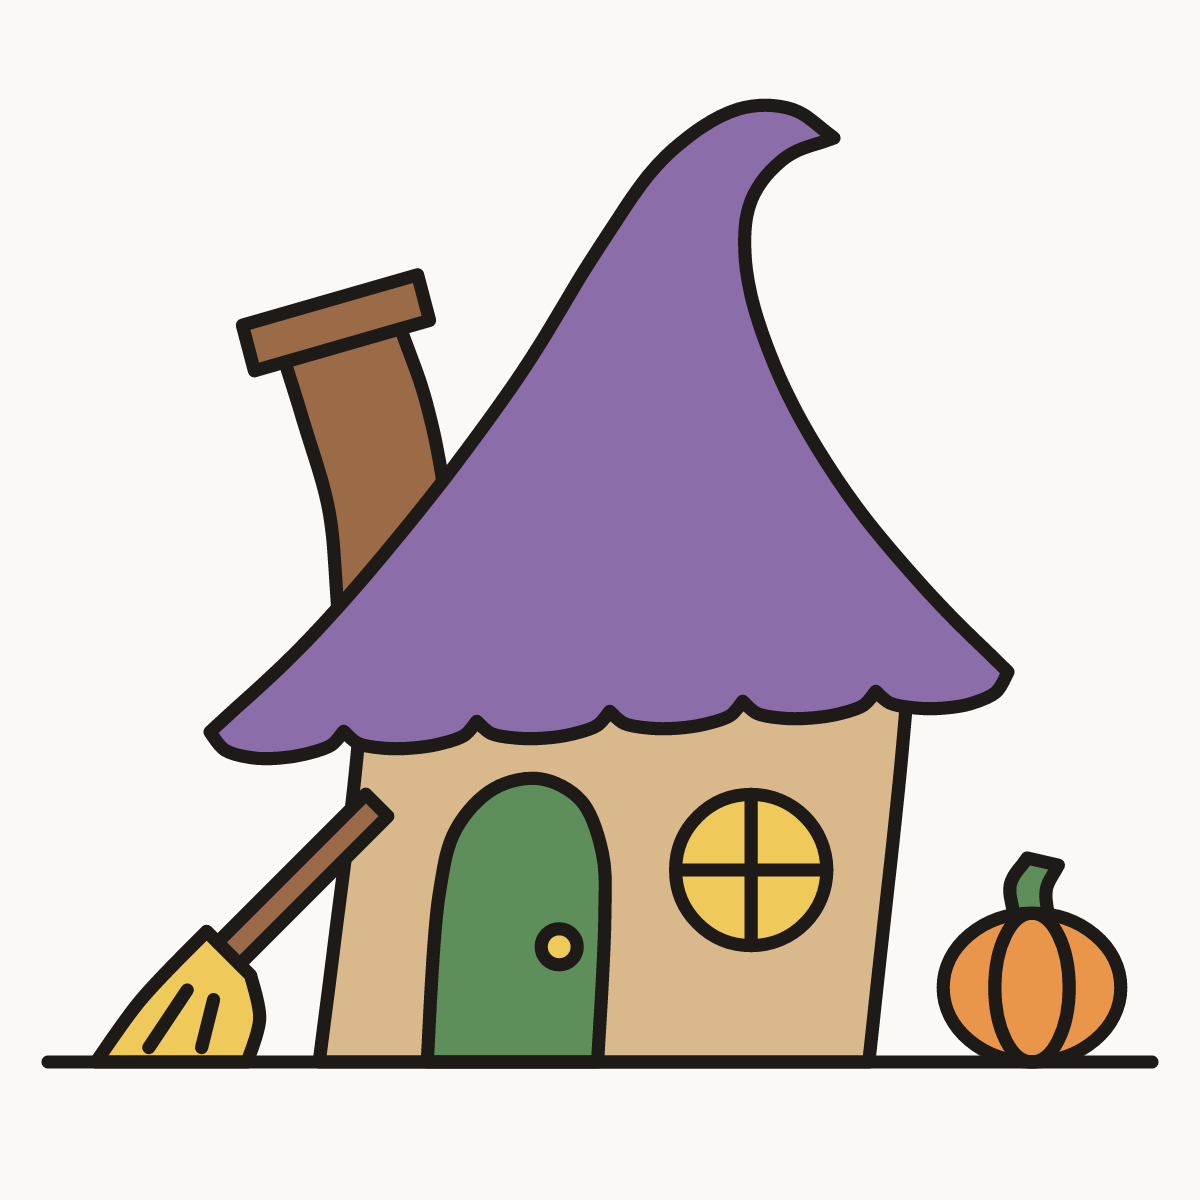
Your finished drawing
Follow the steps above and this is where you end up: a witch house, drawn by you.
Every step in one picture