Watch it draw itself · tap to replay
How to Draw a Witch Hat
Draw a witch hat in 10 easy steps, about 8 minutes. Free, with a printable worksheet.
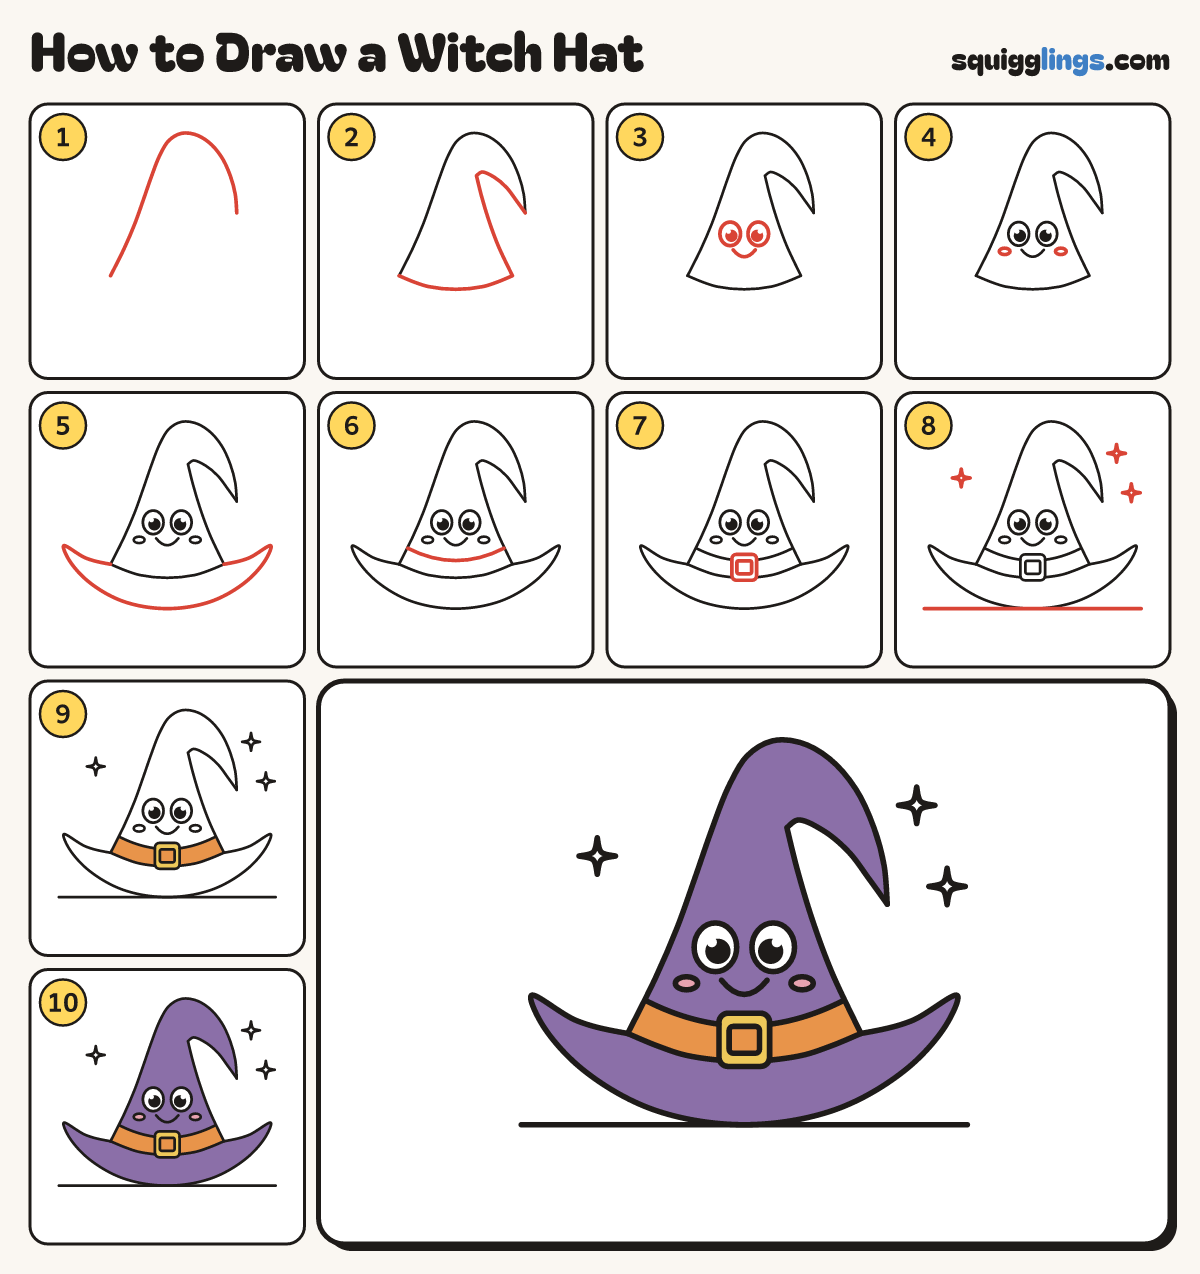
Each picture adds one red line. Draw that line, then scroll to the next picture. Rub out any dashed helper lines at the end. First up: the tall hat.
Step 1: The tall hat
Start low on the left. Draw a tall line up, curl over the top, and droop down to a point.
Tip One long swoop, like a soft sock flopping over.
Step 2: The right side
Start at the drooping point. Curve up under the curl, then down the right side, stopping level. Close the bottom.
Step 3: The face
Low on the hat, draw 2 big oval eyes with a dot and shine. Add a small U smile below.
Step 4: Rosy cheeks
Just outside and below each eye, draw a small sideways oval cheek, clear of the eye and the smile.
Step 5: The brim
From the bottom-left corner, draw a wide brim under the hat, with a turned-up tip at each end.
Tip The brim is much wider than the hat; make the two tips twins.
Step 6: The hat band
Start on the left side, a finger above the corner. Draw a sagging curve across, stopping on the right.
Step 7: The buckle
In the middle of the band, draw a chunky rounded square, taller than the band. Add a smaller one inside.
Step 8: Sparkles and a table
Draw 3 little 4-point sparkles: 2 by the tip, one on the left. Add a table line touching the brim.
Step 9: Orange band, yellow buckle
Colour the buckle yellow. Colour the band orange around it, and the little square in its middle.
Step 10: Colour the hat purple
Colour the cheeks pink. Colour the hat and brim purple around the band, buckle and cheeks, leaving the eyes white.
Your finished drawing
Follow the steps above and this is where you end up: a witch hat, drawn by you.
Every step in one picture