Watch it draw itself · tap to replay
How to Draw Wings
Draw wings in 11 easy steps, about 8 minutes. Free, with a printable worksheet.
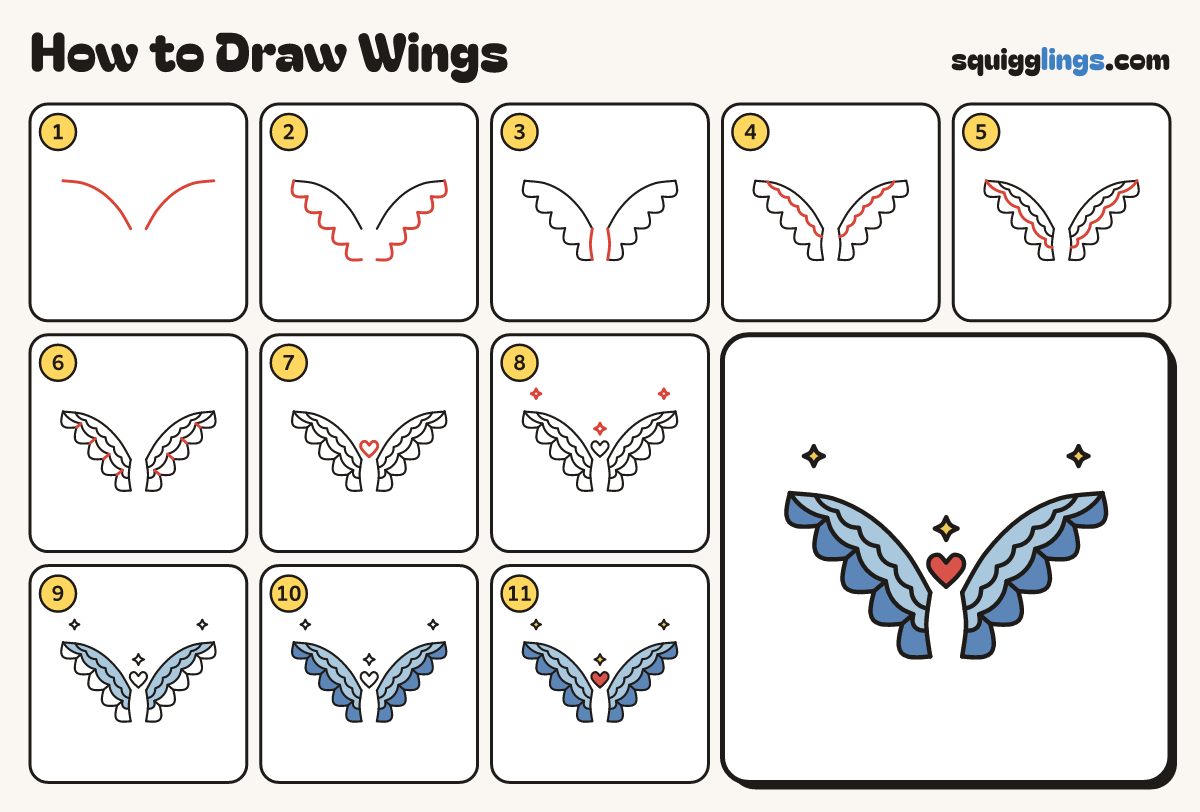
Each picture adds one red line. Draw that line, then scroll to the next picture. Rub out any dashed helper lines at the end. First up: two top edges.
Step 1: Two top edges
From the middle draw a long arch out to a wing tip at the top left. Same on the right.
Tip The 2 top edges make a wide open V, like a seagull far away.
Step 2: Finger feathers
From each wing tip draw 5 round finger feathers, like fat U bumps, stepping back and down to the shoulder.
Tip 5 even bumps, like the fingers of a mitten.
Step 3: The shoulders
On each wing draw a short curve from the top edge down to the last feather, closing the shoulder.
Tip Leave a gap between the 2 wings in the middle.
Step 4: Small feathers
Start on the shoulder line. Draw 6 small U bumps under the top edge, stopping on it near the tip.
Step 5: Another row
Start lower on the shoulder line. Draw 5 bigger U bumps under the first row, ending at the wing tip.
Step 6: Feather lines
From each point between the finger feathers, draw a short line up to the point in the row above.
Step 7: A little heart
In the gap between the 2 shoulders draw a small heart, not touching the wings.
Step 8: Sparkles
Draw a sparkle above the heart and one past each wing tip: a tall diamond crossed with a wide one.
Step 9: Sky-blue wings
Go over your lines, then colour the top of each wing sky blue, down to the second row of bumps.
Step 10: Blue feathers
Colour the finger feathers along the bottom of both wings a deeper blue, up to the lower row of feathers.
Step 11: Red heart, yellow sparkles
Colour the heart red and the sparkles yellow, and your wings are ready to fly!
Your finished drawing
Follow the steps above and this is where you end up: wings, drawn by you.
Every step in one picture