Watch it draw itself · tap to replay
How to Draw a Villa
Draw a villa in 13 easy steps, about 10 minutes. Free, with a printable worksheet.
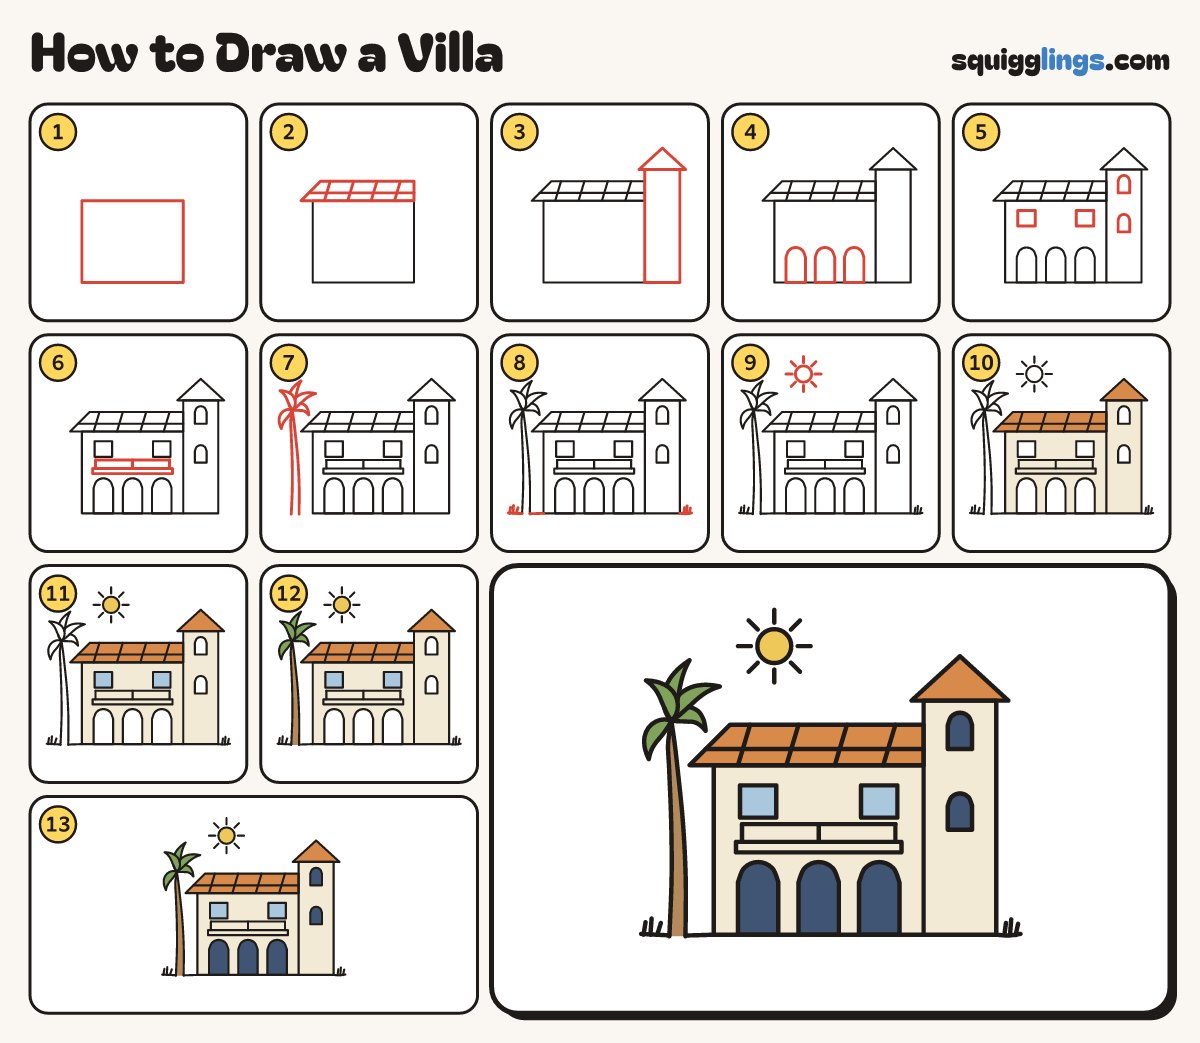
Each picture adds one red line. Draw that line, then scroll to the next picture. Rub out any dashed helper lines at the end. First up: the big box.
Step 1: The big box
In the middle of your paper draw a big wide box for the villa, much wider than it is tall.
Step 2: The low roof
On top draw a low roof poking out on the left. Add a line along it and 4 tile lines.
Step 3: The tower
On the right draw a tall tower from the ground up past the roof. Give it a pointed hat roof.
Step 4: Three arches
Along the bottom of the big box draw 3 tall arched doorways, spaced out evenly.
Step 5: The windows
Above the left and right arches draw 2 square windows. Stack 2 arched windows up the tower.
Step 6: The balcony
Under the windows draw a thin ledge, then a rail on 3 posts from left across to right.
Step 7: A palm tree
Left of the house draw a curved trunk from the bottom up to the roof. Add 5 drooping leaves.
Tip Keep every leaf clear of the roof and the wall.
Step 8: The ground
Draw ground from the left edge to the house, and from the tower to the right edge. Add grass tufts.
Step 9: The sun
In the sky above the roof draw a round sun with 8 short rays.
Step 10: Cream walls, clay roofs
Colour the walls and the tower cream, going round the windows and arches. Colour both roofs ginger like clay tiles.
Step 11: Yellow sun, sky windows
Colour the sun yellow and the 2 big windows sky blue.
Step 12: Brown trunk, green leaves
Colour the palm trunk brown and the 5 leaves green.
Step 13: Navy arches and windows
Colour the 3 arches and the 2 tower windows navy blue. Go over your lines and your villa is done!
Your finished drawing
Follow the steps above and this is where you end up: a villa, drawn by you.
Every step in one picture