Watch it draw itself · tap to replay
How to Draw a Boa Constrictor
Draw a boa constrictor in 12 easy steps, about 9 minutes. Free, with a printable worksheet.
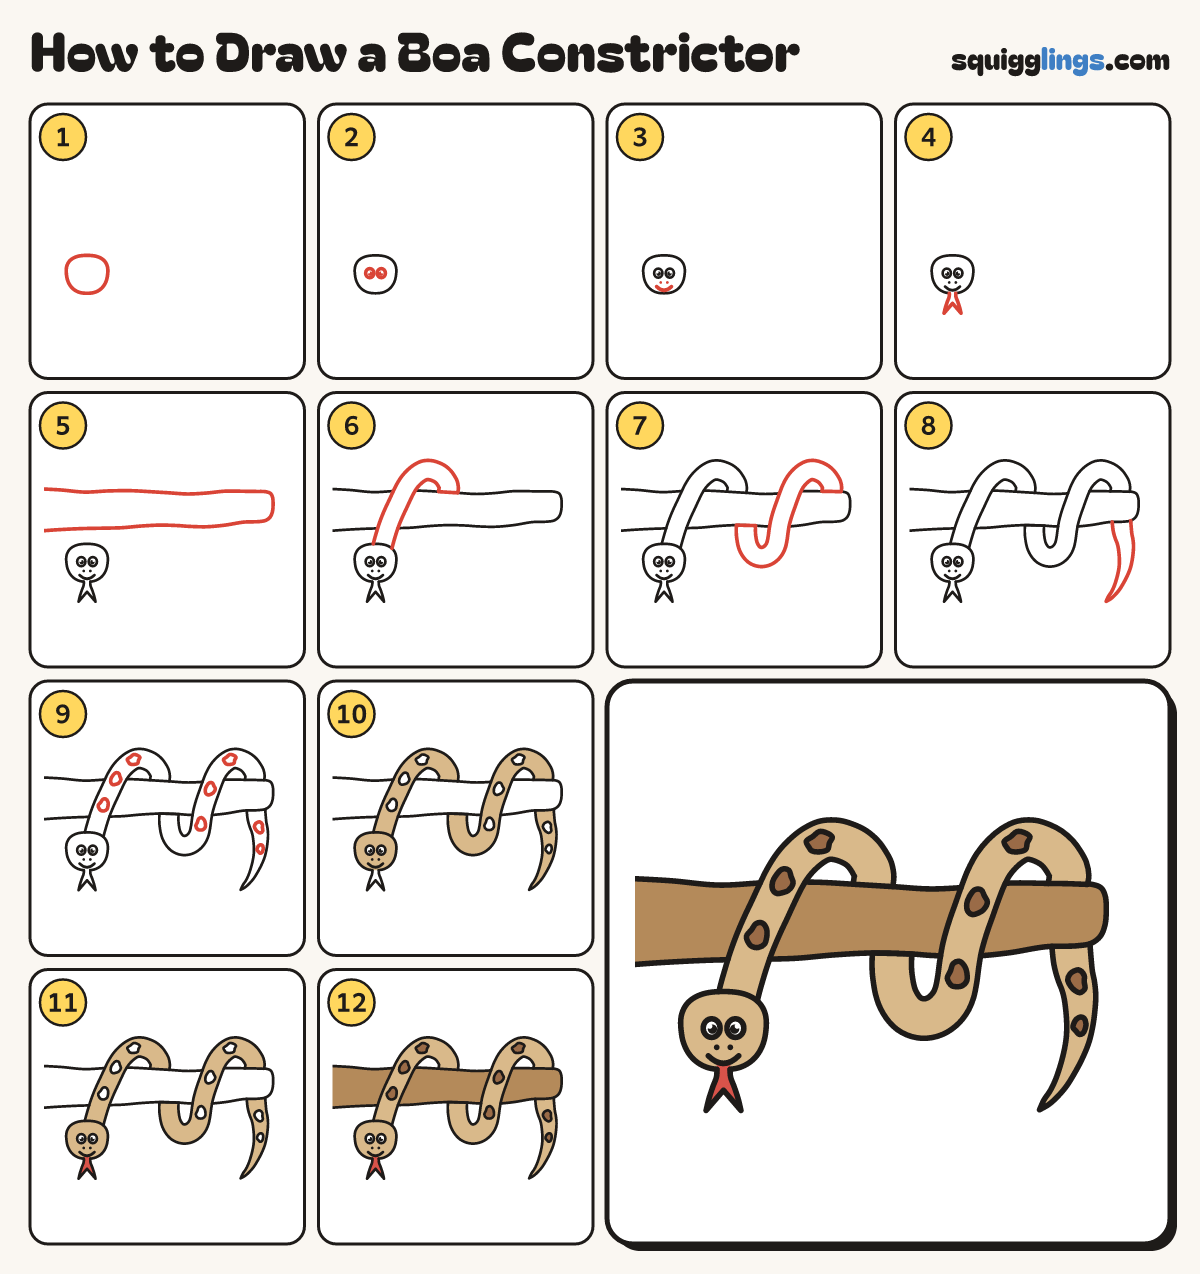
Each picture adds one red line. Draw that line, then scroll to the next picture. Rub out any dashed helper lines at the end. First up: the head.
Step 1: The head
Low on the left of your paper, draw a big round head, a little wider than tall.
Step 2: Two big eyes
In the middle of the head, draw 2 big oval eyes. Add a black dot and white shine in each.
Step 3: Smile and nostrils
Dot 2 tiny nostrils under the eyes. Draw a wide happy smile low on the head, cheek to cheek.
Step 4: Forked tongue
From the middle of the chin, draw a tongue hanging down. Split the end into 2 thin points.
Step 5: The branch
Above the head, draw a thick wavy branch from the left edge to a round end on the right.
Tip The branch is as thick as the head.
Step 6: The first loop
Start on the head's top right. Draw the neck up over the branch. Stop on the head's top left.
Step 7: The second loop
To the right, draw the body coming out from under the branch, up over a second hump, and back down.
Tip Two humps the same height.
Step 8: The tail
Further right, draw the tail hanging down from behind the branch, getting thinner to a fine point near the bottom.
Step 9: Saddle blotches
Draw a row of wobbly blotches along each loop and the tail, following the curve of the body.
Step 10: Colour it tan
Go over your lines. Colour the head and body tan around the saddles. Leave the eyes white.
Step 11: Colour the tongue
Colour the tongue red.
Step 12: Brown saddles, wood branch
Colour the saddles brown. Colour the branch wood brown around the snake. Your boa is done!
Your finished drawing
Follow the steps above and this is where you end up: a boa constrictor, drawn by you.
Every step in one picture