Watch it draw itself · tap to replay
How to Draw a Warbler
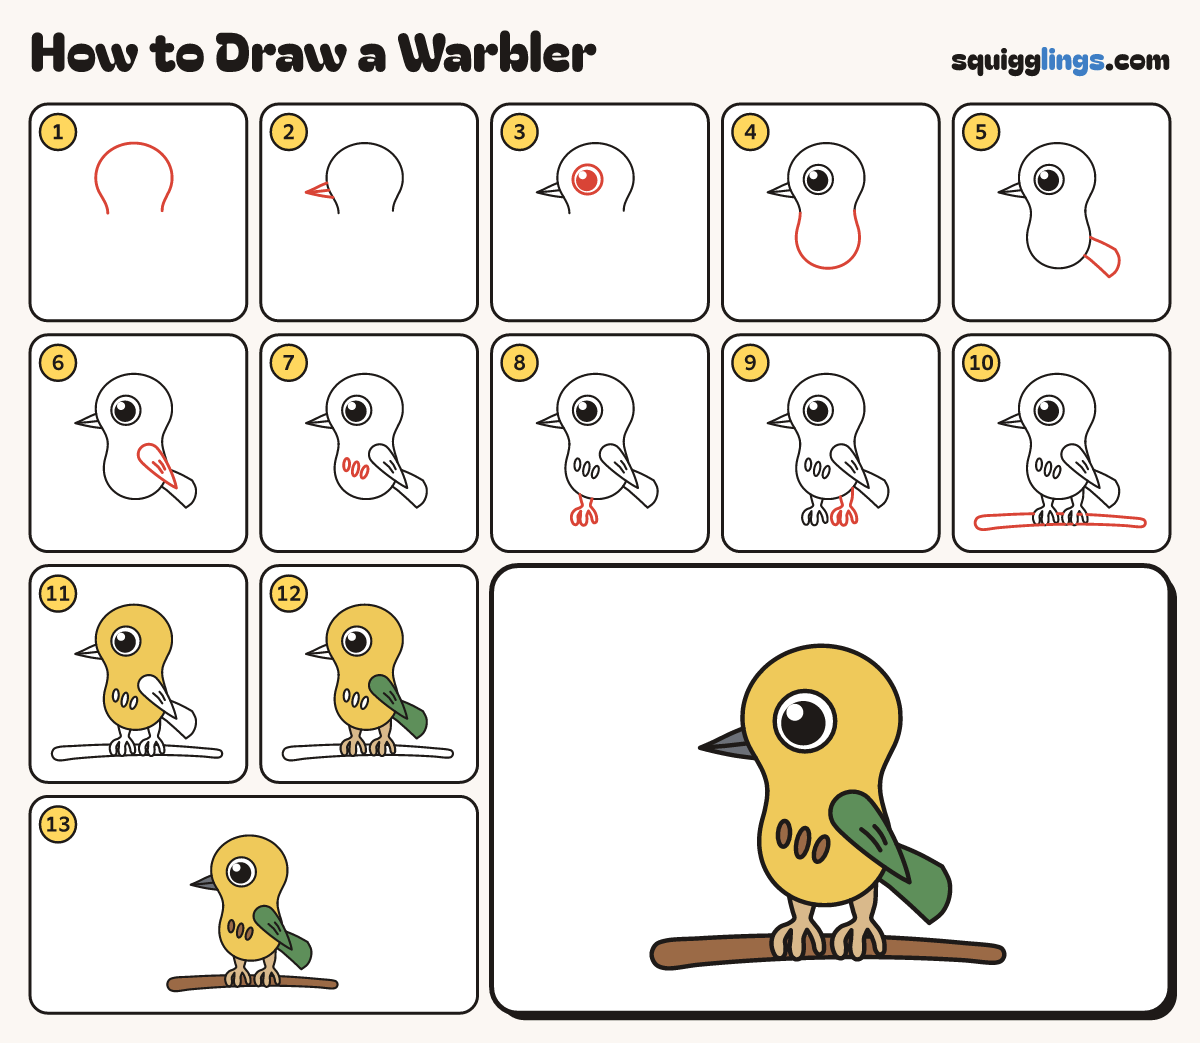
Draw a warbler in 13 easy steps, about 10 minutes. Free, with a printable worksheet.
Each picture adds one red line. Draw that line, then scroll to the next picture. Rub out any dashed helper lines at the end. First up: the head.
Step 1: The head
Start low on the front and draw a big round head over the top. Stop low at the back.
Tip Leave a gap at the bottom for the neck. Keep the top smooth.
Step 2: Thin pointed beak
Start on the front of the head, halfway down. Draw a thin pointed beak, back to the head.
Tip A warbler's beak is thin and sharp, like a pencil tip.
Step 3: One big eye
Behind the beak draw a big round eye. Colour a big black dot inside, leaving a white shine.
Step 4: Plump body
Start under the back of the head. Curve down round a fat belly and up to the throat.
Tip Curve in a little at the neck, so the head stays round.
Step 5: Fan tail
Start on the rump. Draw a fan tail pointing down and back, round the end and back to the body.
Step 6: Folded wing
Start under the head. Draw a long leaf wing down the back to a sharp point. Add 2 lines inside.
Tip Make the wing much longer than it is wide, like a leaf.
Step 7: Breast streaks
On the front of the tummy draw 3 thin ovals in a row, for streaks.
Tip Keep all 3 inside the tummy, away from the edge.
Step 8: Front leg and toes
Start on the tummy near the front. Draw a short leg down, 3 chubby toes, back up to the tummy.
Tip The toes curl down, ready to grip the branch: 2 forward, 1 back.
Step 9: Back leg and toes
A little behind the first leg, start on the tummy and draw another leg and toes, back up to it.
Step 10: The branch
Under the toes, draw a long, gently curved branch, thinner at the right end. Hop over each toe.
Step 11: Yellow warbler
Colour the head and body yellow, around the streaks, not the wing. Leave the eye white.
Step 12: Tan legs, green wing
Colour the legs and toes tan. Colour the wing and the tail green.
Step 13: Brown and dark grey
Colour the 3 streaks and the branch brown, around the toes. Colour the beak dark grey.
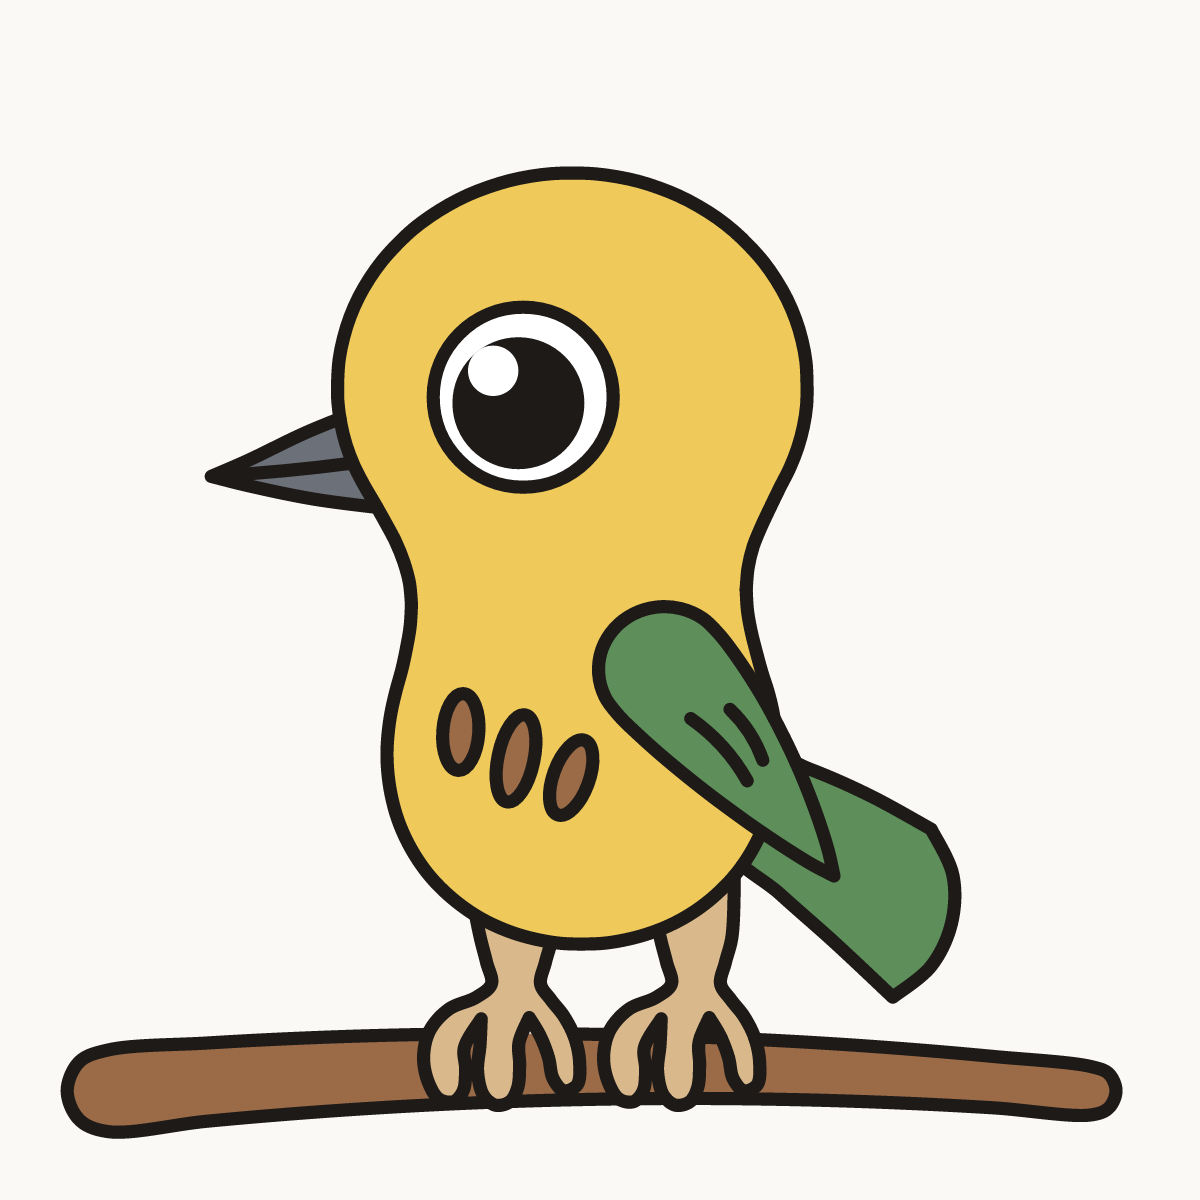
Your finished drawing
Follow the steps above and this is where you end up: a warbler, drawn by you.
Every step in one picture