Watch it draw itself · tap to replay
How to Draw a Walleye
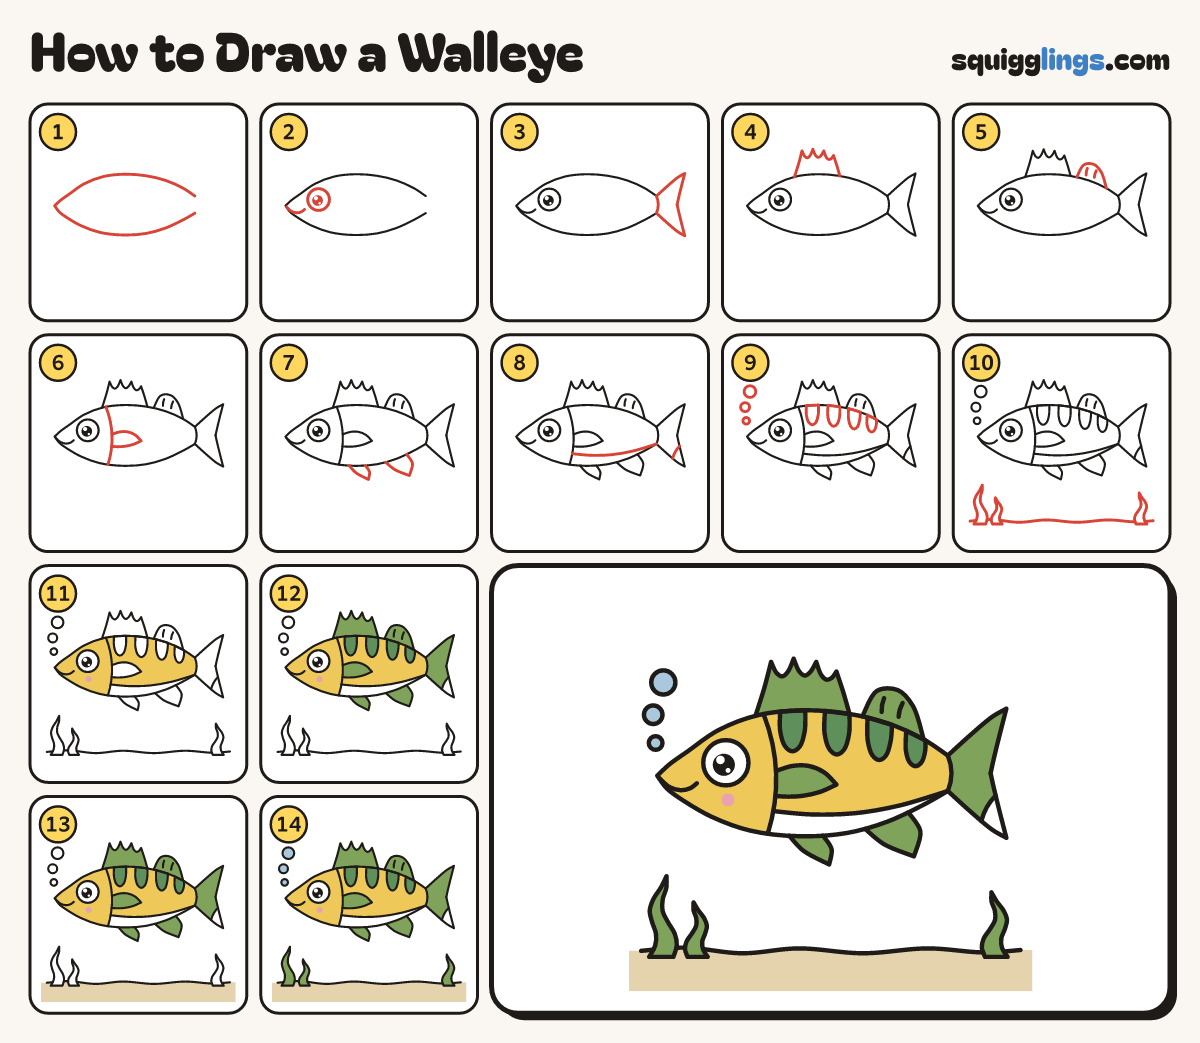
Draw a walleye in 14 easy steps, about 11 minutes. Free, with a printable worksheet.
Each picture adds one red line. Draw that line, then scroll to the next picture. Rub out any dashed helper lines at the end. First up: long body.
Step 1: Long body
Start at the right. Draw a long low back to a pointed nose, then a gentle tummy back again.
Tip A walleye is long and slim, like a torpedo. Leave the right end open for the tail.
Step 2: Eye and mouth
On the head draw 1 big round eye. From the nose tip draw a short smile curving up.
Tip Walleye have big glassy eyes. Keep the eye white when you colour.
Step 3: Forked tail
Close the open end with a curve. From its top, draw a forked tail that ends at its bottom.
Tip Up to a point, in to a dent, then down to a point.
Step 4: Spiky top fin
Start on the back behind the head. Draw a fin with 4 spiky tips, stopping halfway along the back.
Tip Leave a gap behind it for the next fin.
Step 5: Soft back fin
Behind the gap, start on the back. Draw a soft rounded fin, down to the back near the tail.
Step 6: Gill and side fin
Behind the eye draw a curved gill from back to tummy. Halfway down it, add a leaf fin pointing back.
Step 7: Tummy fins
Under the tummy draw 2 little swept-back fins, each from the tummy line out to a point and back.
Step 8: Tummy and tail tip
Low on the side draw a long line from gill to tail. Cut across the bottom tail tip.
Tip Under the long line is the white tummy. The tail tip stays white too.
Step 9: Saddles and bubbles
Hang 4 short rounded patches from the back line, like saddles. Add 3 bubbles by the nose.
Step 10: Sand and seaweed
Draw a wavy sand line from edge to edge. Stand 2 wavy seaweeds on the left, 1 on the right.
Tip Each seaweed is a tall wavy leaf with a pointy tip, standing on the sand.
Step 11: Golden body
Colour the body golden yellow around the saddles and side fin. Keep the tummy white. Add a pink cheek.
Step 12: Green fins, dark saddles
Colour all the fins and the tail light green, but not the tail tip. Colour the 4 saddles dark green.
Step 13: Sandy floor
Colour the floor under the sand line sandy, out to the edges and around the seaweed.
Step 14: Blue bubbles, green seaweed
Colour the bubbles light blue and the seaweed green. Go over your lines and your walleye is done!
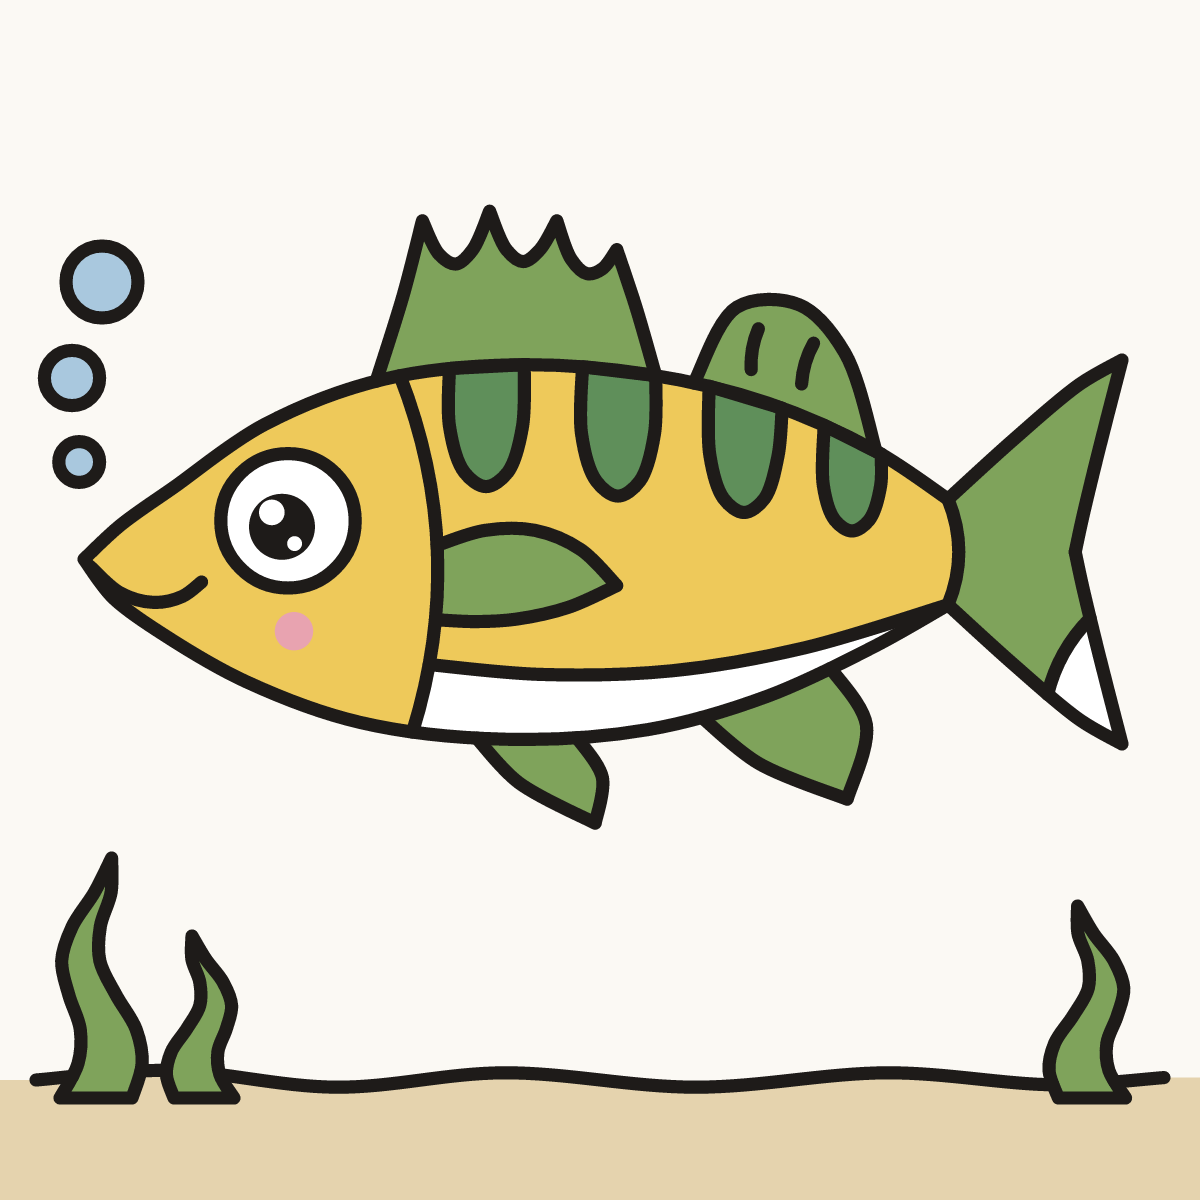
Your finished drawing
Follow the steps above and this is where you end up: a walleye, drawn by you.
Every step in one picture