Watch it draw itself · tap to replay
How to Draw an Ant Hill
Draw an ant hill in 12 easy steps, about 9 minutes. Free, with a printable worksheet.
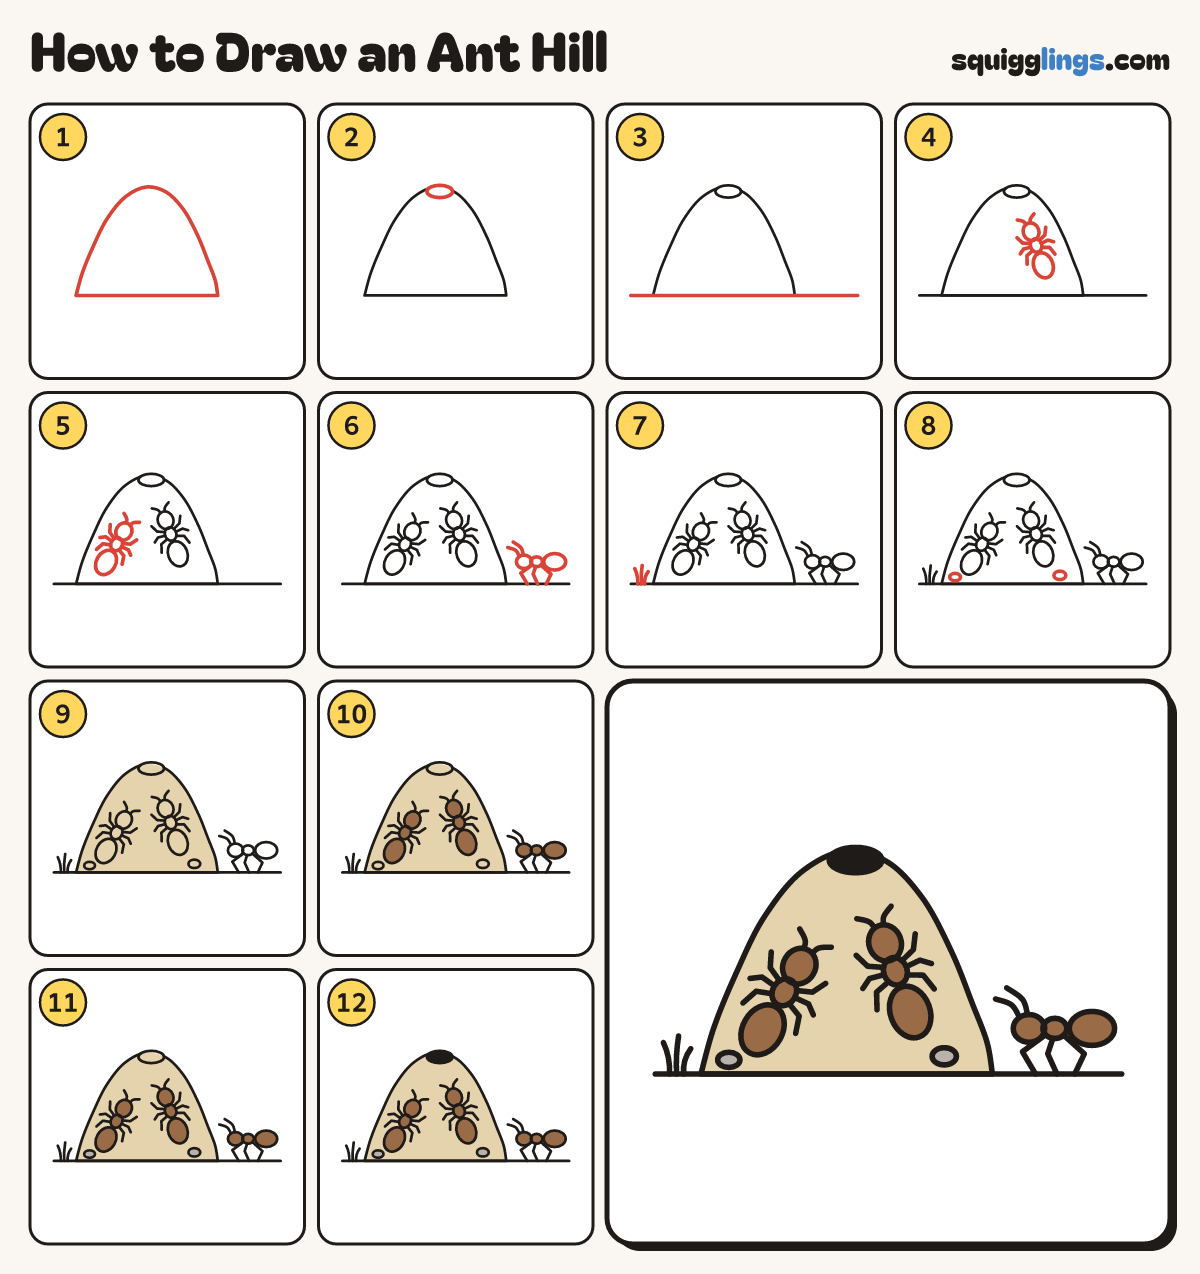
Each picture adds one red line. Draw that line, then scroll to the next picture. Rub out any dashed helper lines at the end. First up: the mound.
Step 1: The mound
Left of the middle of your paper, draw a big soft hill with a round top and a flat bottom.
Tip Taller than a pudding, with a rounded top for the hole.
Step 2: The hole
On the very top of the mound draw a small flat oval for the hole, touching the mound line.
Step 3: The ground
Draw a long ground line from the left edge to the right edge, along the bottom of the mound.
Step 4: Ant near the hole
On the right slope draw an ant walking up: 3 beads, 2 feelers and 6 bent legs.
Tip An ant is 3 beads. Grow 3 bent legs from each side of the middle one.
Step 5: An ant climbing up
On the left slope draw another ant the same way, climbing up: 3 beads, 6 bent legs and feelers.
Step 6: Ant on the ground
Right of the mound draw a third ant walking toward the hill, with 3 bent legs on the ground.
Step 7: A grass tuft
Draw a tuft of 3 grass blades growing up from the ground at the far left.
Step 8: Two pebbles
Draw 2 small oval pebbles on the mound, one low on the left and one low on the right.
Step 9: Sand mound
Colour the mound sand, going round the hole, the ants and the pebbles.
Step 10: Brown ants
Colour the 3 ants brown: head, middle and bottom.
Step 11: Grey pebbles
Colour the 2 pebbles grey.
Step 12: Black hole
Colour the hole black. Your ant hill is busy!
Your finished drawing
Follow the steps above and this is where you end up: an ant hill, drawn by you.
Every step in one picture