Watch it draw itself · tap to replay
How to Draw a Hoodie
Draw a hoodie in 11 easy steps, about 8 minutes. Free, with a printable worksheet.
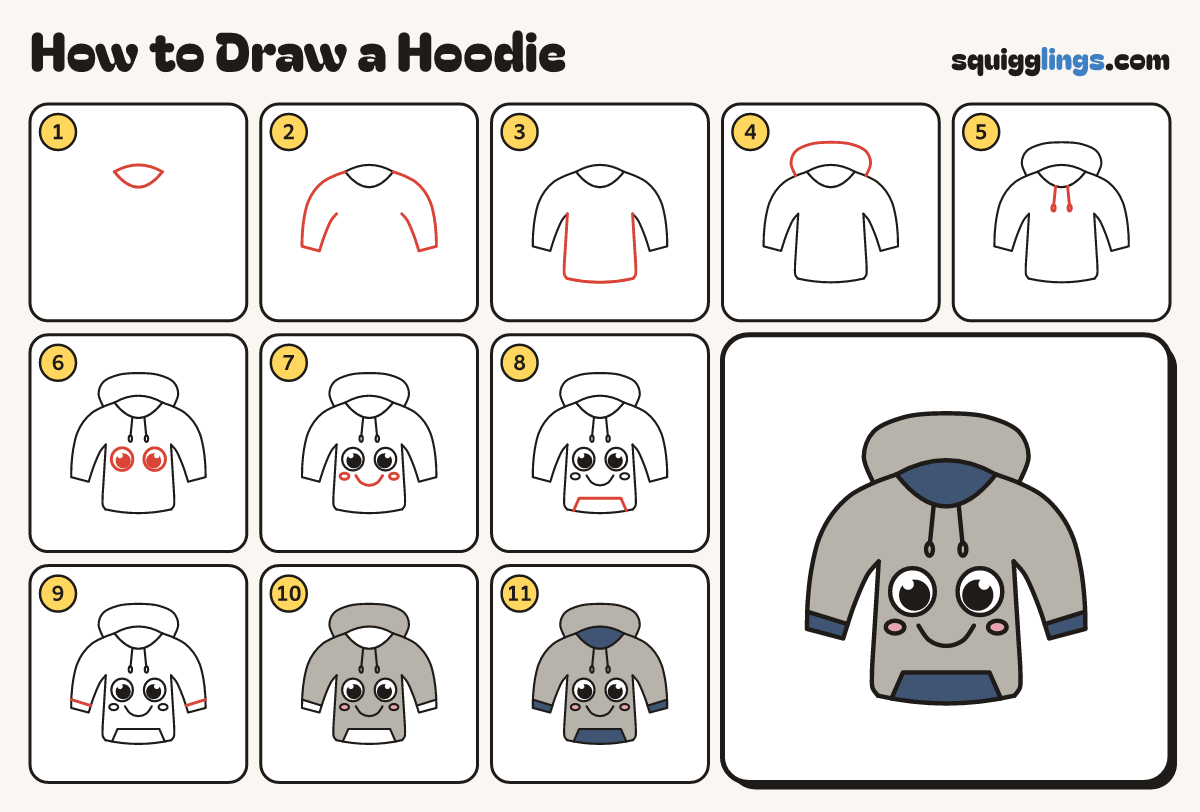
Each picture adds one red line. Draw that line, then scroll to the next picture. Rub out any dashed helper lines at the end. First up: the neck hole.
Step 1: The neck hole
Draw a rainbow 3 fingers wide. From its left end, draw a U dipping down to its right end.
Step 2: Long sleeves
From each end of the rainbow, slope over a shoulder, down a long sleeve, and back up to the armpit.
Step 3: The body
From each armpit, draw a nearly straight side down to a round corner. Join the corners with a drooping hem.
Step 4: The big hood
Start on the left shoulder. Draw a big rounded arch high above the neck hole, down to the right shoulder.
Step 5: Drawstrings
From the neck hole, draw 2 strings hanging down the chest, each ending in a tiny oval tip.
Step 6: Two big eyes
Below the drawstrings, draw 2 big circles close together. Fill most of each with a black dot, leaving a shine.
Step 7: Smile and cheeks
Start under the left eye, draw a U smile to under the right eye. Add a cheek by each end.
Step 8: Kangaroo pocket
Start on the hem near the left corner. Slant a line up, across, and back down to the hem.
Step 9: Cuff bands
On each sleeve, a finger above the cuff, draw a slanted line from the outside edge across to the inside.
Step 10: Pink cheeks, grey hoodie
Colour the cheeks pink. Colour the hoodie grey around the cheeks, pocket, cuffs and neck hole, leaving the eyes white.
Step 11: Navy pocket and cuffs
Colour the front pocket, the 2 cuff bands and the inside of the neck hole navy. Your hoodie is done!
Your finished drawing
Follow the steps above and this is where you end up: a hoodie, drawn by you.
Every step in one picture