Watch it draw itself · tap to replay
How to Draw a Violin Case
Draw a violin case in 14 easy steps, about 11 minutes. Free, with a printable worksheet.
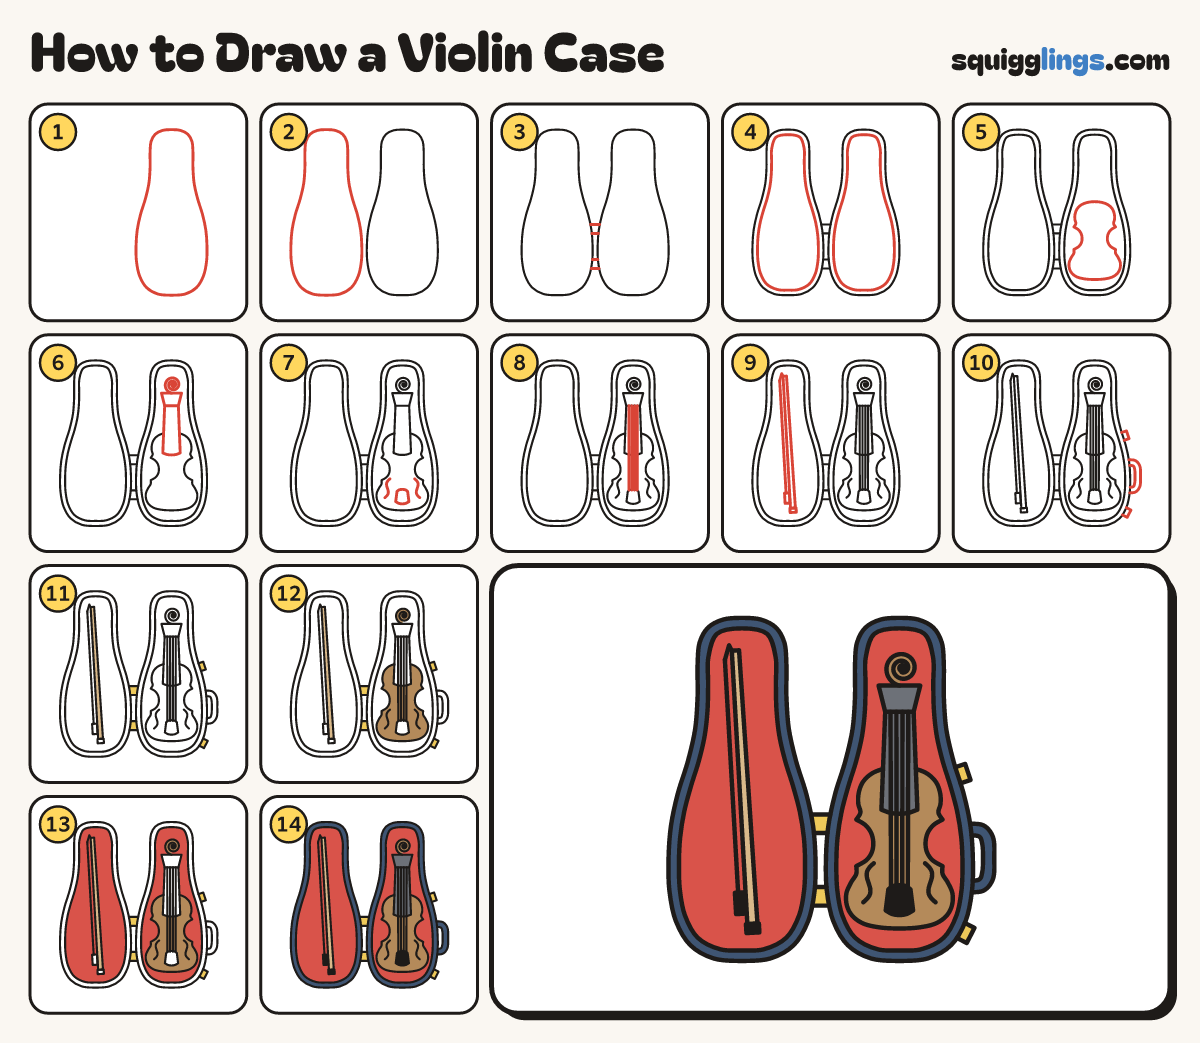
Each picture adds one red line. Draw that line, then scroll to the next picture. Rub out any dashed helper lines at the end. First up: case bottom.
Step 1: Case bottom
On the right draw a tall shape like a bowling pin: narrow at the top, wide and round below.
Tip Leave the left half of your paper empty for the lid.
Step 2: The lid
On the left draw the same shape again, the same size, with a small gap between them.
Tip The case is lying open, and you are looking down into it.
Step 3: Two hinges
Join the two halves with 2 small boxes across the gap, where the shapes are widest.
Step 4: Soft lining
Inside each half draw the same shape again, a little smaller, a finger in from the edge.
Step 5: Violin body
In the right half draw a figure 8 with a pinched waist: a small bump above a big bump.
Tip Four tiny corners at the waist make it a violin, not a guitar.
Step 6: Neck and curl
Start on the top bump. Draw a thin neck, a small box, then a snail curl. Stop in its middle.
Step 7: F-holes and tailpiece
Draw 2 curly f shapes on the big bump. Between them, lower down, draw a rounded tie shape.
Step 8: Four strings
Draw 4 thin strings. Start each at the top of the neck and stop on the tailpiece.
Step 9: The bow
In the lid, start at the top. Draw a long thin stick down and stop at a block. Add hair.
Tip The bow is nearly as long as the case.
Step 10: Handle and catches
On the right edge draw a D handle. Add a small catch above it and one below.
Step 11: Yellow and tan
Colour the hinges and the catches yellow. Colour the bow stick tan.
Step 12: Wooden violin
Colour the violin's body and the snail curl wood brown.
Step 13: Red lining
Colour the soft lining red in both halves, going round the violin and the bow.
Step 14: Dark case
Colour the case rim and handle dark blue, the neck dark grey, and the tailpiece and bow blocks black.
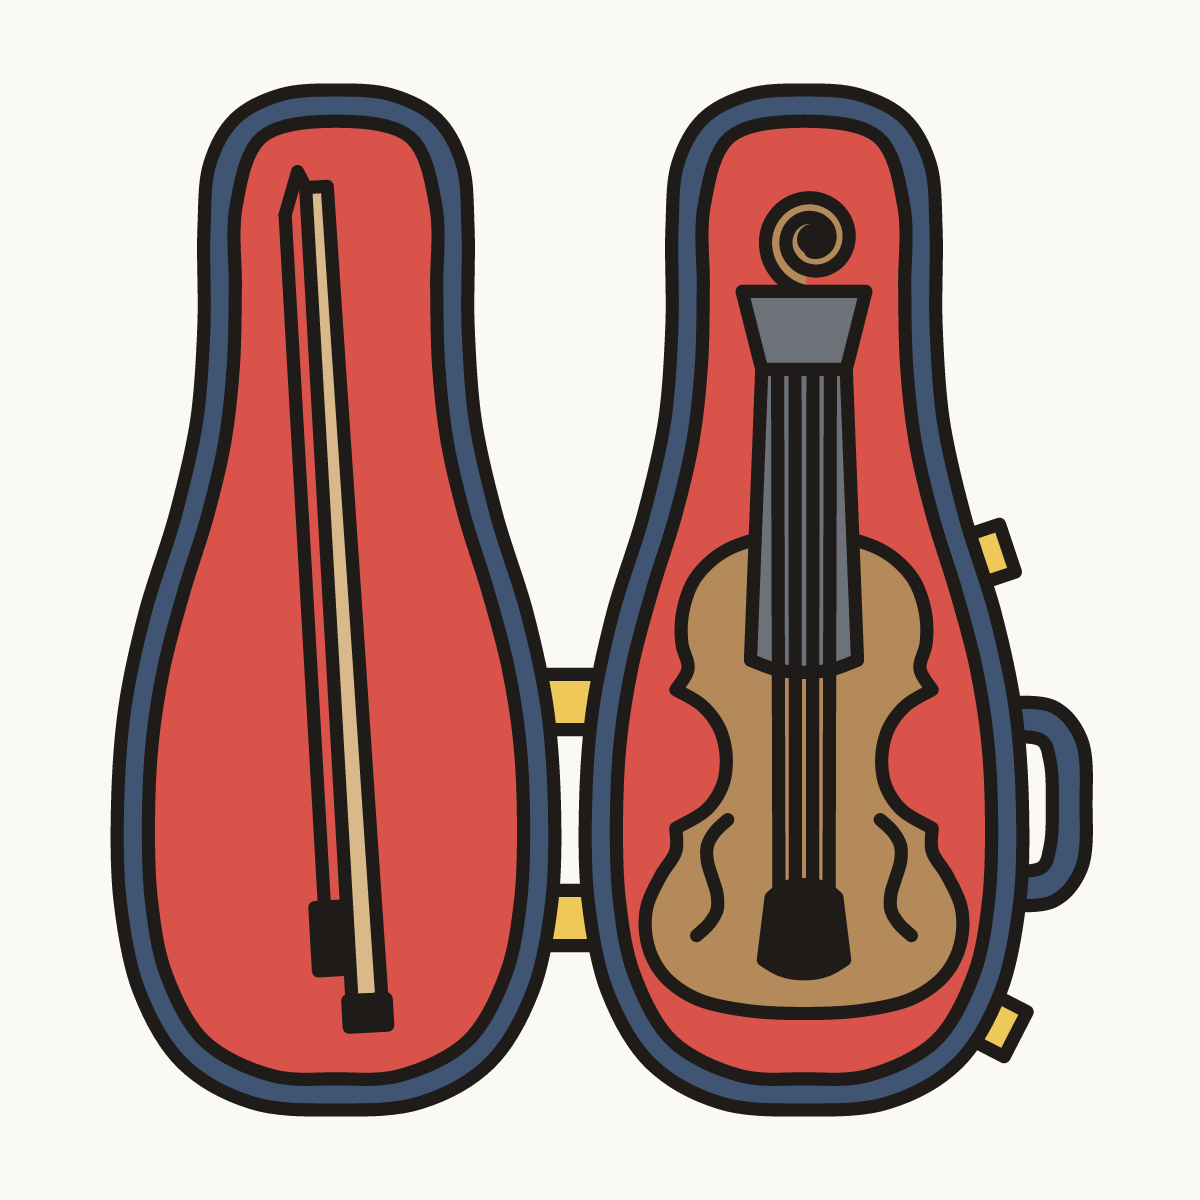
Your finished drawing
Follow the steps above and this is where you end up: a violin case, drawn by you.
Every step in one picture