Watch it draw itself · tap to replay
How to Draw a Portcullis
Draw a portcullis in 11 easy steps, about 8 minutes. Free, with a printable worksheet.
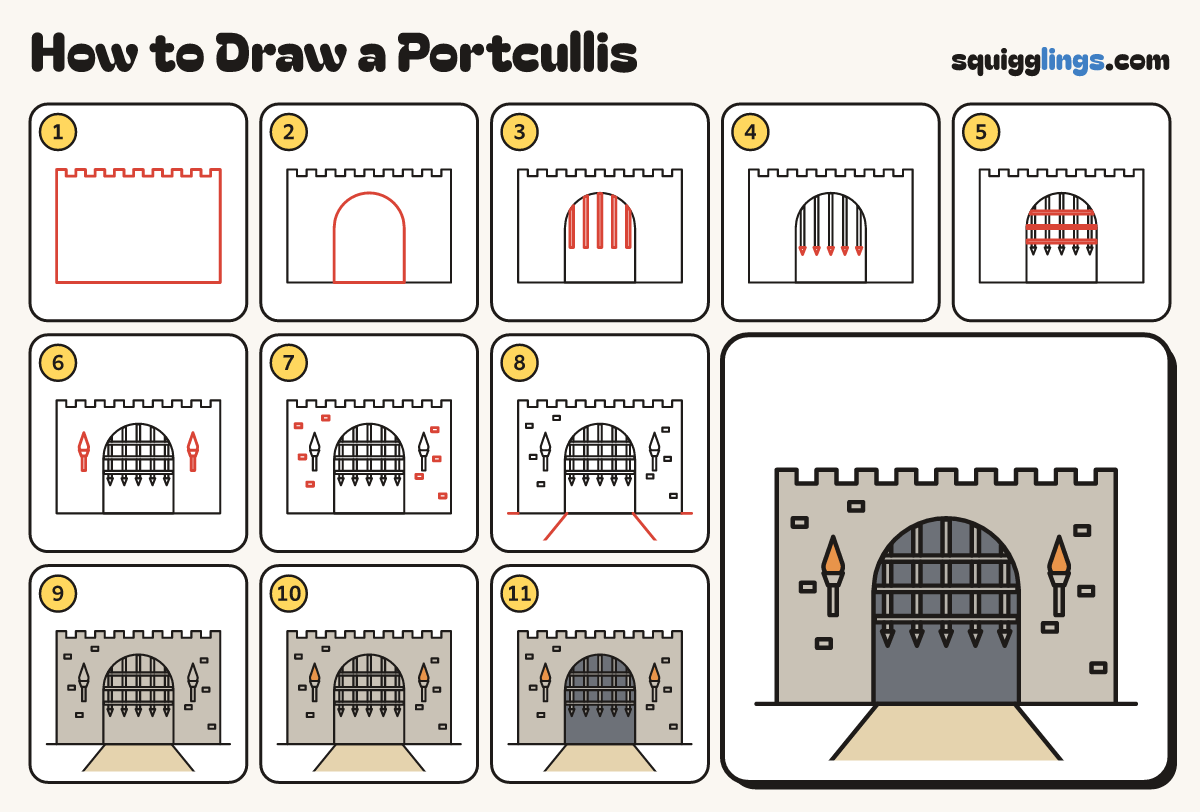
Each picture adds one red line. Draw that line, then scroll to the next picture. Rub out any dashed helper lines at the end. First up: the castle wall.
Step 1: The castle wall
Draw a wide wall across your paper with square teeth along the top, like a castle.
Step 2: The great arch
In the middle of the wall draw a big doorway with 2 straight sides and a round rainbow top.
Tip The portcullis is the iron gate that slides down inside this arch.
Step 3: 5 iron bars
Inside the arch draw 5 thin upright bars hanging from the top, stopping well above the ground.
Step 4: Pointed tips
Give every bar a sharp little spike at its bottom end, pointing down.
Step 5: Cross bars
Draw 3 flat bars straight across the upright bars, making a grid.
Step 6: Torches
On each side of the arch draw a torch: a short stick, a little cup, and a teardrop flame.
Step 7: Stone blocks
Scatter a few small stone blocks over the wall, not in a row.
Step 8: Ground and road
Draw the ground line out to each edge. From the arch draw 2 road lines down to the bottom edge.
Step 9: Stone wall, sandy road
Colour the wall stone grey, going round the arch, and colour the road sandy.
Step 10: Grey bars, orange flames
Colour all the bars and spikes light grey, and colour the 2 flames orange.
Step 11: Dark doorway
Colour the doorway dark grey around the bars. Go over your lines and your portcullis is done!
Your finished drawing
Follow the steps above and this is where you end up: a portcullis, drawn by you.
Every step in one picture