Watch it draw itself · tap to replay
How to Draw a Vending Machine
Draw a vending machine in 12 easy steps, about 9 minutes. Free, with a printable worksheet.
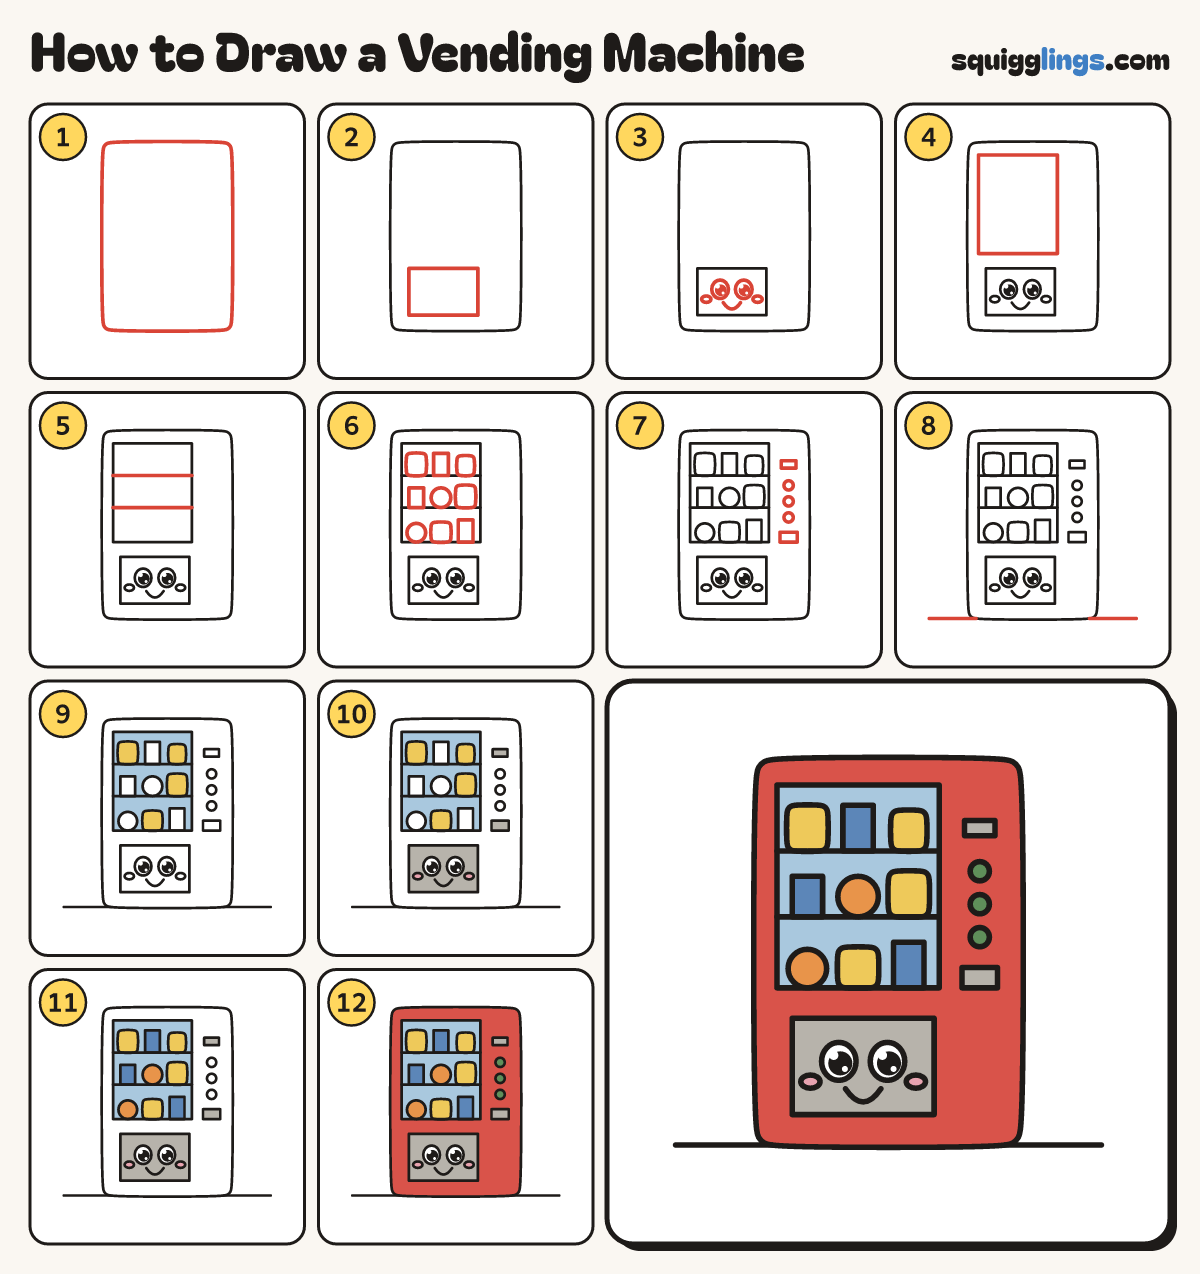
Each picture adds one red line. Draw that line, then scroll to the next picture. Rub out any dashed helper lines at the end. First up: the machine.
Step 1: The machine
In the middle draw a big tall box with soft corners, filling most of the page.
Tip Put in a coin, press a button, and your snack drops into the flap.
Step 2: The snack flap
Near the bottom of the box, a little to the left, draw a wide rectangle for the snack flap.
Step 3: A happy face
On the flap draw 2 big egg eyes with a dot and shine. Add a U smile and 2 cheeks.
Step 4: The glass window
On the left of the box draw a tall rectangle window from near the top down past the middle.
Tip Leave a strip of the box free on the right.
Step 5: Shelves
Across the window draw 2 straight lines from the left edge to the right edge, splitting it into 3 shelves.
Step 6: Snacks on the shelves
On each shelf draw 3 snacks, mixing tall thin cans, chunky bags with soft corners and round ones.
Step 7: Coin slot and buttons
On the right strip draw a flat coin slot near the top, 3 round buttons below, and a change box.
Step 8: The ground
Along the machine's bottom draw a ground line, from well out on the left to well out on the right.
Step 9: Yellow bags, sky glass
Go over your lines. Colour the bags yellow, then the window sky blue around all the snacks.
Step 10: Pink cheeks, grey flap
Colour the cheeks pink, then the flap, coin slot and change box grey around the face. Leave the eyes white.
Step 11: Orange balls, blue cans
Colour the round snacks orange and the cans blue.
Step 12: Green buttons, red machine
Colour the buttons green, then the machine red around all the other parts. Your vending machine is stocked!
Your finished drawing
Follow the steps above and this is where you end up: a vending machine, drawn by you.
Every step in one picture