Watch it draw itself · tap to replay
How to Draw a Unicycle
Draw a unicycle in 11 easy steps, about 8 minutes. Free, with a printable worksheet.
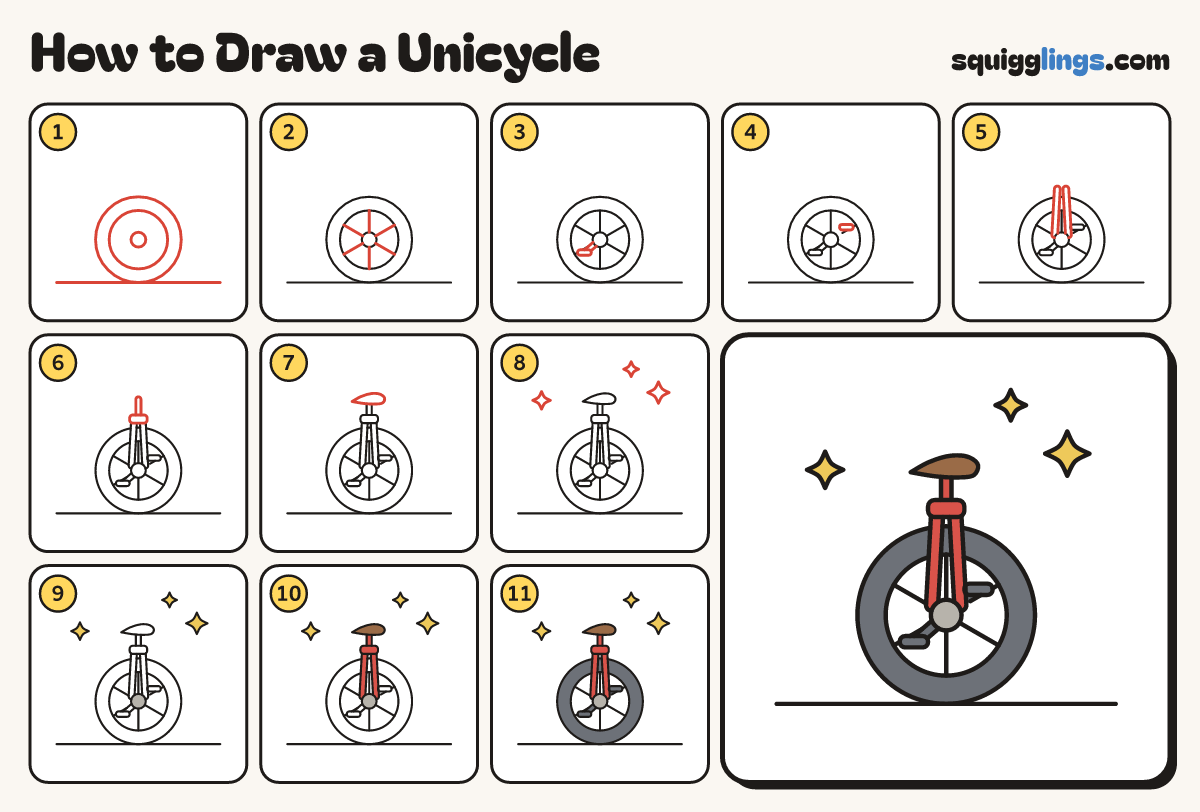
Each picture adds one red line. Draw that line, then scroll to the next picture. Rub out any dashed helper lines at the end. First up: one big wheel.
Step 1: One big wheel
Draw one BIG wheel in the middle, with a rim circle and a hub. Add a road line under it.
Tip Trace round a cup: it is the biggest thing in the drawing.
Step 2: Spokes
In the wheel draw 3 straight lines through the hub from rim to rim, like cutting a pizza into 6.
Step 3: Crank and pedal
From the hub draw a fat stick forward and down, stopping inside the tyre in a small flat pedal.
Step 4: The other pedal
From the hub draw a second fat stick the opposite way, up and back, ending in another flat pedal.
Step 5: The fork
Start on the hub. Draw 2 fat sticks straight up, close together like a V, stopping above the tyre.
Step 6: Collar and post
Across the tops of the sticks draw a fat pill collar. From it draw a thin post up a finger.
Step 7: Saddle
On top of the post draw a chunky saddle: a pointy nose at the front, a hump, and flat under.
Tip Like a slice of bread: pointy at the front, fat at the back.
Step 8: Sparkle stars
Around the top draw 3 sparkle stars: 4 points joined with curves that dip in toward the middle.
Step 9: Yellow stars, grey hub
Go over your lines. Colour the 3 sparkle stars yellow and the little hub light grey.
Step 10: Red fork, brown saddle
Colour the 2 fork sticks, the collar and the post red, around the hub. Colour the saddle brown.
Step 11: Dark grey tyre
Colour the fat tyre, the cranks and the pedals dark grey, around the fork and hub.
Your finished drawing
Follow the steps above and this is where you end up: a unicycle, drawn by you.
Every step in one picture