Watch it draw itself · tap to replay
How to Draw a Tram
Draw a tram in 12 easy steps, about 9 minutes. Free, with a printable worksheet.
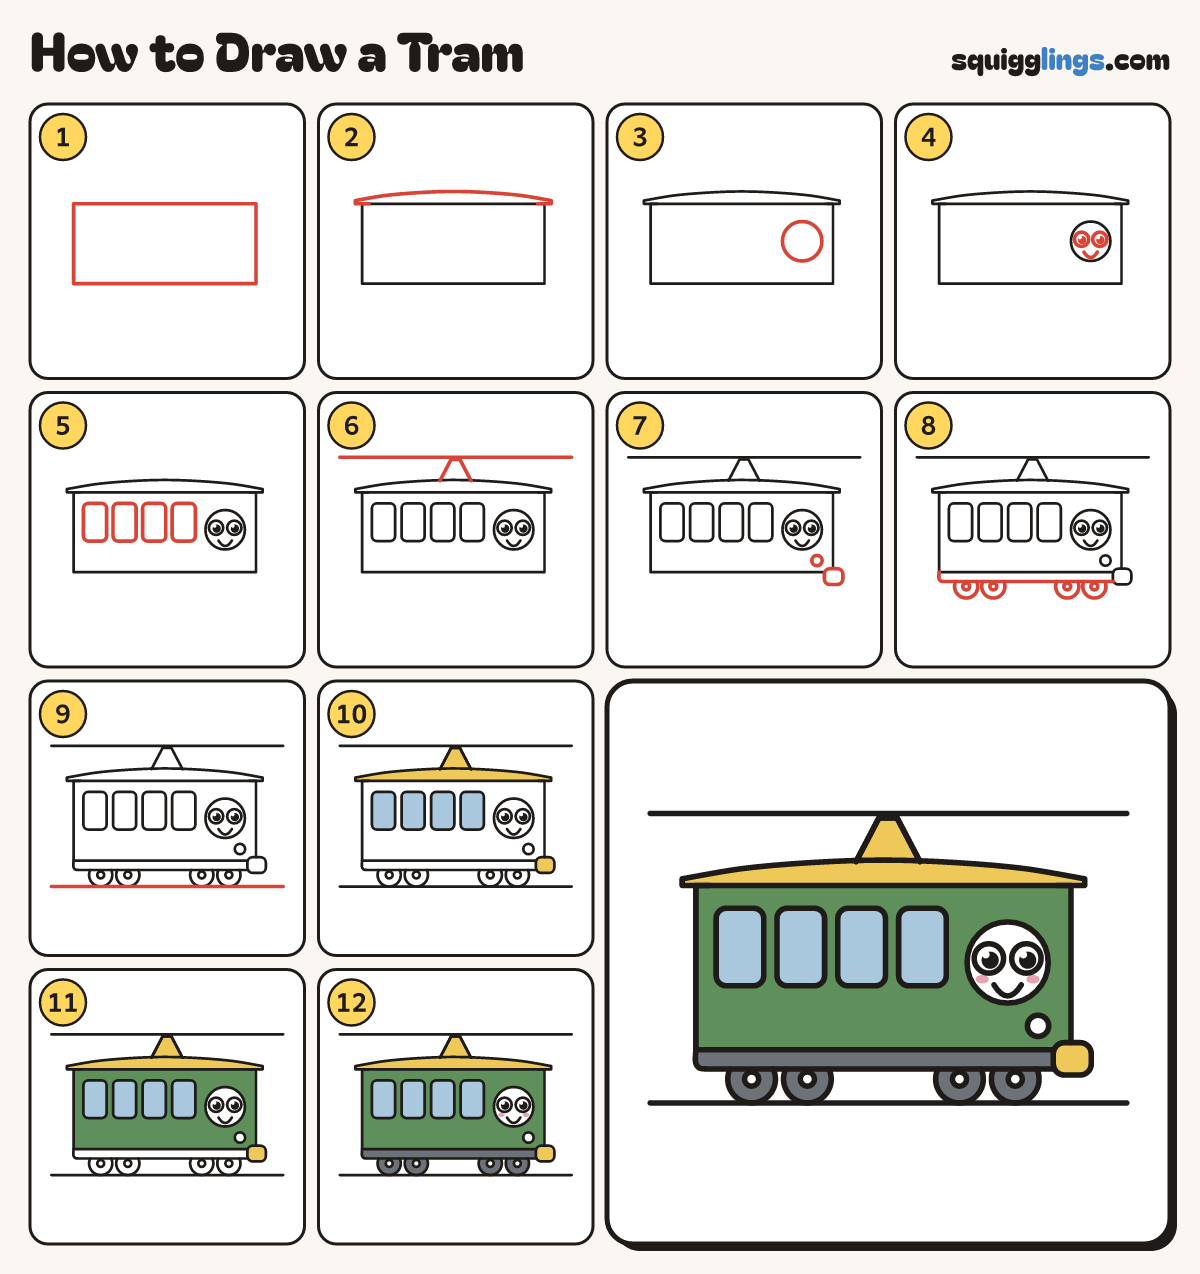
Each picture adds one red line. Draw that line, then scroll to the next picture. Rub out any dashed helper lines at the end. First up: the long car.
Step 1: The long car
Draw one long box right across your paper, a little below the middle.
Tip The box is about twice as wide as it is tall.
Step 2: Brim roof
Start at the top right corner. Draw a roof poking out past both ends. Stop at the top left corner.
Step 3: The round face
Near the right end of the box draw a big circle, half as tall as the box. That's the face.
Step 4: Big eyes and smile
In the circle draw 2 big round eyes with a shine. Under them draw a wide U smile.
Step 5: Four windows
Along the box, behind the face, draw 4 tall windows with round corners. Keep them all the same size.
Tip Line the tops and bottoms up. Stop before the face.
Step 6: Power arm and wire
Start on the roof and draw a flat-topped tent. Stop on the roof. Rule a long wire touching its top.
Tip The arm pulls power from the wire, so it must touch.
Step 7: Lamp and bumper
Draw a small round lamp under the face. Add a rounded bumper poking out at the bottom front.
Step 8: Skirt and wheels
Start at the bottom left corner. Draw a skirt under the tram, ending at the bumper. Add 4 wheels.
Step 9: The rail
Rule one long rail under the wheels from edge to edge. It just touches every wheel.
Step 10: Windows and roof
Colour the windows sky blue and the roof, arm and bumper yellow. Leave the face, eyes and lamp white.
Step 11: Green car
Go over your lines. Colour the box green around the windows, the face, the lamp and the bumper.
Step 12: Grey wheels, pink cheeks
Colour the skirt and wheels grey around the bumper. Leave the hubs white. Add 2 pink cheeks beside the smile.
Your finished drawing
Follow the steps above and this is where you end up: a tram, drawn by you.
Every step in one picture