Watch it draw itself · tap to replay
How to Draw a Tuba
Draw a tuba in 9 easy steps, about 7 minutes. Free, with a printable worksheet.
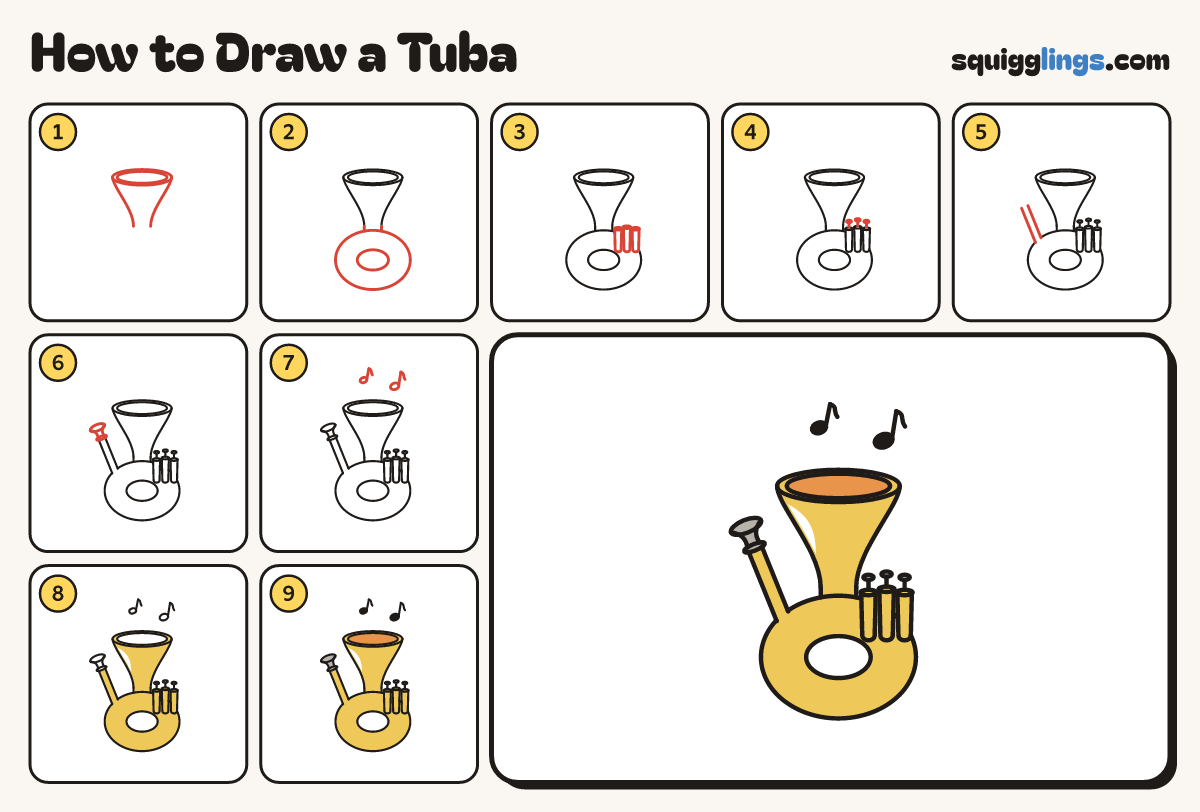
Each picture adds one red line. Draw that line, then scroll to the next picture. Rub out any dashed helper lines at the end. First up: the big bell.
Step 1: The big bell
Near the top draw a wide flat oval rim. Start at each end and swoop down to a neck below.
Step 2: The tubing ring
Under the neck draw a fat ring with a hole. From each neck end draw a line down onto it.
Step 3: Three valve tins
On the right of the ring draw 3 small tins standing in a row, each with a flat oval lid.
Step 4: Three buttons
Start on the middle of each lid. Draw a short stick up, ending in a small flat oval.
Step 5: The lead pipe
Start on the upper left of the ring. Draw a thin tube slanting up left, 2 fingers long, ending open.
Step 6: The mouthpiece
Start at the end of the lead pipe. Draw a thin ring, then a cup swooping out to a rim.
Step 7: Oompah! Music notes
Above the bell rim draw a tilted oval note with a tall stem and curly flag. Add a smaller note.
Step 8: Shiny yellow brass
Colour the tuba yellow. Leave the ring hole, the inside oval and a thin sliver on the bell white.
Step 9: Orange bell, grey mouthpiece
Colour the inside oval of the bell orange and the mouthpiece grey like silver. Colour the note heads black.
Your finished drawing
Follow the steps above and this is where you end up: a tuba, drawn by you.
Every step in one picture