Watch it draw itself · tap to replay
How to Draw a Trilobite
Draw a trilobite in 11 easy steps, about 8 minutes. Free, with a printable worksheet.
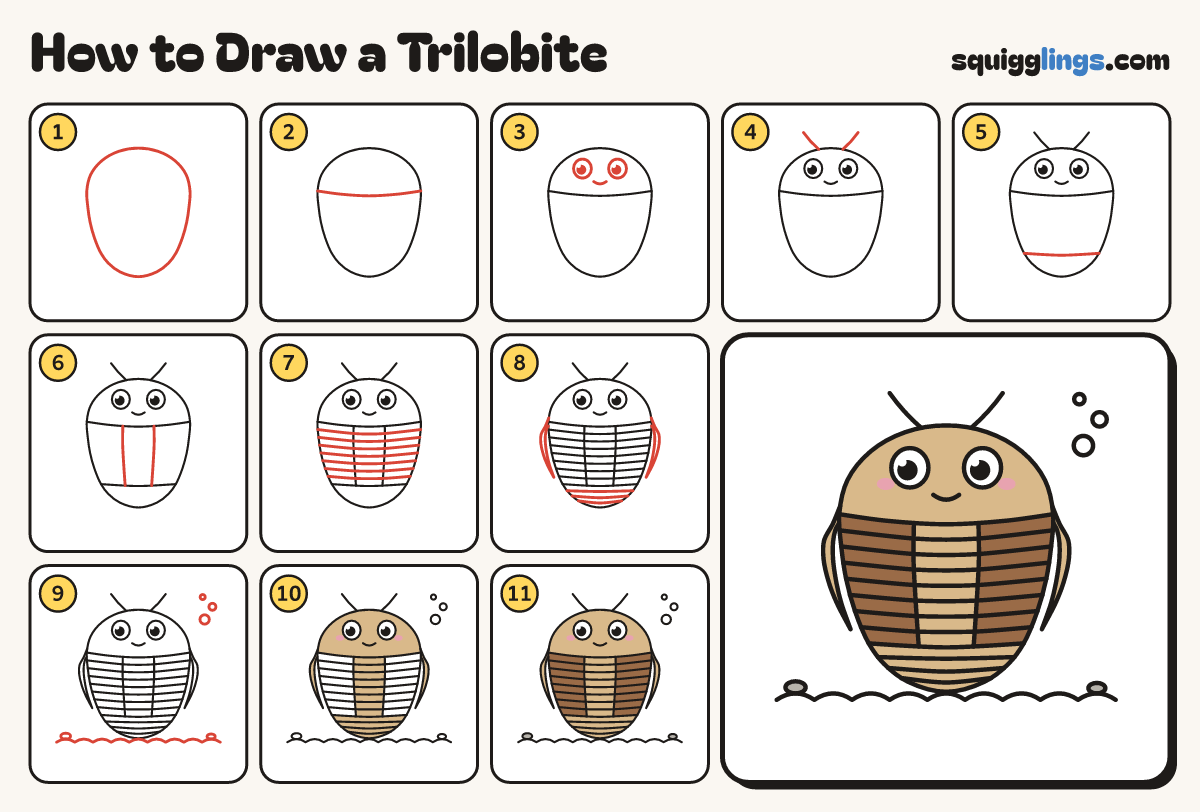
Each picture adds one red line. Draw that line, then scroll to the next picture. Rub out any dashed helper lines at the end. First up: shield body.
Step 1: Shield body
Draw a big shield shape in the middle, round on top and narrowing down to a small round tail.
Tip It is widest a third of the way down.
Step 2: Head shield
At the widest part draw one curve across the body, edge to edge. Above it is the head.
Step 3: Two big eyes
On the head shield draw 2 big round eyes with a shine. Under them draw a tiny smile.
Step 4: Feelers
From the front edge of the head draw 2 feelers curving up and out.
Step 5: Tail shield
Near the bottom draw another curve right across the body from edge to edge. Below it is the tail.
Step 6: Middle ridge
Draw 2 long lines down the middle, from the head line to the tail line, a thumb apart.
Step 7: Body segments
Between the head and tail lines draw 7 gentle curves right across the body, evenly spaced.
Step 8: Tail bits and spines
On the tail draw 3 short curves. At both ends of the head line, draw a long spike pointing back.
Step 9: Sand and bubbles
Under the trilobite draw a wavy sand line. Sit a small pebble on each end. Add 3 bubbles.
Step 10: Pink cheeks, tan head
Colour the cheeks pink, then the head, ridge, tail and spines tan around them. Leave the eyes white.
Step 11: Brown sides, grey pebbles
Go over your lines. Colour the 2 sides brown around the ridge, and the pebbles grey.
Your finished drawing
Follow the steps above and this is where you end up: a trilobite, drawn by you.
Every step in one picture