Watch it draw itself · tap to replay
How to Draw a Treble Clef
Draw a treble clef in 12 easy steps, about 9 minutes. Free, with a printable worksheet.
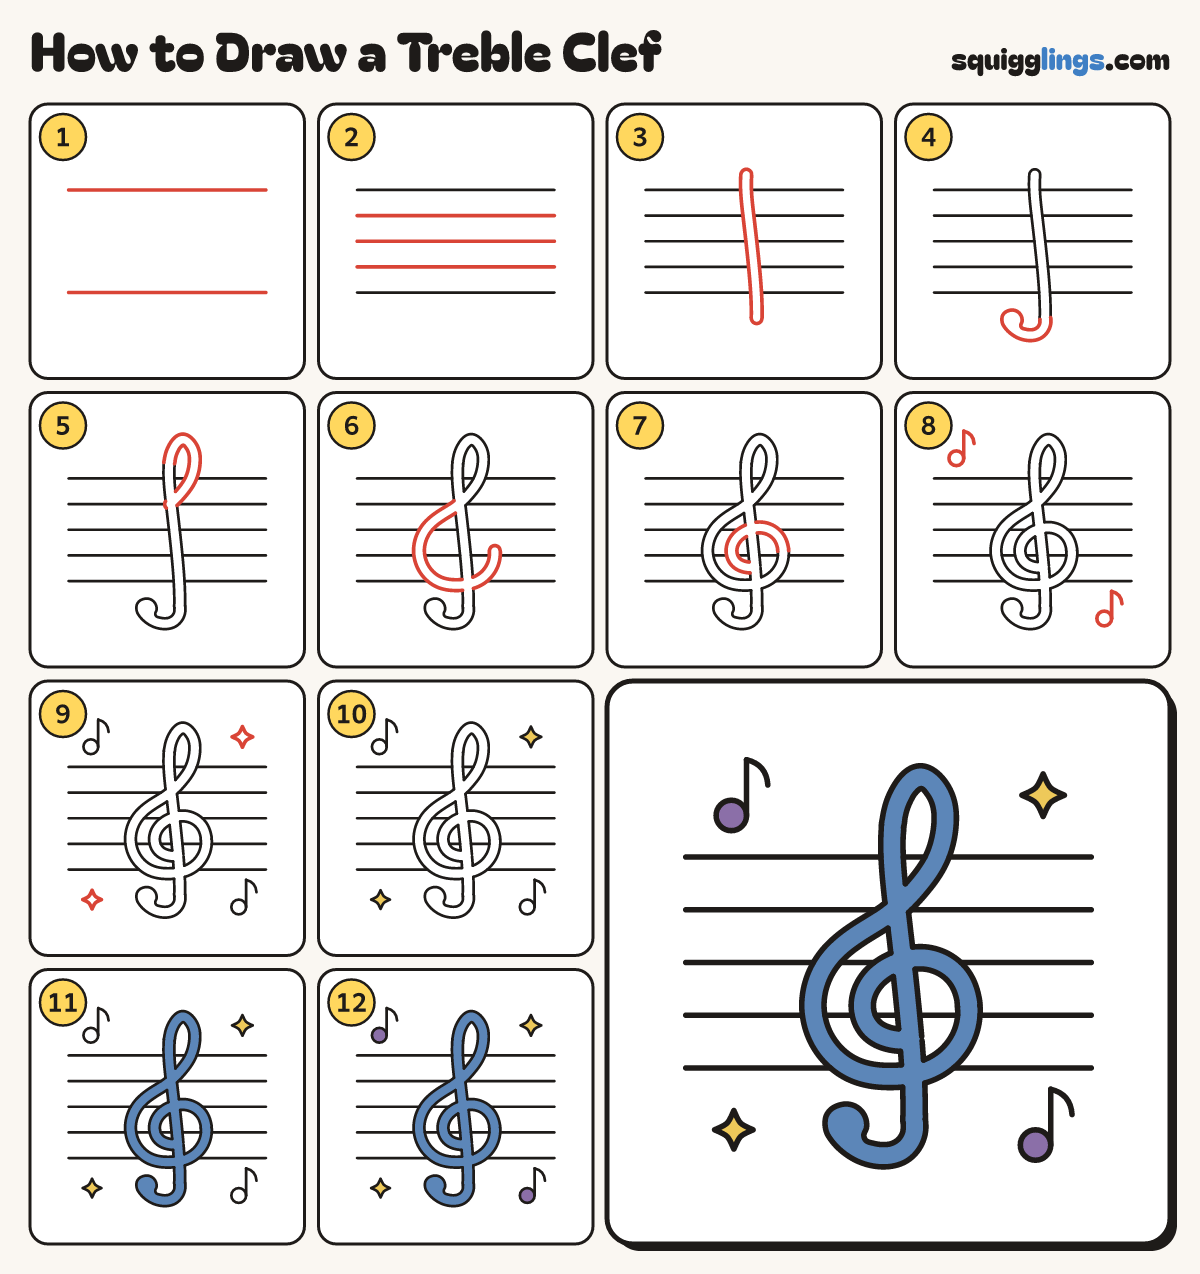
Each picture adds one red line. Draw that line, then scroll to the next picture. Rub out any dashed helper lines at the end. First up: top and bottom lines.
Step 1: Top and bottom lines
Draw 2 long flat lines across your paper, one above the middle and one below, far apart.
Tip Use a ruler if you like. These are the top and bottom of the music lines.
Step 2: Three lines between
Draw a line halfway between them. Then draw 1 more line in each gap. Now you have 5.
Tip Keep all 5 lines the same distance apart.
Step 3: The stem
In the middle draw a tall thin sausage, leaning a little, from above the top line to below the bottom.
Step 4: Hook and ball
From the bottom of the stem curl a fat hook round to the left. End it with a round ball.
Step 5: Loop on top
From the top of the stem draw a fat loop up, over to the right and back to the stem.
Tip The loop comes back to the stem at the second line down.
Step 6: The big curve
From there swing a fat curve out to the left, down under the bottom line and up the right side.
Step 7: The curl
Carry on over the top and curl back in to the stem, wrapping round the second line up.
Tip The curl hugs the second line up. That line is the note G.
Step 8: Two little notes
Draw a little music note top left and one bottom right: a dot, a stem, a flag.
Step 9: Sparkles
Draw a sparkle star in the top right corner and one in the bottom left corner.
Step 10: Yellow sparkles
Colour the 2 sparkles yellow.
Step 11: Blue treble clef
Colour the whole treble clef blue, right down to the ball. Leave the gaps inside it white.
Step 12: Purple little notes
Colour the 2 little note dots purple. Go over your lines, and your treble clef is ready to play!
Your finished drawing
Follow the steps above and this is where you end up: a treble clef, drawn by you.
Every step in one picture