Watch it draw itself · tap to replay
How to Draw a Time Machine
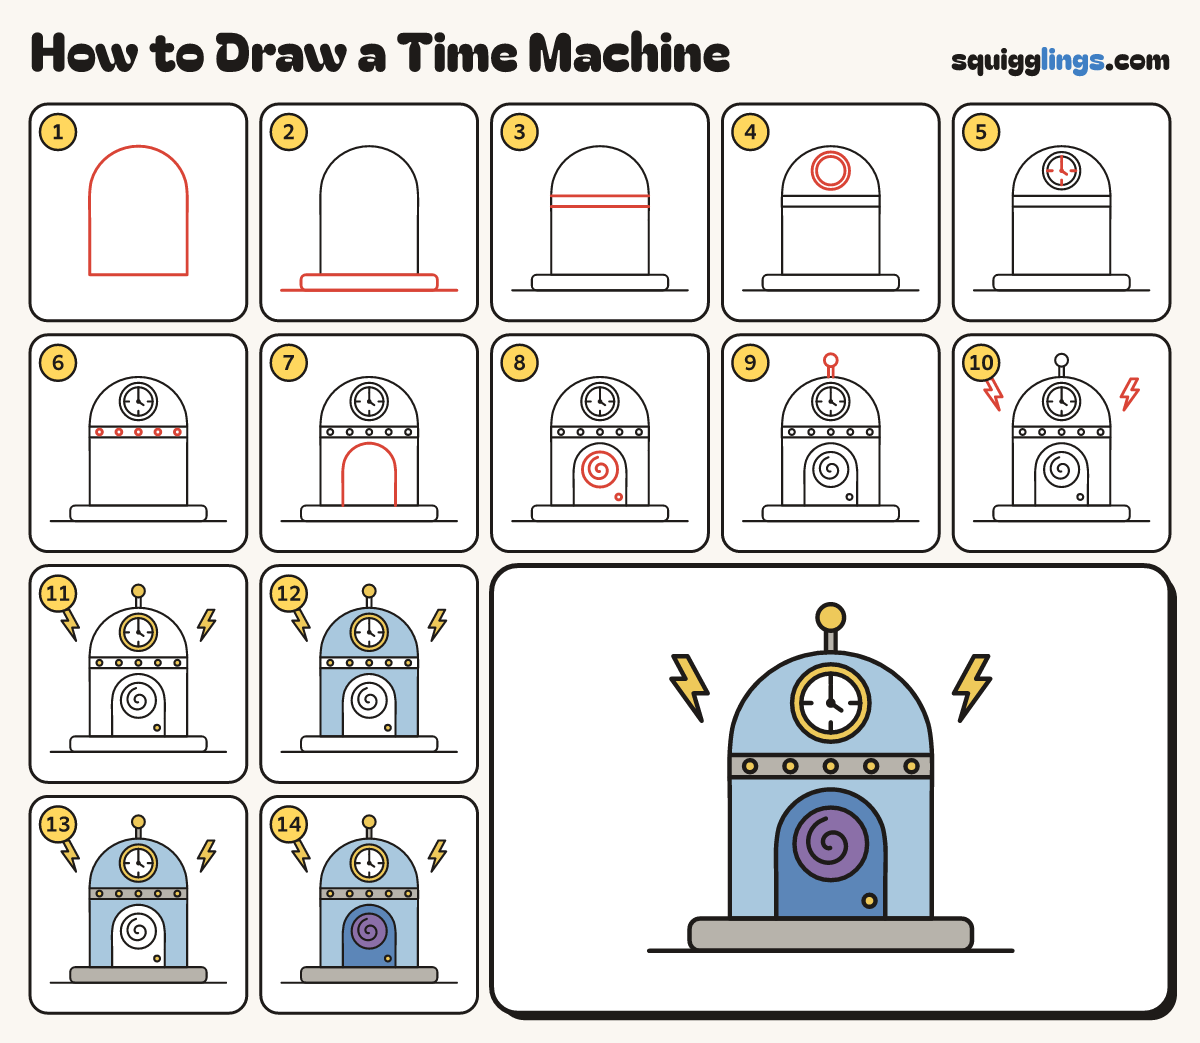
Draw a time machine in 14 easy steps, about 11 minutes. Free, with a printable worksheet.
Each picture adds one red line. Draw that line, then scroll to the next picture. Rub out any dashed helper lines at the end. First up: the pod.
Step 1: The pod
In the middle draw a tall pod: a round dome top, straight sides and a flat bottom.
Tip Like a door with a rainbow top.
Step 2: Base and ground
Under the pod draw a long flat slab with round corners. Add a ground line from side to side.
Step 3: Trim band
Under the dome draw 2 lines close together, from the left side across to the right side.
Step 4: A big clock
In the dome draw a big circle. Draw a smaller circle inside it for the rim.
Tip Let the clock nearly fill the dome.
Step 5: Hands and marks
From the middle draw a long hand up and a short hand. Add 4 small marks round the edge.
Tip The marks sit at the top, bottom, left and right.
Step 6: Row of lights
Inside the band draw 5 small round lights in a row, with even gaps.
Tip Start with the middle one, then add 2 on each side.
Step 7: The door
Start on the pod's bottom line. Draw up, arch over under the band, come down and stop on the line.
Step 8: Swirly window
In the door draw a round window. Start in its middle and draw a swirl going round. Add a knob.
Tip The swirl is where time spins!
Step 9: The antenna
On top of the dome draw a short thin rod with a ball on top.
Tip Keep it right in the middle, above the clock.
Step 10: Lightning bolts
On each side of the dome draw a small zigzag lightning bolt, not touching the pod.
Step 11: Yellow parts
Go over your lines. Colour the ball, bolts, lights, knob and clock rim yellow. Leave the clock face white.
Step 12: Light blue pod
Colour the pod light blue, around the clock. Leave the band and the door white for now.
Step 13: Grey trim
Colour the band grey, around the lights. Colour the base and the antenna rod grey too.
Step 14: Purple window, blue door
Colour the round window purple and the door dark blue, around the knob. Your time machine is ready!
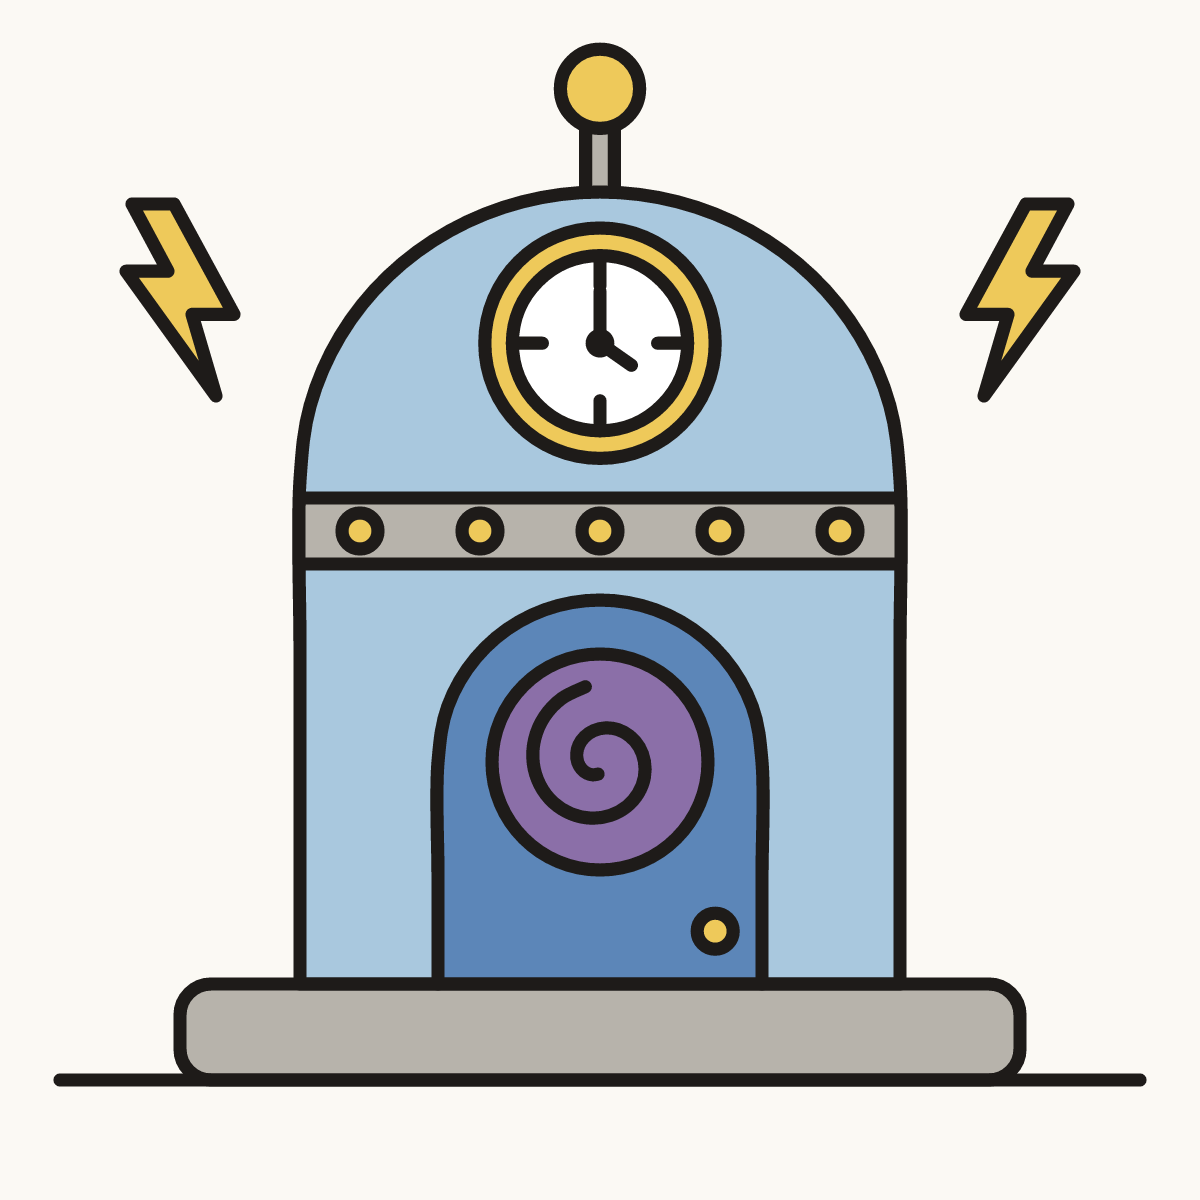
Your finished drawing
Follow the steps above and this is where you end up: a time machine, drawn by you.
Every step in one picture