Watch it draw itself · tap to replay
How to Draw a Thanksgiving Tree
Draw a Thanksgiving tree in 13 easy steps, about 10 minutes. Free, with a printable worksheet.
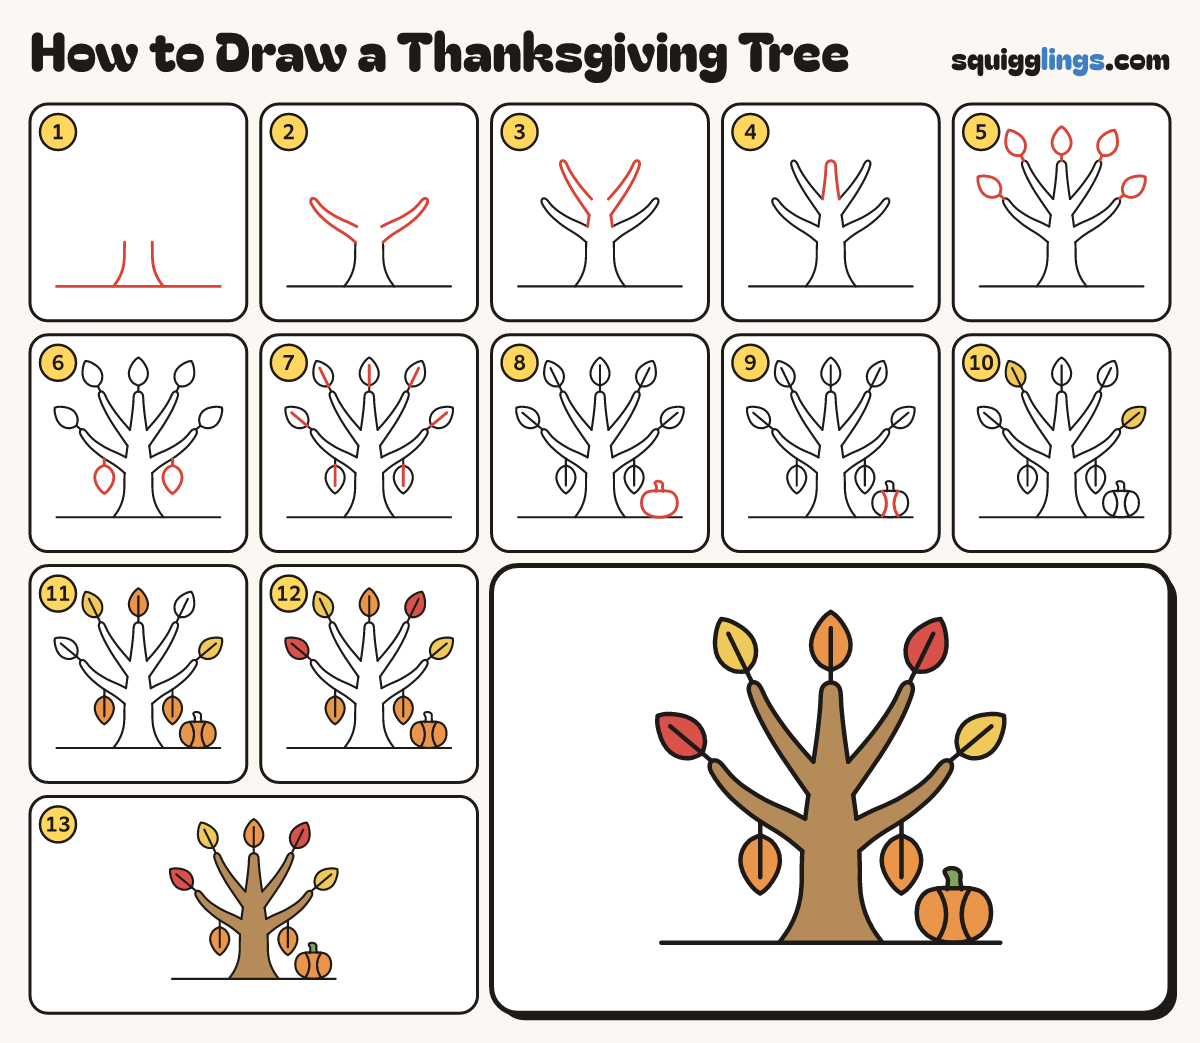
Each picture adds one red line. Draw that line, then scroll to the next picture. Rub out any dashed helper lines at the end. First up: sturdy trunk.
Step 1: Sturdy trunk
Draw a ground line. From it draw 2 trunk lines that lean in, then go up. Stop half way.
Tip Wide at the roots, like a hand standing on its wrist.
Step 2: Low branches
From the top of each trunk line draw a bare branch out to a round tip and back.
Tip A branch gets thinner towards its tip.
Step 3: High branches
Start a little higher on each side. Draw 2 more branches reaching up to round tips. Stop at the trunk.
Step 4: Tree top
Start where a high branch ends. Draw up and over a thin round top, down to the other branch.
Step 5: Five big leaves
At the tip of each branch draw a short stalk and a big pointed leaf. That makes 5 leaves.
Tip Each leaf is fat in the middle with a point at the end.
Step 6: Two hanging leaves
Under each low branch draw a short stalk with a big leaf hanging down. Now there are 7 leaves.
Step 7: Leaf lines
Inside each of the 7 leaves draw 1 line from the stalk, stopping before the point.
Step 8: Pumpkin
On the ground beside the trunk draw a wide round pumpkin. Its short stalk starts and stops on top.
Step 9: Pumpkin lines
Inside the pumpkin draw 2 curved lines from top to bottom, bending away from each other.
Step 10: Yellow leaves
Colour 2 leaves yellow: the leaf on the high left branch and the leaf on the low right branch.
Step 11: Orange leaves
Colour the top leaf and the 2 hanging leaves orange. Colour the pumpkin orange too.
Step 12: Red leaves
Colour the last 2 leaves red.
Step 13: Brown and green
Colour the trunk and all the branches brown. Colour the pumpkin stalk green.
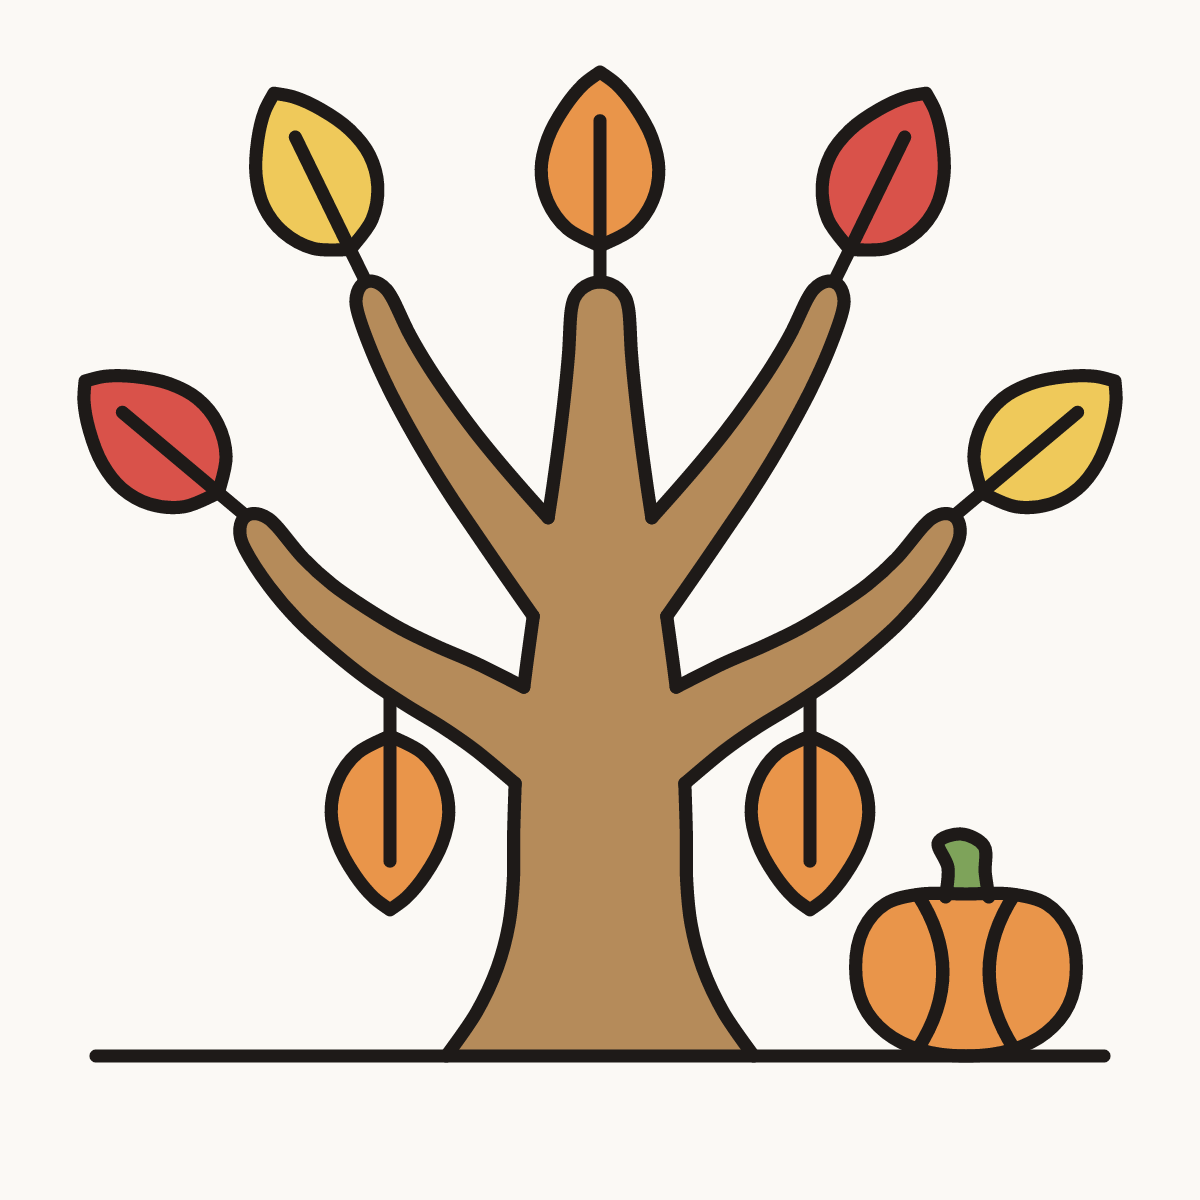
Your finished drawing
Follow the steps above and this is where you end up: a Thanksgiving tree, drawn by you.
Every step in one picture