Watch it draw itself · tap to replay
How to Draw a Thanksgiving Dinner Plate
Draw a Thanksgiving dinner plate in 11 easy steps, about 8 minutes. Free, with a printable worksheet.
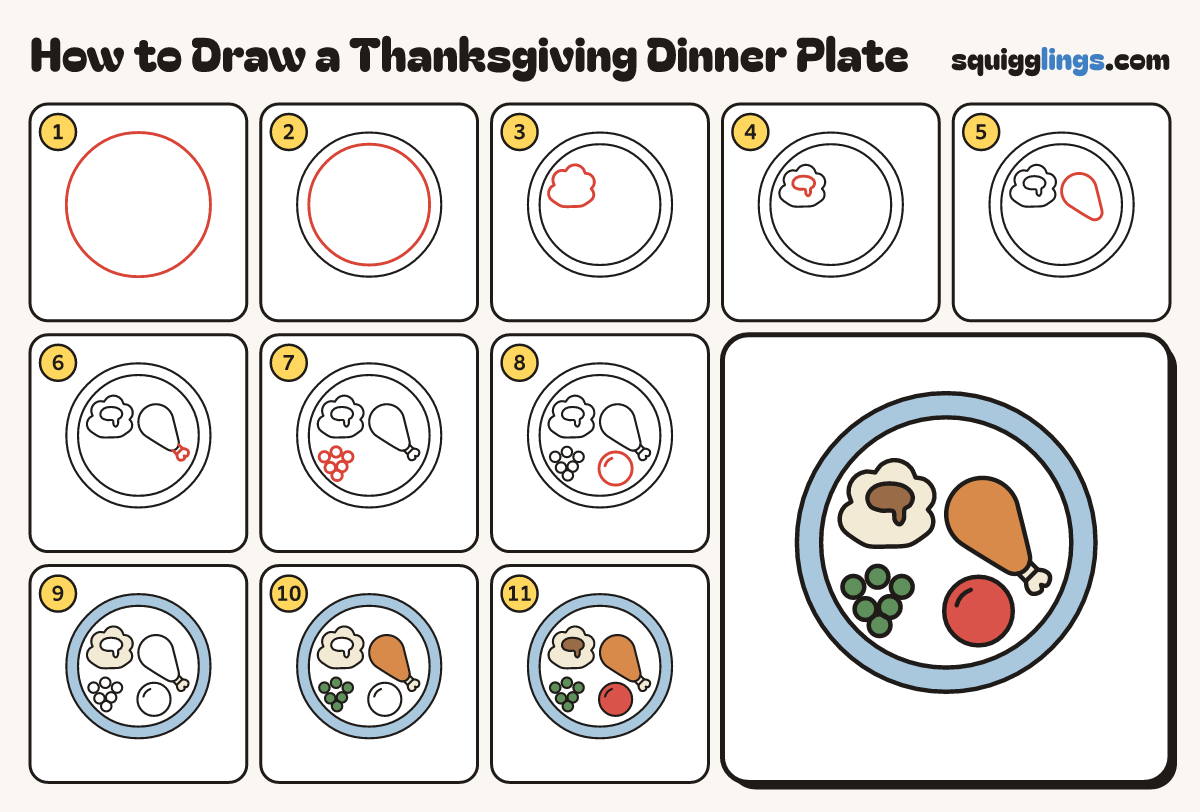
Each picture adds one red line. Draw that line, then scroll to the next picture. Rub out any dashed helper lines at the end. First up: the plate.
Step 1: The plate
In the middle of your paper draw a big round plate, as big as your fist.
Step 2: The rim
Inside the plate draw a second circle a finger in from the edge, for the rim.
Step 3: Mashed potatoes
On the top-left of the plate draw a hill of mashed potatoes with 5 soft round bumps, like a cloud.
Step 4: Gravy
Inside the top of the potato hill draw a wobbly puddle of gravy with one drip running down.
Step 5: The drumstick
On the right draw the drumstick: a big end on top narrowing to a small one, like a bowling pin.
Tip Leave a clear gap from the potatoes.
Step 6: The bone
From the small end draw a short fat bone poking out, ending in a knuckle of 2 soft bumps.
Tip The knuckle bumps, dips, and bumps again, like the top of a heart.
Step 7: Peas
On the bottom-left of the plate draw 6 little round peas in a cluster: 3, then 2, then 1.
Step 8: Cranberry sauce
Between the peas and the drumstick draw a round cranberry slice. Add a little shine curve inside.
Step 9: Cream potatoes, sky rim
Go over your lines. Colour the potatoes and bone cream, and the rim sky blue. Leave the gravy white.
Step 10: Ginger drumstick, green peas
Colour the drumstick ginger and the peas green.
Step 11: Red cranberry, brown gravy
Colour the cranberry slice red and the gravy brown. Happy Thanksgiving!
Your finished drawing
Follow the steps above and this is where you end up: a Thanksgiving dinner plate, drawn by you.
Every step in one picture