Watch it draw itself · tap to replay
How to Draw a Tesseract
Draw a tesseract in 13 easy steps, about 10 minutes. Free, with a printable worksheet.
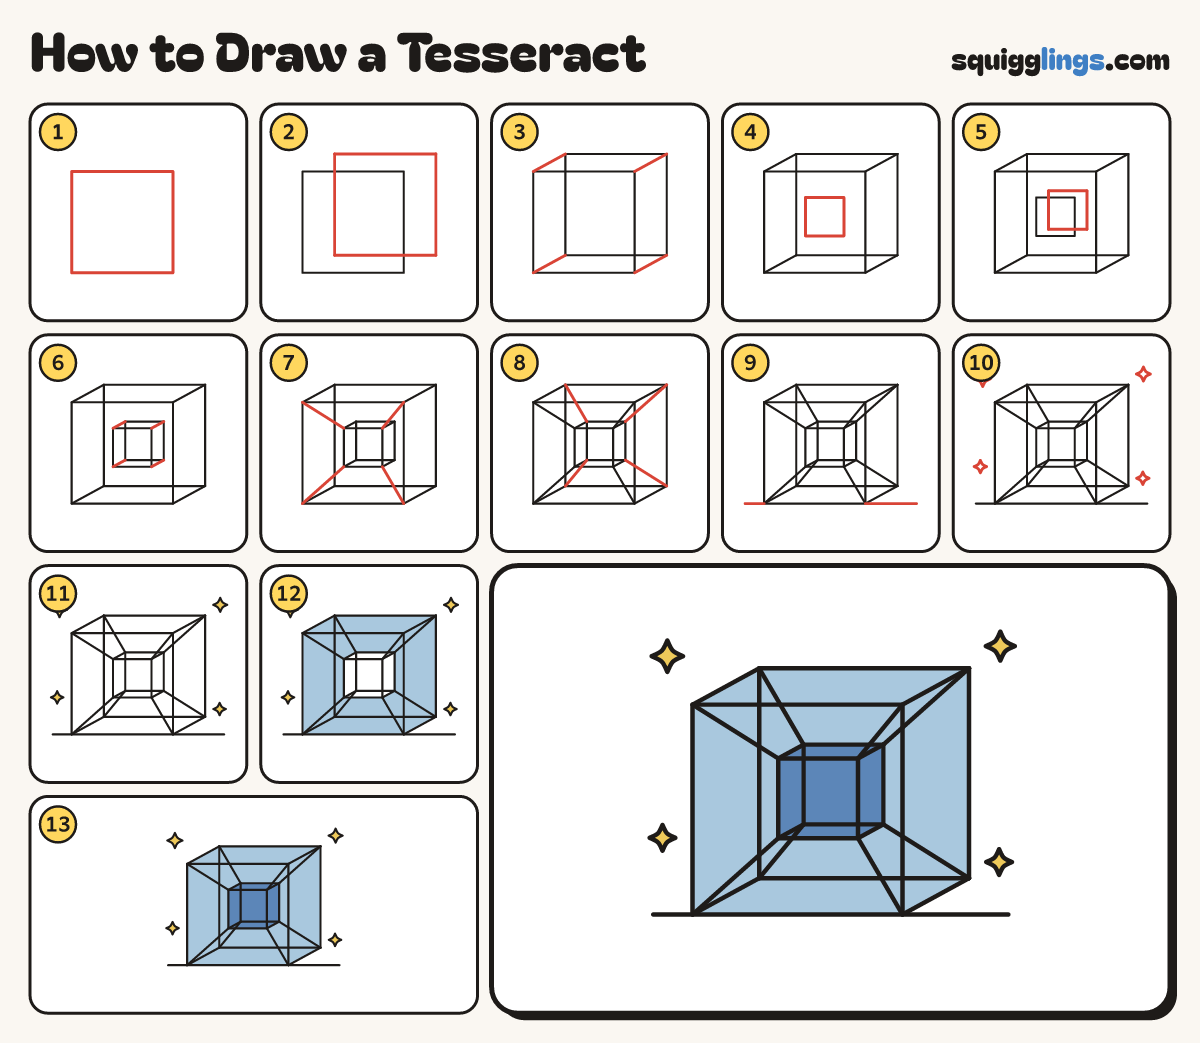
Each picture adds one red line. Draw that line, then scroll to the next picture. Rub out any dashed helper lines at the end. First up: big front square.
Step 1: Big front square
A little left of the middle of your paper draw a big square with 4 equal sides.
Tip A tesseract is a cube inside a cube. Start with the big one.
Step 2: Big back square
Draw the same square again, a little to the right and a little up, so the 2 squares overlap.
Tip Draw right over the first square. This cube is see-through, like glass.
Step 3: Join the corners
Start at each corner of the front square. Draw a short slanted line and stop at the same back corner.
Tip All 4 lines lean the same way and are the same length. Now it is a cube!
Step 4: Small front square
Inside the big front square draw a small square, a bit up and right of its middle.
Tip Make it a bit more than a third as wide as the big square.
Step 5: Small back square
Draw the same small square again, a little to the right and a little up.
Step 6: The small cube
Join the small squares the same way: from each front corner, a short slanted line to its back corner.
Step 7: Front corner lines
Draw a straight line from each corner of the big front square to the same corner of the small one.
Tip Use a ruler if you like. The lines cross over other lines, and that is fine.
Step 8: Back corner lines
Do the same at the back: start at each big back corner and stop at the small back corner.
Tip Count the joining lines: 8, one for every corner.
Step 9: The floor
Draw a floor line out from each bottom corner of the big front square, nearly to the paper's edge.
Step 10: Sparkles
Draw 2 sparkle stars on each side of the tesseract, one high and one low.
Tip A sparkle star has 4 points: up, down, left and right.
Step 11: Yellow sparkles
Go over your lines. Colour the 4 sparkles yellow.
Step 12: Sky blue big cube
Colour the big cube sky blue, over the lines inside it. Stop at the small cube and leave it white.
Step 13: Blue small cube
Colour the whole small cube a darker blue. Your tesseract is done!
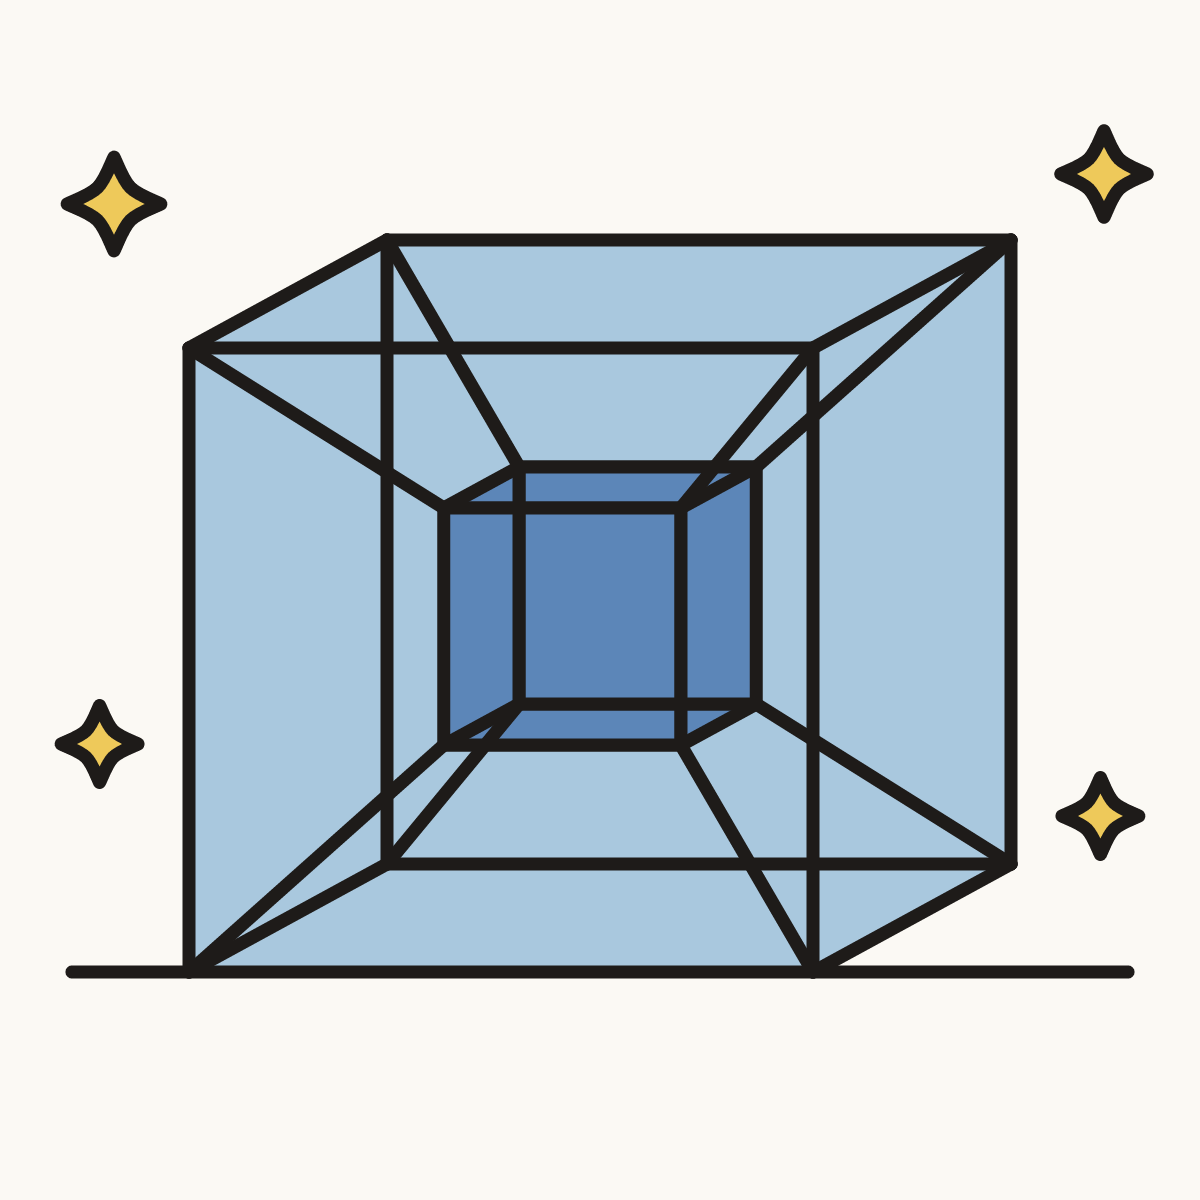
Your finished drawing
Follow the steps above and this is where you end up: a tesseract, drawn by you.
Every step in one picture