Watch it draw itself · tap to replay
How to Draw an Old Telephone
Draw an old telephone in 11 easy steps, about 8 minutes. Free, with a printable worksheet.
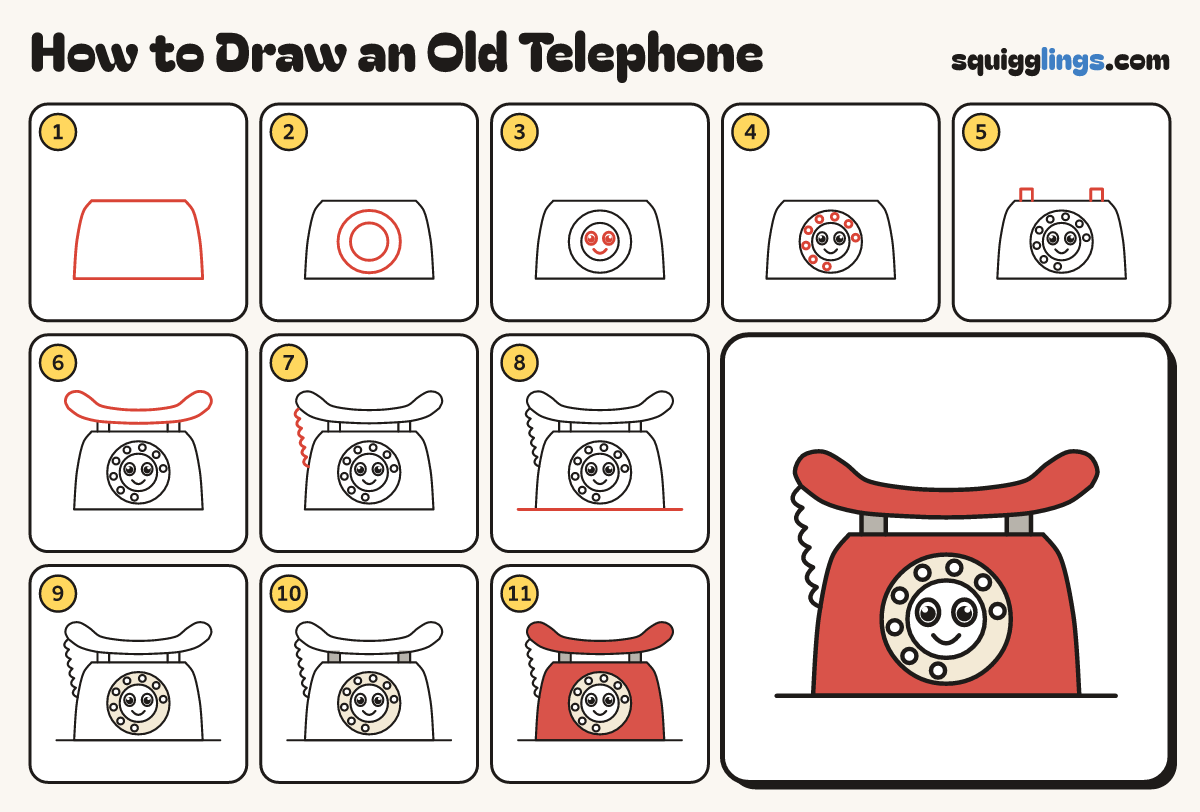
Each picture adds one red line. Draw that line, then scroll to the next picture. Rub out any dashed helper lines at the end. First up: the body.
Step 1: The body
A little below the middle draw the telephone body: a wide soft hill, flat on top, wider at the bottom.
Step 2: The dial
On the front draw one BIG dial circle, nearly as tall as the body. Add a smaller circle inside.
Step 3: A little face
Inside the middle circle draw 2 big round eyes with black dots, and a U smile under them.
Step 4: Finger holes
Between the 2 circles draw 8 small circles in a ring, evenly spaced, leaving the bottom-right gap empty.
Step 5: The cradle
On top of the body draw 2 short upright boxes near each end for the cradle.
Step 6: The handset
On the cradle draw a long curved handset with a round end on each side, like a banana.
Tip The round ends are the part you talk into and listen to.
Step 7: Curly cord
Start at the handset's left end. Draw a row of little bumps down the left side, stop on the body.
Step 8: Ground line
Draw a ground line under the telephone from far left to far right.
Step 9: Cream dial, white holes
Colour the big dial cream, leaving the finger holes and the middle circle white. Keep the eyes white.
Step 10: Grey cradle
Colour the cradle posts grey.
Step 11: Red body and handset
Colour the body and handset red, going around the dial. Go over your lines. Your telephone is ready to ring!
Your finished drawing
Follow the steps above and this is where you end up: an old telephone, drawn by you.
Every step in one picture