Watch it draw itself · tap to replay
How to Draw a Tapir
Draw a tapir in 11 easy steps, about 8 minutes. Free, with a printable worksheet.
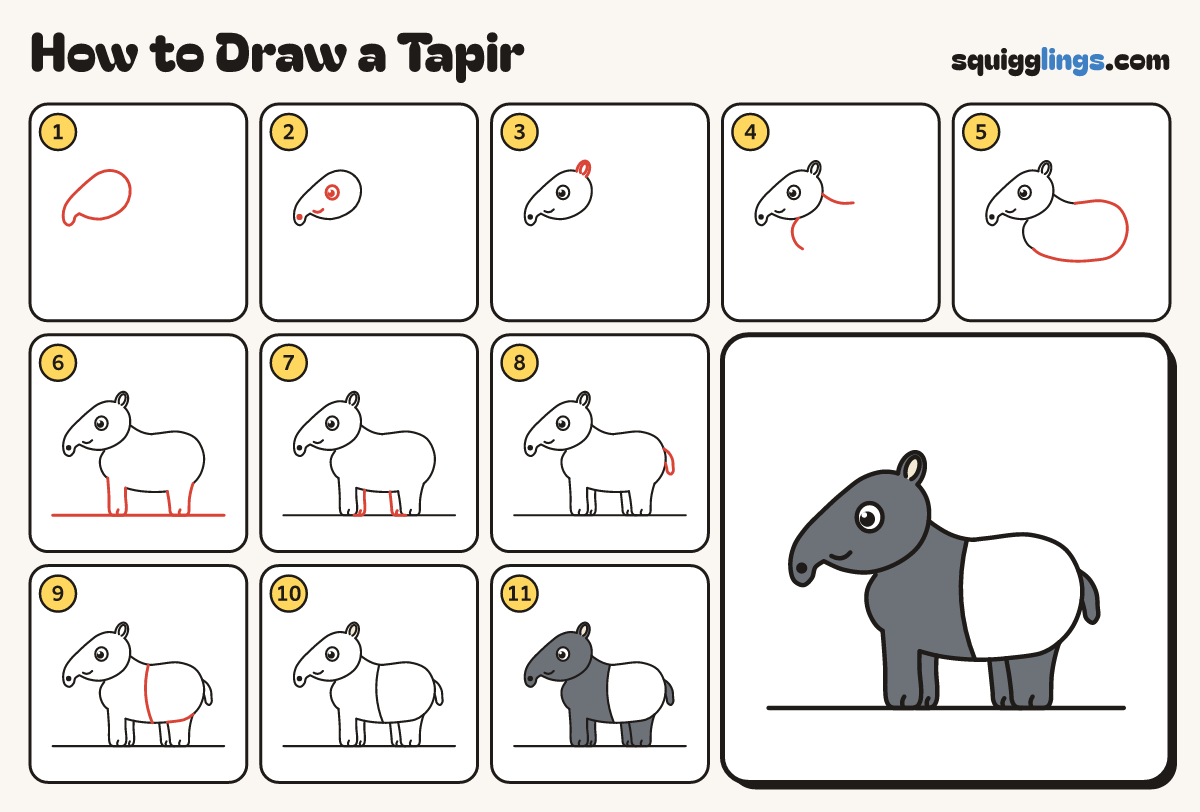
Each picture adds one red line. Draw that line, then scroll to the next picture. Rub out any dashed helper lines at the end. First up: the head.
Step 1: The head
Near the top left draw a long rounded head that slopes down into a short drooping trunk.
Tip A big head is what makes it cute.
Step 2: Eye and smile
Draw a big eye high on the head, a nostril on the trunk tip and a smile behind the trunk.
Step 3: The ear
On top at the back of the head draw a small oval ear, with a smaller oval inside.
Step 4: The neck
Start behind the head, draw the neck down, stop at the back. Start under the chin, draw to the chest.
Step 5: The body
From the neck draw a big bean body: over the back, round the bottom, along the tummy to the chest.
Step 6: 2 legs
Draw a ground line. From the chest draw a front leg, thinner near a round foot. Add a back leg.
Tip Each foot is a round pad with one line up the middle.
Step 7: The far legs
Start on the tummy behind the front leg. Draw a thinner leg down to a foot. Repeat at the back.
Step 8: The tail
On the top corner of the bottom draw a short stubby tail, like a little thumb.
Step 9: The pale patch
Draw a curved line from the back to the tummy. Add a curve across the top of the back leg.
Tip The patch inside these lines stays white.
Step 10: Cream ear, white patch
Go over your lines. Colour the ear inside cream. Leave the pale patch and the eye white.
Step 11: Colour it slate
Colour the head, ear, neck, front half, legs and tail slate grey, around the eye, ear inside and patch.
Your finished drawing
Follow the steps above and this is where you end up: a tapir, drawn by you.
Every step in one picture