Watch it draw itself · tap to replay
How to Draw a Swordfish
Draw a swordfish in 14 easy steps, about 11 minutes. Free, with a printable worksheet.
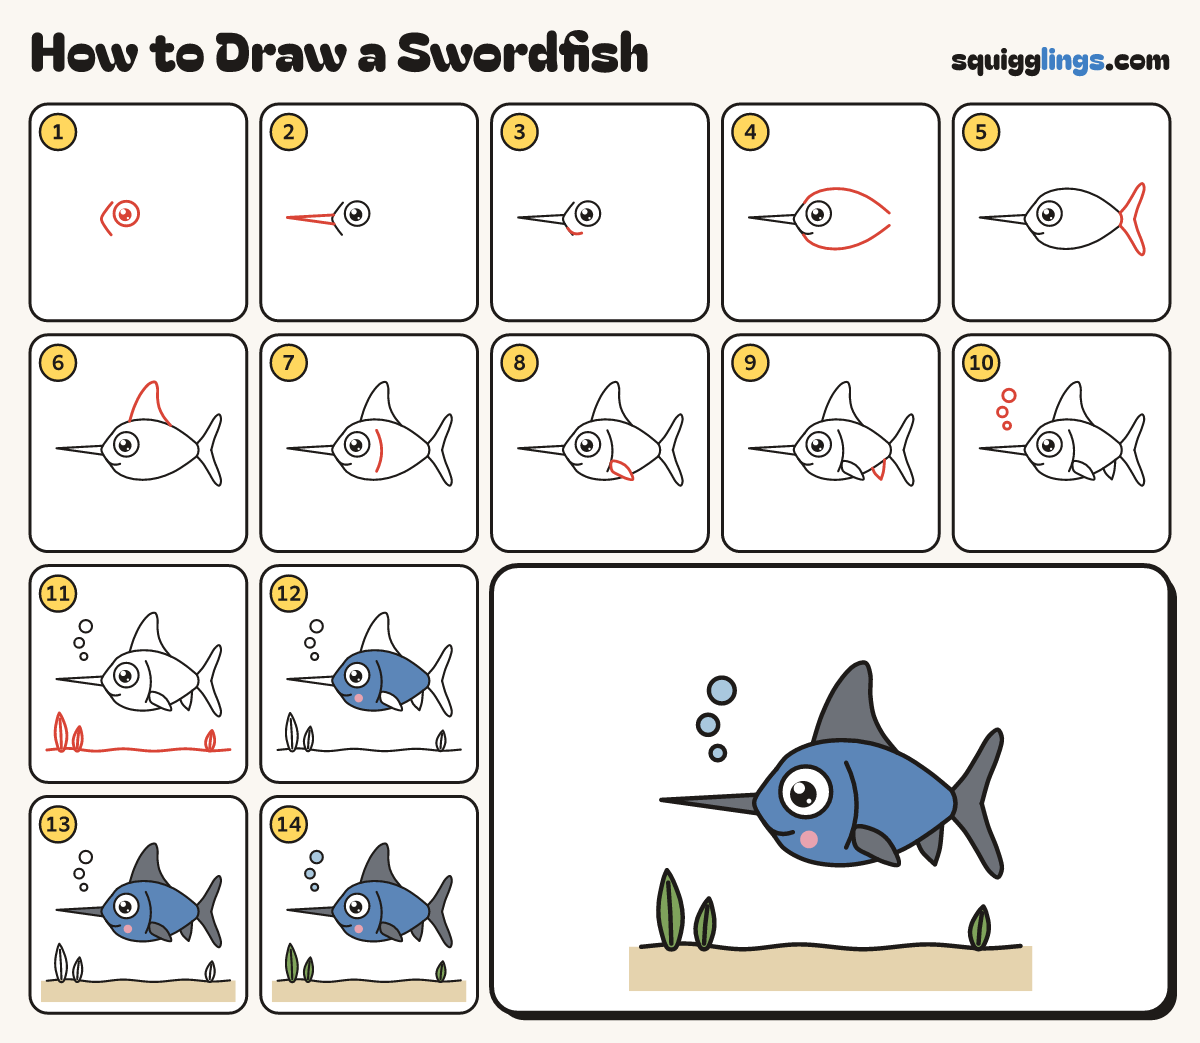
Each picture adds one red line. Draw that line, then scroll to the next picture. Rub out any dashed helper lines at the end. First up: eye and snout.
Step 1: Eye and snout
Left of the middle, draw one big eye. In front, draw a rounded snout from eye-top down to eye-bottom.
Step 2: The sword
Start on the snout. Draw a long thin sword forward to a sharp point, and back to the snout.
Step 3: Smile
Start on the snout under the sword. Draw a short smile curving back. Stop under the eye.
Step 4: Long body
Start at the snout top. Draw the back over the eye. Stop at a thin tail neck. Add the belly.
Step 5: Crescent tail
From the back's end, draw a lobe up to a dent, then one down. Close the tail with a curve.
Step 6: Tall back fin
Start on the back behind the eye. Draw a tall curved fin leaning back. Stop on the back.
Step 7: Gill
A finger behind the eye, start below the back. Draw a short C toward the tail. Stop above the belly.
Step 8: Side fin
Start on the gill line below the middle. Draw a leaf fin pointing down and back, back to the gill.
Step 9: Belly fin
Near the tail, start on the belly line. Draw a small pointed fin hanging down, back to the belly.
Step 10: Bubbles
Above the sword, draw 3 bubbles floating up in a curve, smallest at the bottom.
Step 11: Sand and seaweed
Draw a wavy sand line across the bottom. Start on the sand, draw 3 seaweed leaves, back to the sand.
Step 12: Colour the body blue
Colour the body blue around the eye and the side fin. Leave the eye white. Add a pink cheek dot.
Step 13: Grey fins, sandy floor
Colour the sword, the tail and the 3 fins grey. Colour the floor under the sand line sandy.
Step 14: Blue bubbles, green seaweed
Colour the bubbles light blue and the seaweed green.
Your finished drawing
Follow the steps above and this is where you end up: a swordfish, drawn by you.
Every step in one picture