Watch it draw itself · tap to replay
How to Draw a Star Fruit
Draw a star fruit in 10 easy steps, about 8 minutes. Free, with a printable worksheet.
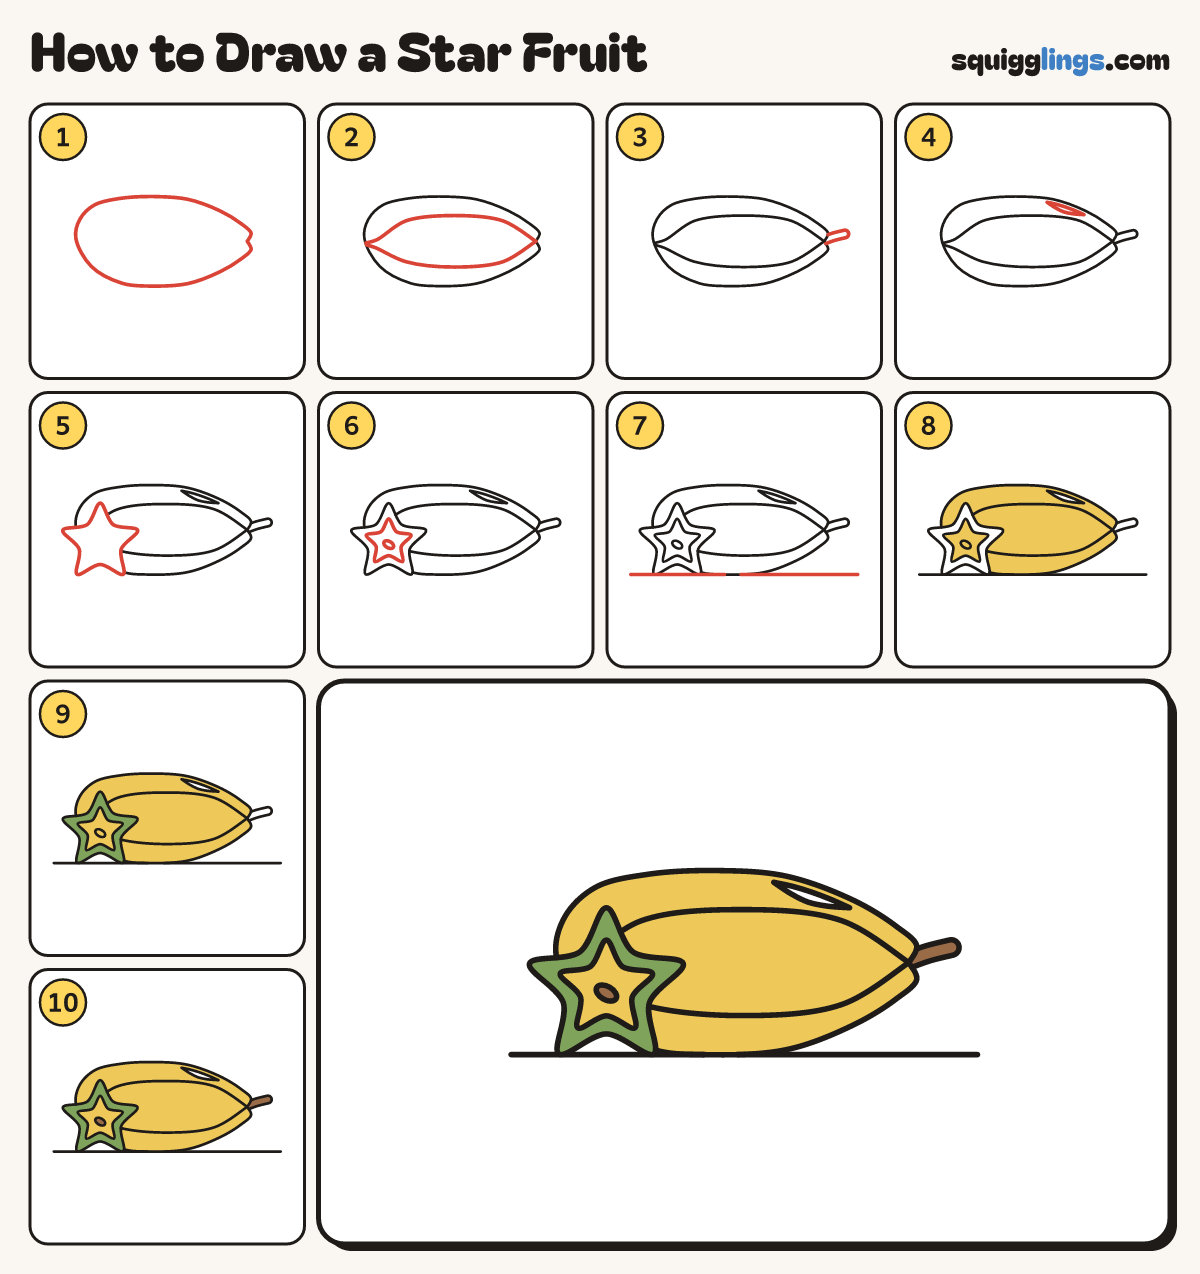
Each picture adds one red line. Draw that line, then scroll to the next picture. Rub out any dashed helper lines at the end. First up: the fruit.
Step 1: The fruit
Across the middle draw a long fat egg shape lying down, with a tiny dip at the right end.
Tip The left end is round; the right end dips in where the stem goes.
Step 2: Two long ridges
From end to end draw a long curve just below the top. Draw another just above the bottom.
Tip Now the fruit has 3 long faces, like a star from the side.
Step 3: A stubby stem
At the right point draw a short fat stem poking out to the right.
Step 4: Waxy shine
Inside the top right edge, draw one thin curved sliver for the shine.
Step 5: A star slice
At the front left draw a fat star slice with 5 round points. Rub out the fruit lines inside it.
Tip The star points are soft and round, not sharp.
Step 6: Inside the star
Inside the star draw a smaller star, a finger in from the edge. Add a tiny seed in the middle.
Step 7: The ground
Draw a ground line from edge to edge. It touches the bottom of the star and passes under the fruit.
Step 8: Yellow fruit
Colour the fruit yellow around the star, leaving the shine white. Colour the inside star yellow too.
Step 9: Green edges
Colour the edge of the star green, between the two stars.
Step 10: Brown stem and seed
Colour the stem brown and the tiny seed brown, and your star fruit is done!
Your finished drawing
Follow the steps above and this is where you end up: a star fruit, drawn by you.
Every step in one picture