Watch it draw itself · tap to replay
How to Draw a Spine
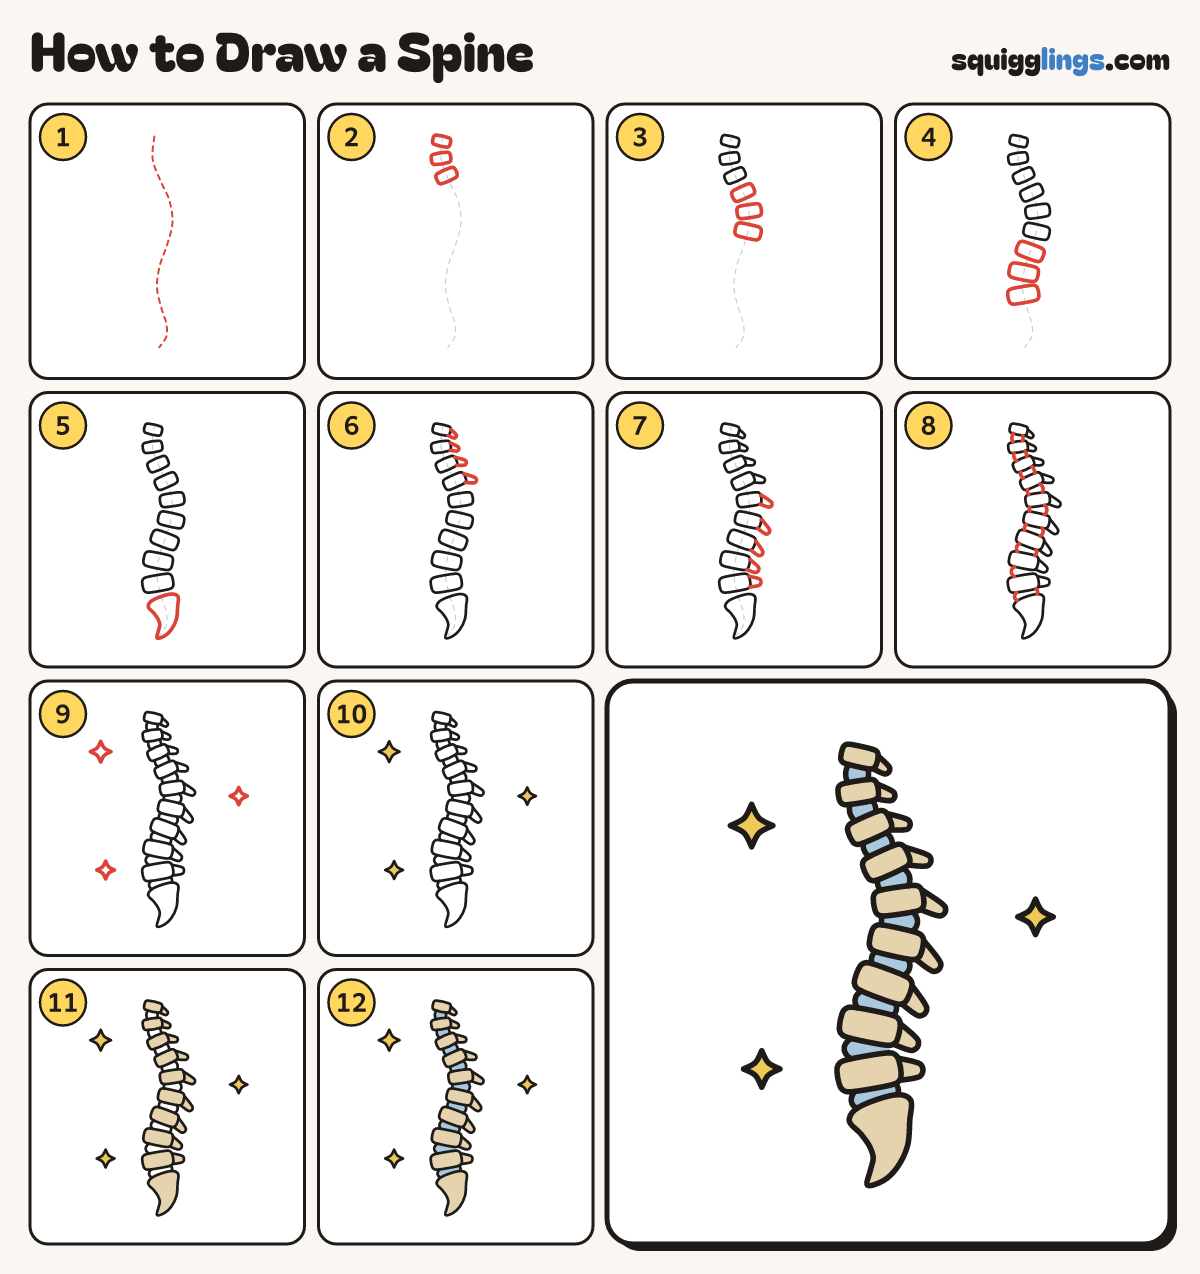
Draw a spine in 12 easy steps, about 9 minutes. Free, with a printable worksheet.
Each picture adds one red line. Draw that line, then scroll to the next picture. Rub out any dashed helper lines at the end. First up: a wavy guide.
Step 1: A wavy guide
Start near the top. Lightly draw a tall wavy line, like a lazy S, and stop near the bottom.
Tip Press softly and keep the bends gentle. You will rub this line out later.
Step 2: Neck bones
At the top of the guide, draw 3 small soft boxes, one under the other, with little gaps between them.
Tip Tip each box so it sits square across the wavy line.
Step 3: Middle bones
Carry on down the guide with 3 more soft boxes. Make each one a little bigger than the last.
Step 4: Lower bones
Below them, draw the 3 biggest boxes. Stop a little way above the end of the guide.
Tip Count your bones: 9 in all, small at the top, big at the bottom.
Step 5: The tail end
Under the last bone, draw a wedge as wide as that bone. Curve it down to a small round tip.
Step 6: Top back bumps
On the right side of each of the top 4 bones, draw a small thumb pointing out and down.
Tip The bumps are on the back. You can feel yours down the middle of your back!
Step 7: Lower back bumps
Draw the same thumb on the right side of the 5 lower bones. Make them a little bigger.
Step 8: Soft cushions
Rub out the guide. In every gap, join the bones with 2 tiny curves, one in front, one behind.
Tip The cushions let your back bend and twist.
Step 9: Sparkles
In the empty space beside the spine, draw 3 sparkle stars: 2 on the left, 1 on the right.
Step 10: Yellow sparkles
Colour the 3 sparkles yellow.
Step 11: Sandy bones
Go over your lines. Colour every bone, every bump and the tail end a pale sandy colour.
Step 12: Blue cushions
Colour the thin cushions between the bones sky blue. Your spine is done!
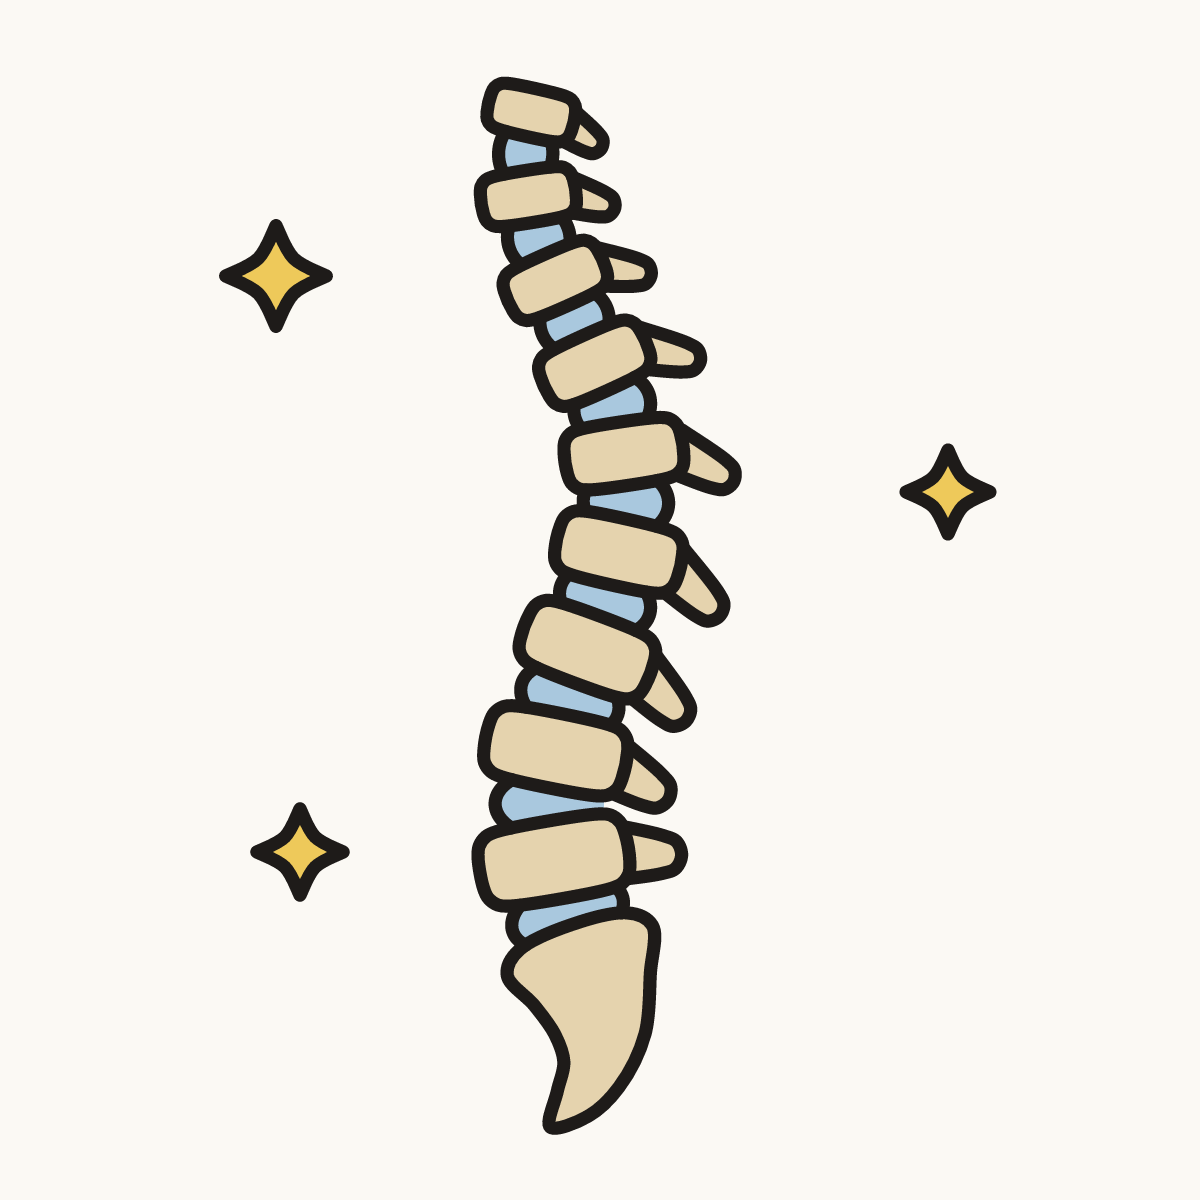
Your finished drawing
Follow the steps above and this is where you end up: a spine, drawn by you.
Every step in one picture