Watch it draw itself · tap to replay
How to Draw a Spell Book
Draw a spell book in 12 easy steps, about 9 minutes. Free, with a printable worksheet.
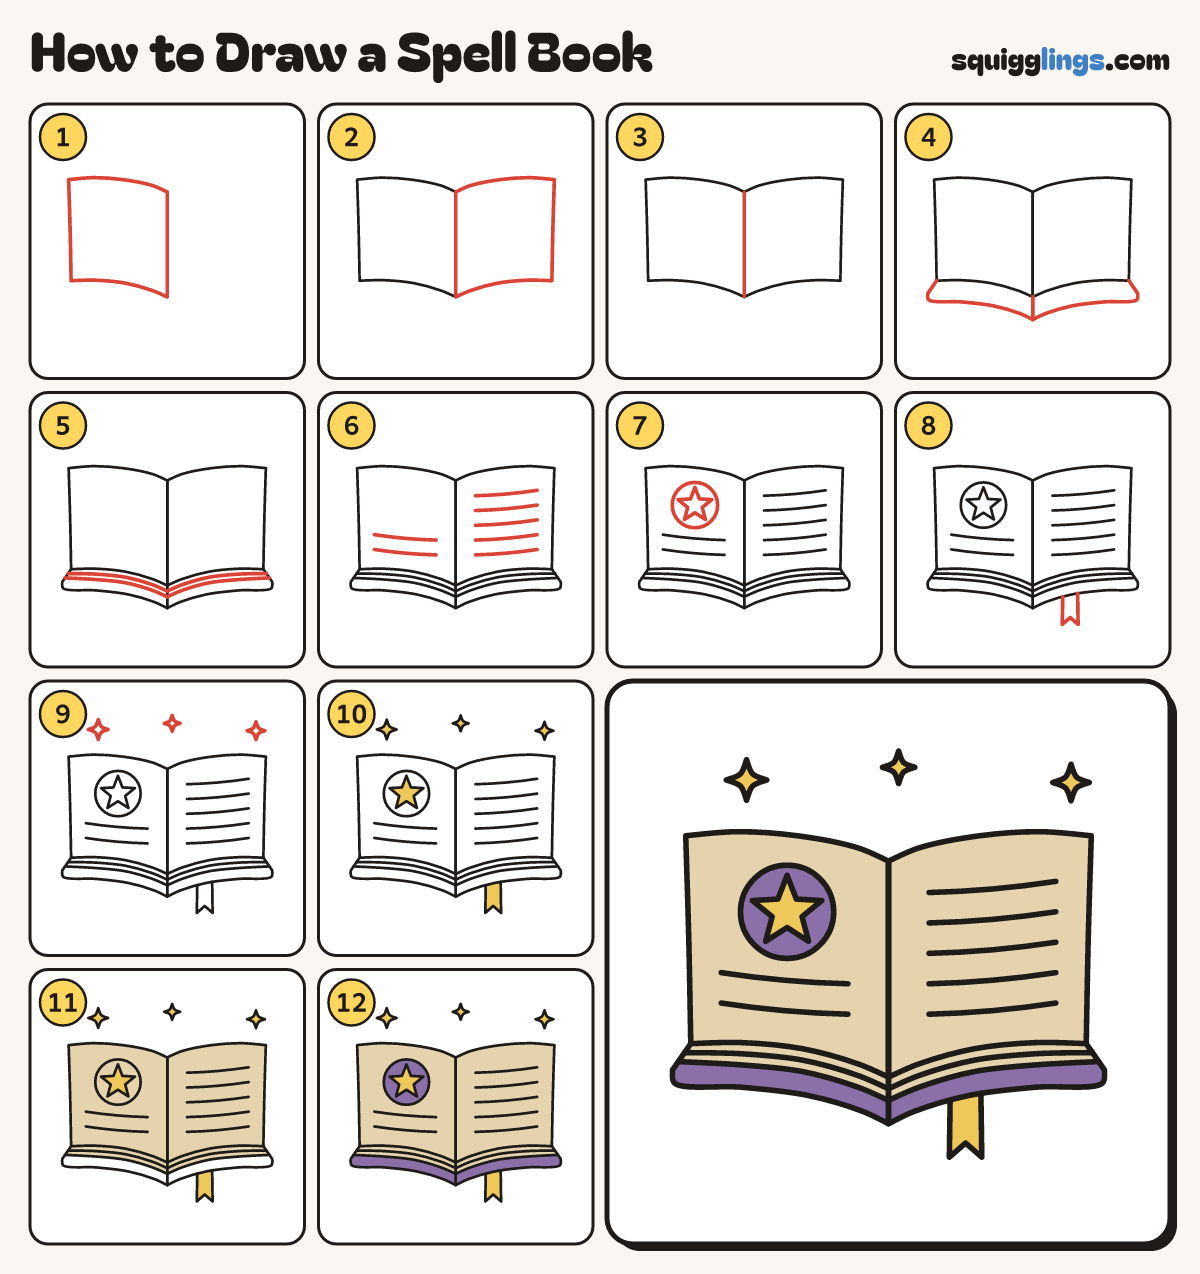
Each picture adds one red line. Draw that line, then scroll to the next picture. Rub out any dashed helper lines at the end. First up: the left page.
Step 1: The left page
Above the middle of your paper, draw the left page: a wide box, bowed up on top and down underneath.
Tip The pages bow because the book is open. Its right edge is the spine.
Step 2: The right page
Do the same on the right side so the two pages are mirror images, meeting in the middle.
Step 3: The spine
Draw a line straight down the middle where the pages meet, from the top to the bottom.
Step 4: The covers
Under each page, draw the cover: start at the outside corner, curve along under the page, stop at the spine.
Step 5: Page edges
Under each page, draw 2 curved lines from the cover's side to the spine, for the stack of pages.
Step 6: Words
On the right page, draw 5 wavy lines for writing. On the left page, draw 2 wavy lines low down.
Step 7: A magic star
On the left page, draw a big circle. Inside it, draw a 5-point star with its points near the circle.
Tip A star in a circle is the book's magic sign.
Step 8: A bookmark
Draw a ribbon under the right page: start on the cover's edge, go down, draw a V, come back up.
Step 9: Sparkles
Above the book, draw 3 sparkle stars floating up: one over each page and a small one in the middle.
Tip The sparkles show the magic leaking out.
Step 10: Yellow star and ribbon
Colour the star, the three sparkles and the ribbon yellow.
Step 11: Old sand pages
Colour the pages and the page edges sand so they look old, going around the magic circle.
Step 12: Purple circle and cover
Colour the circle purple around the star, then the cover purple. Go over your lines. Your spell book is done!
Your finished drawing
Follow the steps above and this is where you end up: a spell book, drawn by you.
Every step in one picture