Watch it draw itself · tap to replay
How to Draw a Dog Toy
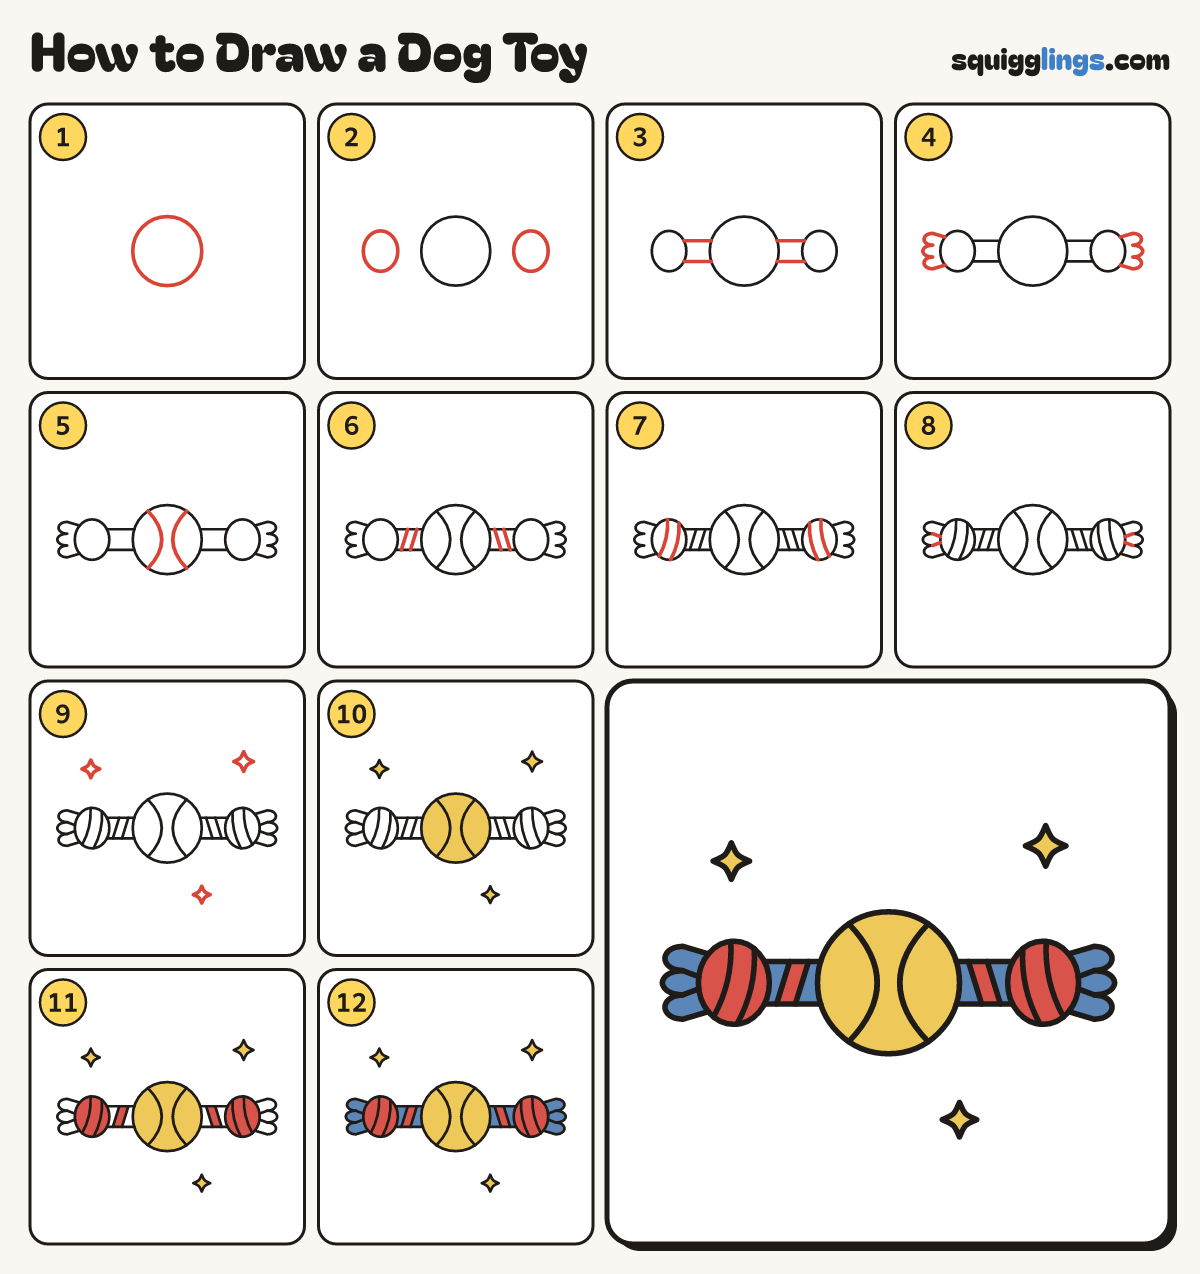
Draw a dog toy in 12 easy steps, about 9 minutes. Free, with a printable worksheet.
Each picture adds one red line. Draw that line, then scroll to the next picture. Rub out any dashed helper lines at the end. First up: the ball.
Step 1: The ball
In the middle of your page, draw a big round ball.
Tip Go round slowly. Turn your paper as you draw if it helps.
Step 2: Two knots
A little way out on each side, draw an egg-shaped knot, level with the middle of the ball.
Tip Each knot is about half as tall as the ball.
Step 3: The rope
Start on each knot. Draw 2 straight lines across to the ball, a finger apart, for a thick rope.
Step 4: Frayed ends
Past each knot, draw a short tassel that fans out and ends in 3 round bumps.
Tip The rope comes undone past the knot, so the end spreads out.
Step 5: Ball seams
On the ball, draw 2 curves from top to bottom that bend in towards each other.
Tip These are the lines on a tennis ball. Keep a wide gap between them.
Step 6: Rope twists
Across each rope, draw 2 slanted lines from the top edge to the bottom edge.
Tip Now each rope has 3 stripes.
Step 7: Knot wraps
Across each knot, draw 2 slanted curves from its top edge to its bottom edge.
Tip They show the rope winding round itself.
Step 8: Loose threads
In each tassel, draw 2 short lines from the dips between the bumps to the knot.
Step 9: Sparkles
Around the toy, draw 3 sparkle stars: 2 above it and 1 below.
Tip A sparkle star has 4 points: up, down, left and right.
Step 10: Yellow ball
Go over your lines. Colour the ball and the 3 sparkles yellow.
Step 11: Red knots
Colour both knots red. Colour the middle stripe of each rope red too.
Step 12: Blue stripes
Colour the other rope stripes and the 2 tassels blue. Your dog toy is ready to tug!
Your finished drawing
Follow the steps above and this is where you end up: a dog toy, drawn by you.
Every step in one picture