Watch it draw itself · tap to replay
How to Draw Sleepover Sleeping Bags
Draw sleepover sleeping bags in 12 easy steps, about 9 minutes. Free, with a printable worksheet.
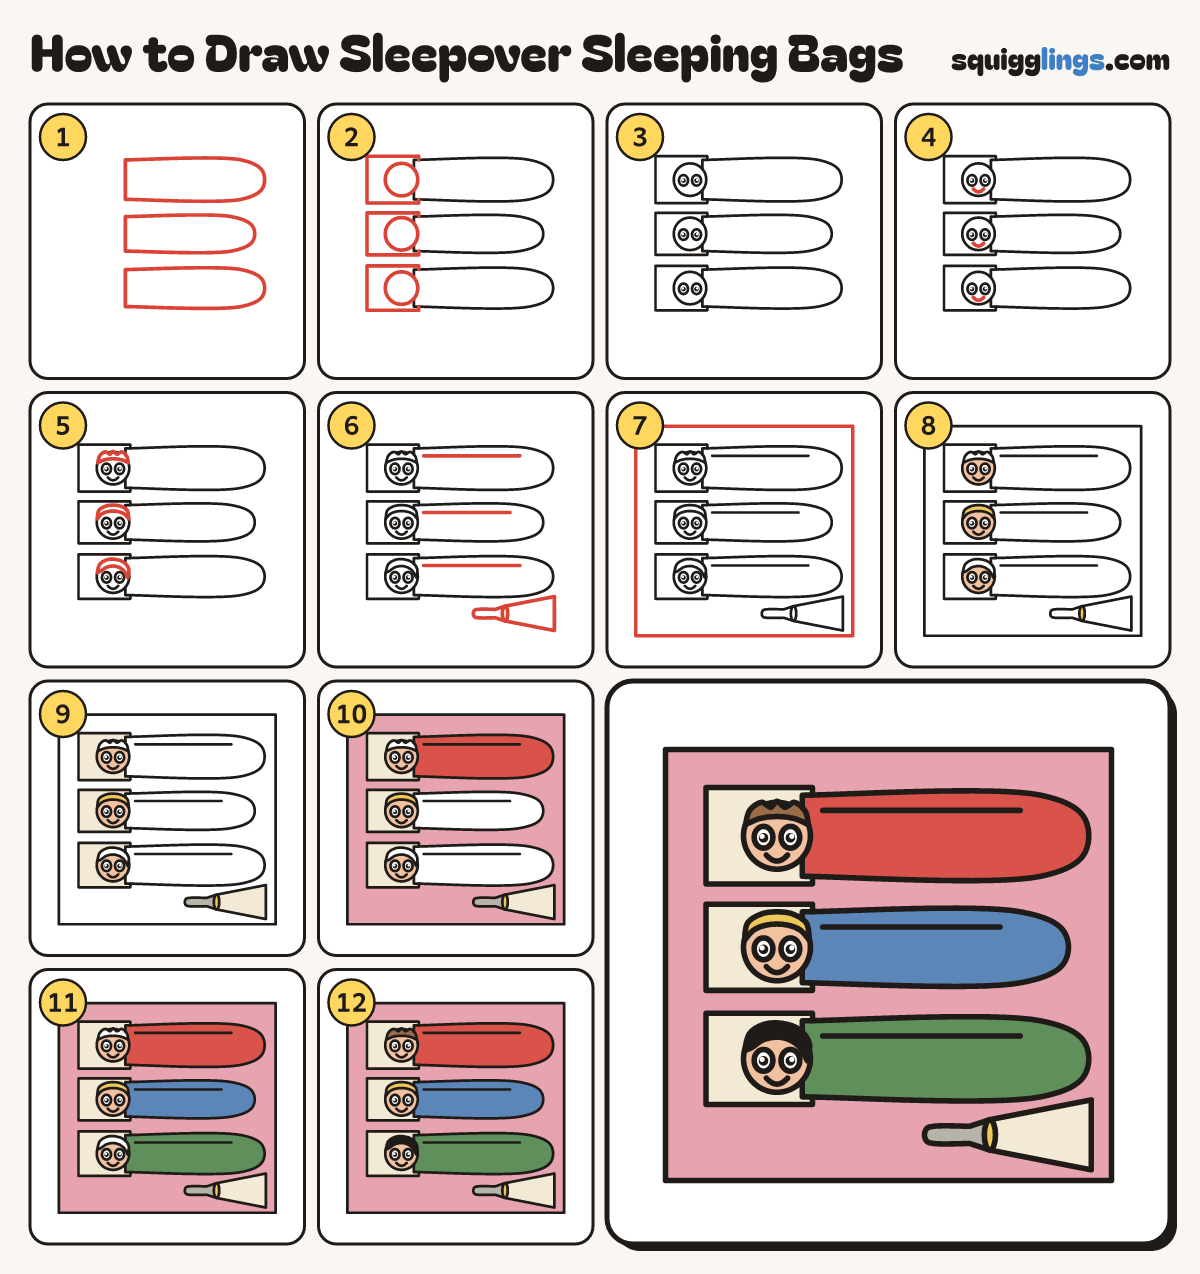
Each picture adds one red line. Draw that line, then scroll to the next picture. Rub out any dashed helper lines at the end. First up: 3 sleeping bags.
Step 1: 3 sleeping bags
Draw 3 long sleeping bags lying flat in a row, one above the other. Round them at the feet.
Tip The head end is square. The middle bag is a little shorter.
Step 2: Pillows and heads
At the left end of each bag draw a wide pillow behind it. Draw a round head on each pillow.
Step 3: Round eyes
On each head draw 2 round eyes close together, with a black dot in each.
Step 4: Smiles
Under the eyes give every kid a small U smile, from below one eye to below the other.
Step 5: Hair
Give the top kid soft tufts, the middle kid a smooth round fringe, and the bottom kid a swoosh.
Step 6: Zips and a flashlight
Draw a zip along the top of each bag. Below the bottom bag draw a flashlight shining a wide beam.
Step 7: The rug
Around everything draw a big rectangle for the rug, going behind the bags, pillows and flashlight.
Step 8: Peach and yellow
Colour the faces peach, leaving the eyes white. Colour the middle kid's hair and the lens yellow.
Step 9: Cream and grey
Colour the pillows and the beam cream, around the heads. Colour the flashlight grey around the lens.
Step 10: Pink rug, red bag
Colour the rug pink, around the bags, pillows and flashlight. Colour the top bag red.
Step 11: Blue and green bags
Colour the middle bag blue and the bottom bag green.
Step 12: Brown and black hair
Colour the top kid's hair brown and the bottom kid's hair black. Go over your lines. Done!
Your finished drawing
Follow the steps above and this is where you end up: sleepover sleeping bags, drawn by you.
Every step in one picture