Watch it draw itself · tap to replay
How to Draw Cupped Hands
Draw cupped hands in 10 easy steps, about 8 minutes. Free, with a printable worksheet.
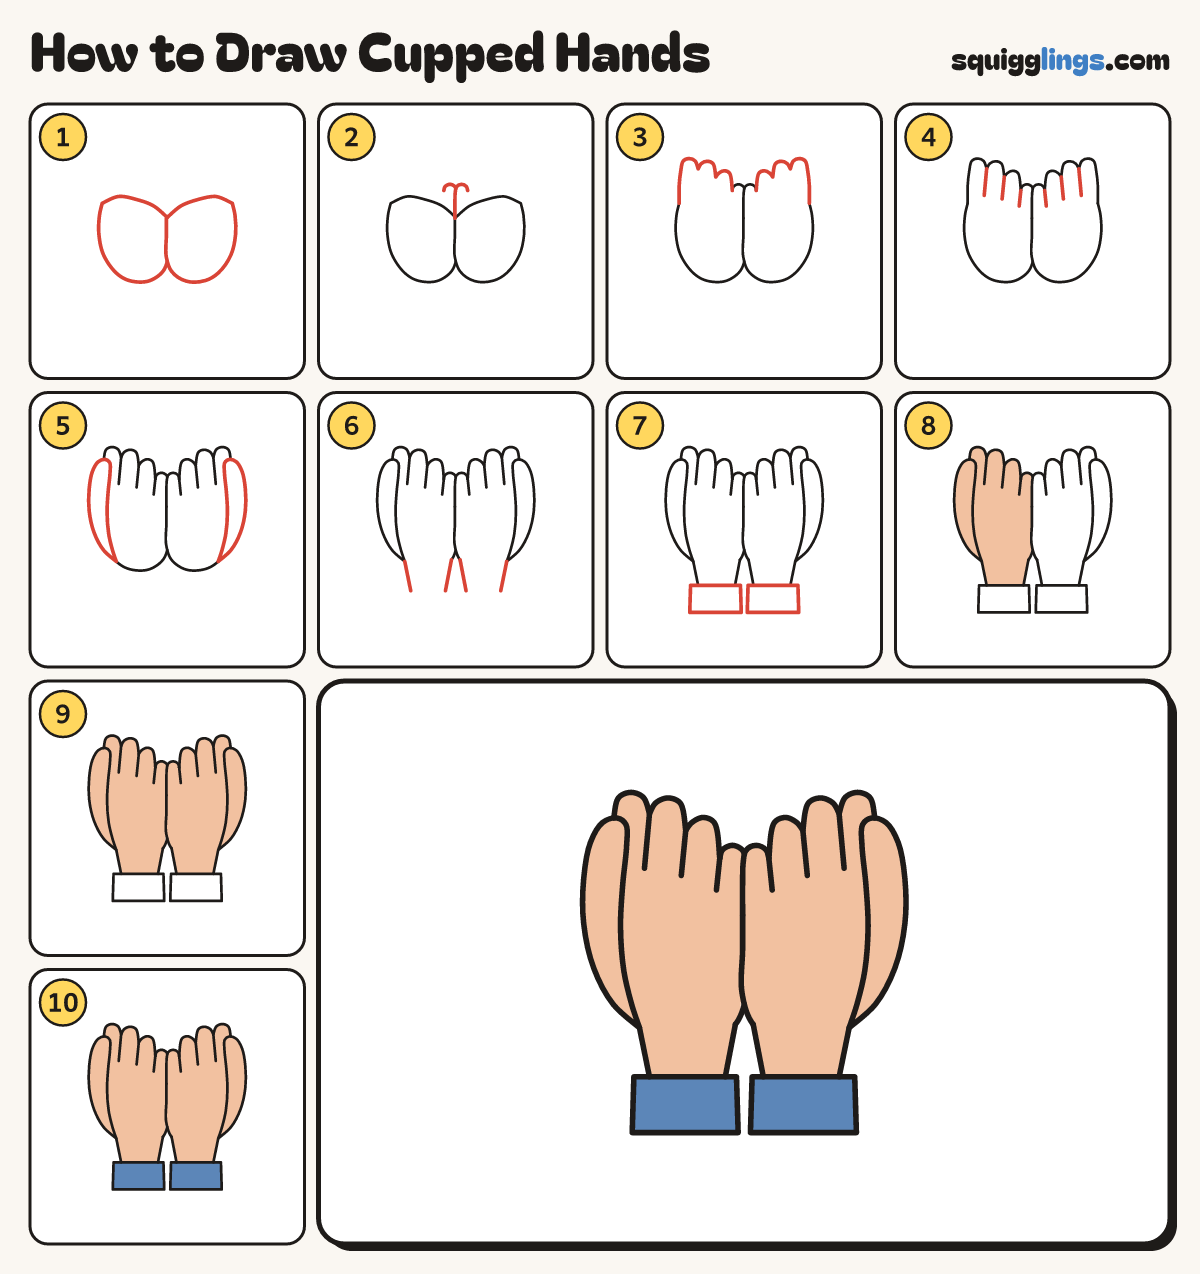
Each picture adds one red line. Draw that line, then scroll to the next picture. Rub out any dashed helper lines at the end. First up: two palms.
Step 1: Two palms
Draw 2 rounded palms side by side, touching in the middle, each wider at the top like half a bowl.
Tip Together the 2 palms make the bottom of a bowl.
Step 2: Little fingers
Start where the palms touch at the top. Draw a round little finger on each hand, stopping a finger-width out.
Tip The 2 little fingers touch, so the hands make one cup.
Step 3: 3 more fingers
From each little finger draw 3 more fingertips, each a bit higher, stopping at the palm's outer corner.
Tip Keep the fingers close together. Rub out the palm line inside them.
Step 4: Finger lines
From each dip between the fingertips, draw a short line down, stopping where the fingers meet the palm.
Step 5: Thumbs
Draw a fat thumb along each palm's outer side, from near the bottom up to beside the first finger.
Tip Rub out the palm and finger lines inside each thumb.
Step 6: Wrists
Start near the bottom of each palm. Draw 2 wrist lines down and stop a finger's length below.
Tip Rub out the bottom of each palm between its wrist lines.
Step 7: Cuffs
Across the end of each wrist draw a wide cuff like a soft box.
Step 8: Peach left hand
Go over your lines, then colour the hand on the left peach, with its thumb and wrist.
Step 9: Peach right hand
Colour the hand on the right peach too, with its thumb and wrist.
Step 10: Blue cuffs
Colour both cuffs blue. Go over your lines and your cupped hands are done.
Your finished drawing
Follow the steps above and this is where you end up: cupped hands, drawn by you.
Every step in one picture