Watch it draw itself · tap to replay
How to Draw a Shopkeeper
Draw a shopkeeper in 12 easy steps, about 9 minutes. Free, with a printable worksheet.
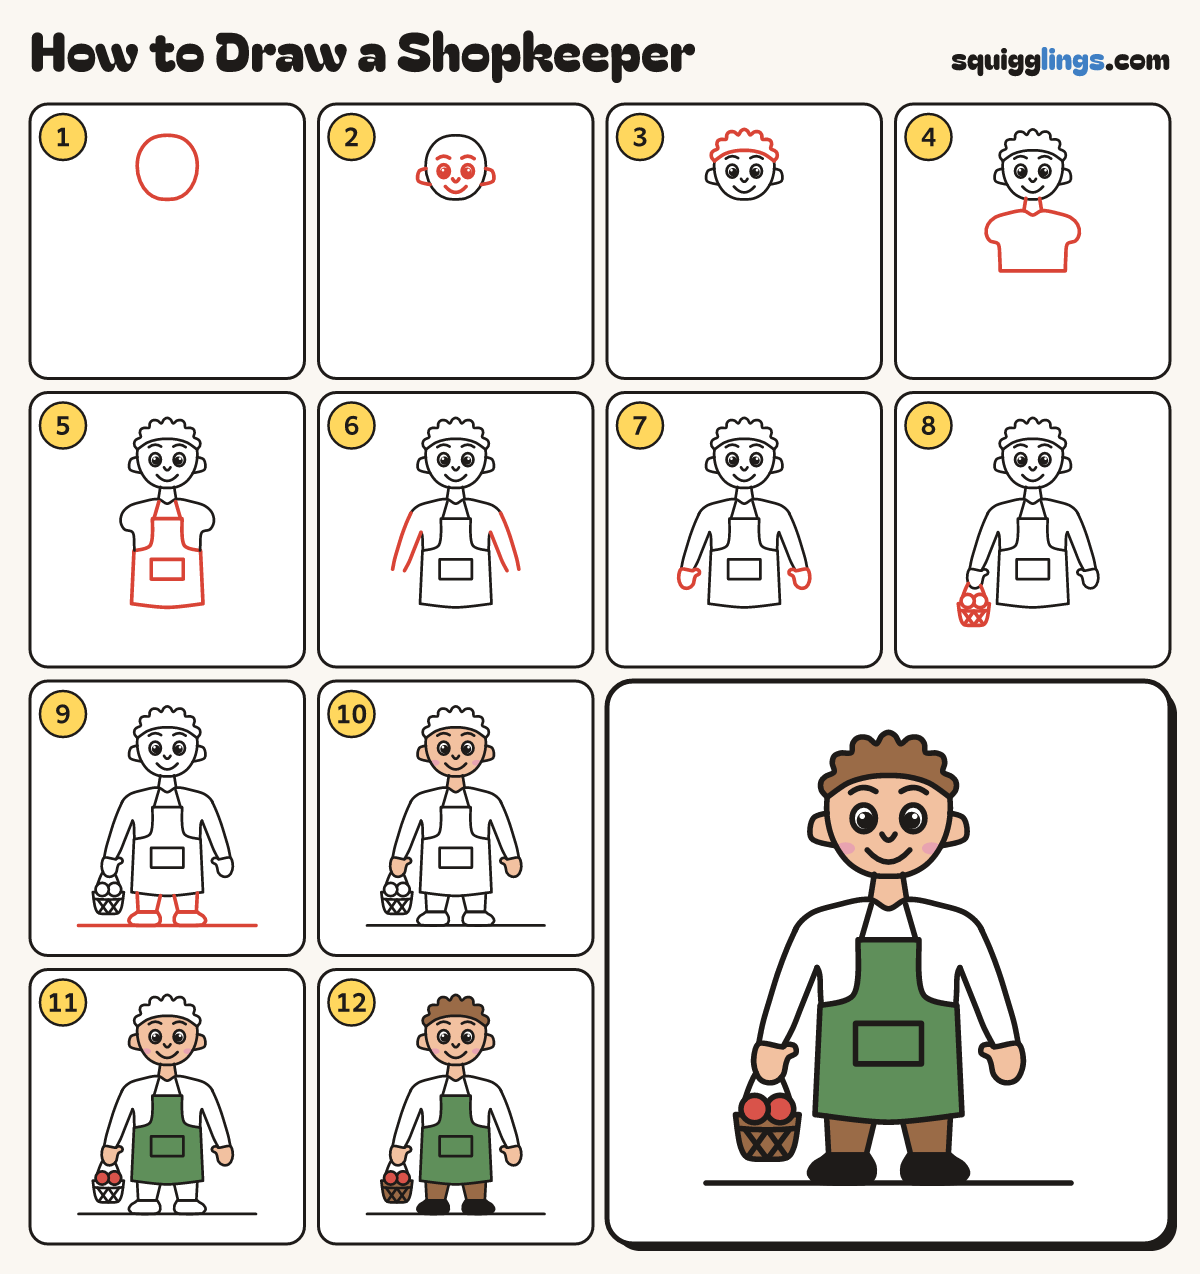
Each picture adds one red line. Draw that line, then scroll to the next picture. Rub out any dashed helper lines at the end. First up: the head.
Step 1: The head
Near the top of your paper draw an egg for the head, a little narrower at the chin.
Tip Leave most of the page below for the body and legs.
Step 2: The face
Add eyes, nose, smile and eyebrows. Start on the head, bulge out an ear on each side, and stop.
Step 3: Soft hair
Start on the left of the head, by the eyebrows. Draw soft tufts over the top, stop on the right.
Step 4: Neck and shirt
Draw 2 neck lines. From the left one draw a shirt with round shoulders, over to the right one.
Step 5: Apron and pocket
Draw a long apron: a bib on the chest, then wide down past the knees, with a pocket.
Step 6: Long sleeves
Draw each long sleeve from the shoulder and armpit down to the wrist, narrower at the bottom.
Tip Rub out the shirt lines inside the sleeves.
Step 7: Mitten hands
At the bottom of each arm draw a mitten, round like an egg, with a little thumb pointing in.
Step 8: Basket of apples
Under the left hand draw a criss-cross basket with 2 apples. Draw a handle from the rim into the hand.
Step 9: Trousers, shoes and ground
Start at the left of the shirt. Draw 2 trouser legs and stop at the right. Add shoes and ground.
Step 10: Peach skin, pink cheeks
Colour the face, ears, neck and hands peach, with pink cheeks. Leave the eyes and shirt white.
Step 11: Red apples, green apron
Colour the apples red. Colour the apron and its pocket green.
Step 12: Brown and black
Colour the hair, trousers and basket brown, around the apples, then the shoes black. Your shopkeeper is done!
Your finished drawing
Follow the steps above and this is where you end up: a shopkeeper, drawn by you.
Every step in one picture