Watch it draw itself · tap to replay
How to Draw Shading Techniques
Draw shading techniques in 10 easy steps, about 8 minutes. Free, with a printable worksheet.
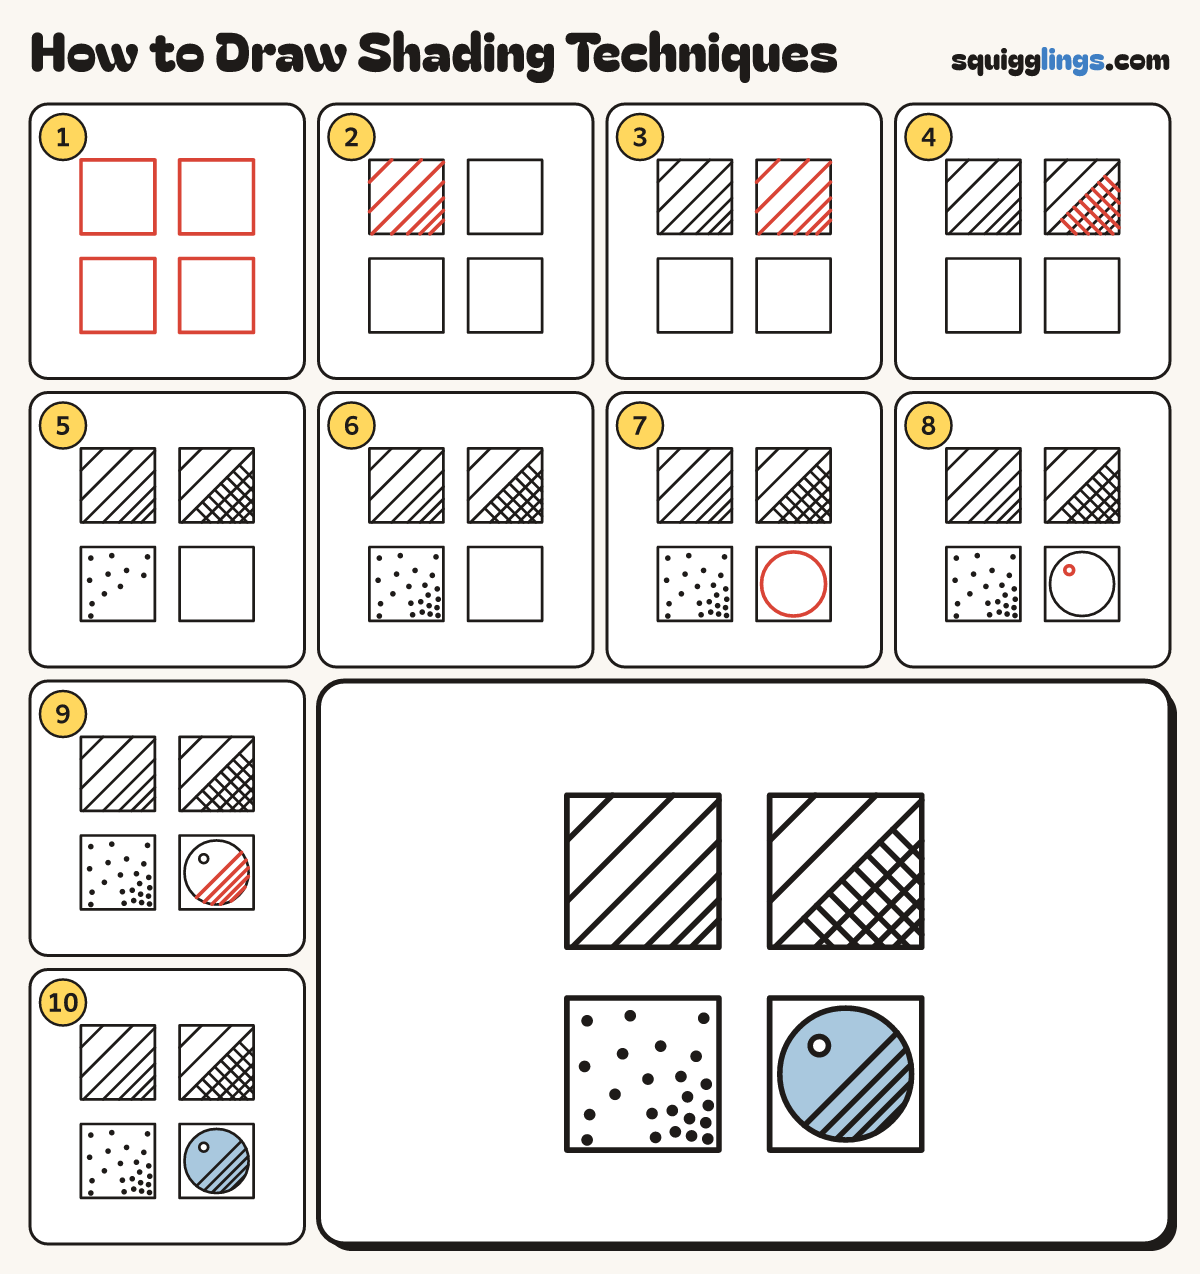
Each picture adds one red line. Draw that line, then scroll to the next picture. Rub out any dashed helper lines at the end. First up: 4 boxes.
Step 1: 4 boxes
Draw 4 squares the same size, 2 on top and 2 underneath, with a gap between, like 4 windows.
Tip Pretend the light comes from the top left, so the bottom right is dark.
Step 2: Hatching
In the top left box draw slanted lines leaning the same way: far apart top left, closer together bottom right.
Step 3: Cross-hatching lines
In the top right box draw the same slanted lines: far apart top left, closer together bottom right.
Step 4: Crossing lines
Now cross the bottom right half with lines leaning the other way, from the long middle line to the edges.
Tip Crossed lines look darker than plain lines.
Step 5: Stippling
In the bottom left box press round dots with your pencil tip, spread well apart on the light top left.
Step 6: More dots
Keep dotting toward the bottom right corner, closer and closer together, until that corner is nearly all dots.
Tip Lots of dots close together look dark.
Step 7: The ball
In the bottom right box draw one round circle for a ball, nearly filling the box.
Step 8: The highlight
Inside the ball, near its top left edge, draw a small circle for the highlight where the light hits.
Step 9: Hatch the ball
Shade the ball with slanted lines across its bottom right, closer together toward the edge. Leave the top left empty.
Step 10: Sky blue ball
Colour the ball sky blue over the lines, leaving the highlight white. All 4 boxes go from light to dark!
Your finished drawing
Follow the steps above and this is where you end up: shading techniques, drawn by you.
Every step in one picture