Watch it draw itself · tap to replay
How to Draw Serif Letters
Draw serif letters in 10 easy steps, about 8 minutes. Free, with a printable worksheet.
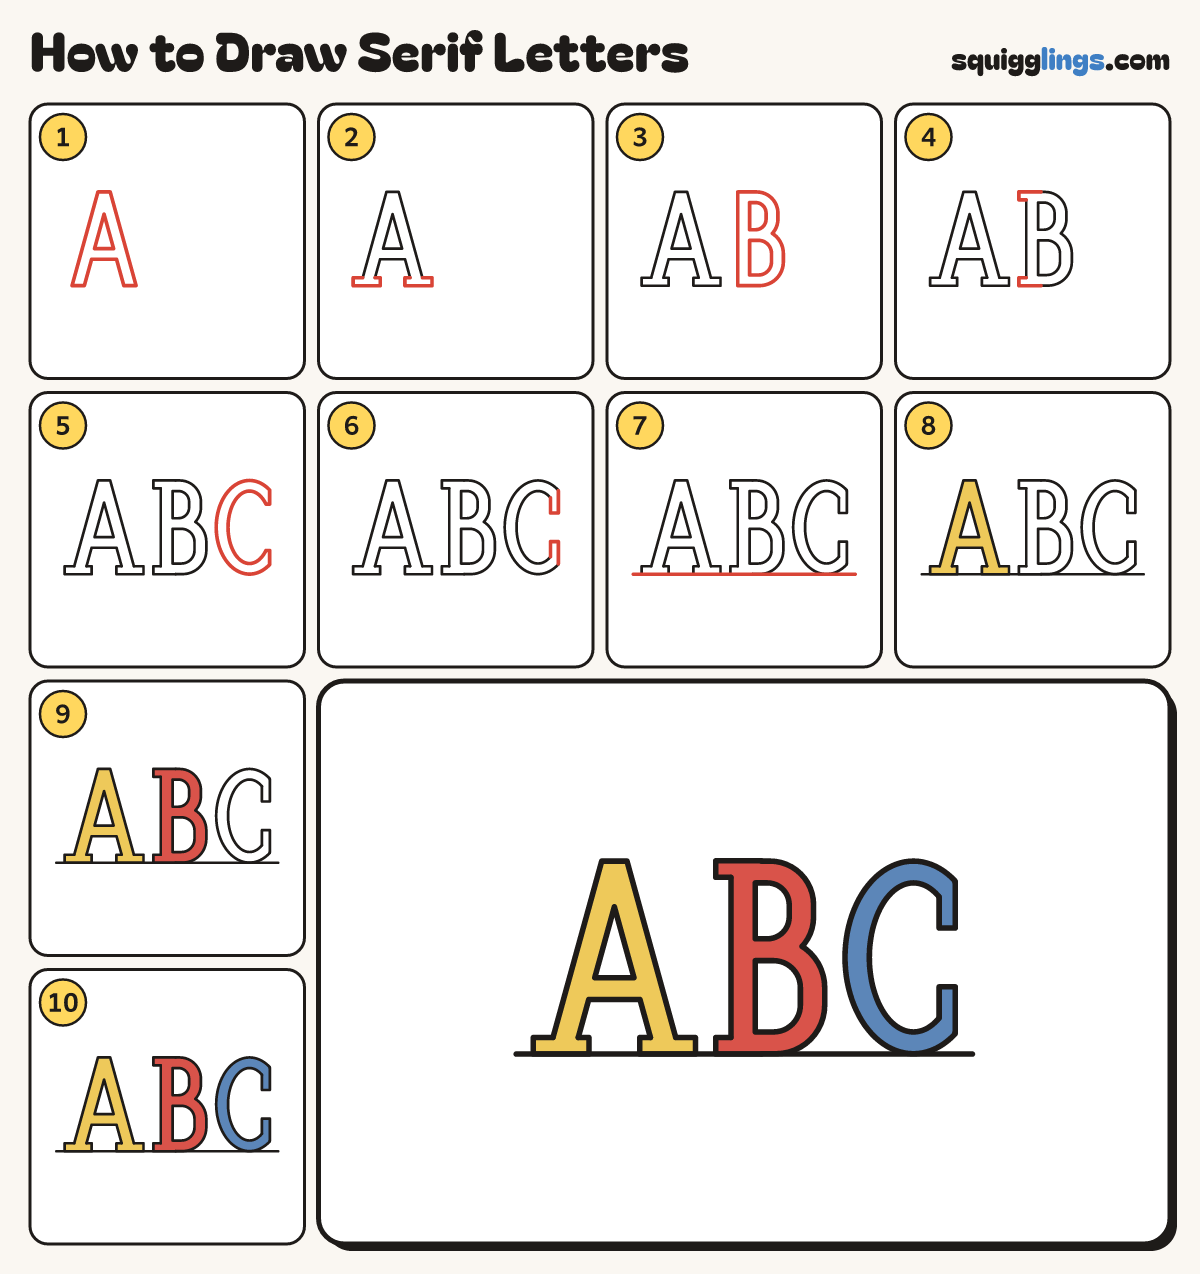
Each picture adds one red line. Draw that line, then scroll to the next picture. Rub out any dashed helper lines at the end. First up: the big a.
Step 1: The big A
On the left draw a fat A: 2 thick slanted legs with a flat top, and a thick bar across.
Tip Draw it as an outline, like a letter cut out of card.
Step 2: The A's feet
On the bottom of each leg draw a flat foot, wider than the leg. Rub out the lines inside it.
Tip These little feet are called serifs. They turn plain letters into serif letters.
Step 3: The big B
Leave a gap, then draw a fat B: a thick stem, a round bump on top, a bigger one below.
Tip Make the B exactly as tall as the A.
Step 4: The B's feet
At the top and bottom of the stem draw a flat foot poking out to the left. Rub out inside.
Step 5: The big C
Leave a gap again. Draw a fat C as tall as the B, with a wide opening on the right.
Step 6: The C's tips
On each end of the C draw a small upright block that pokes into the opening. Rub out inside.
Tip Every serif is a small block on the end of a stroke.
Step 7: The floor
Draw a long floor line under the letters, from the left edge to the right edge.
Step 8: Yellow A
Go over your lines. Colour the A and its feet yellow, leaving the little triangle empty.
Step 9: Red B
Colour the B and its feet red, leaving the 2 holes empty.
Step 10: Blue C
Colour the C and its tips blue. Your serif letters are done!
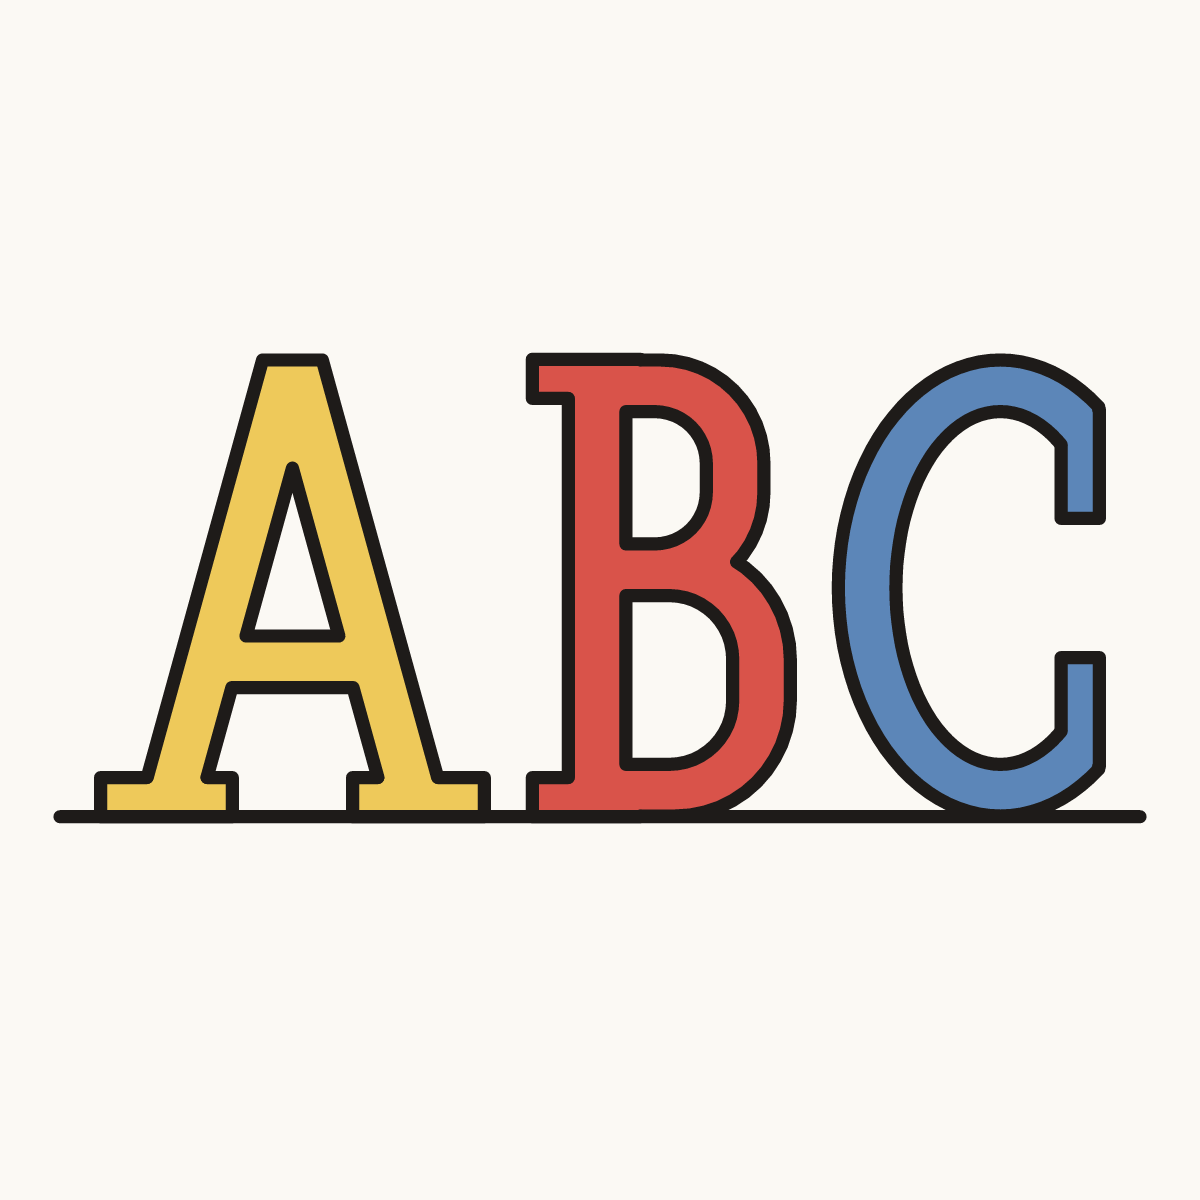
Your finished drawing
Follow the steps above and this is where you end up: serif letters, drawn by you.
Every step in one picture