Watch it draw itself · tap to replay
How to Draw a Semaphore Signal
Draw a semaphore signal in 13 easy steps, about 10 minutes. Free, with a printable worksheet.
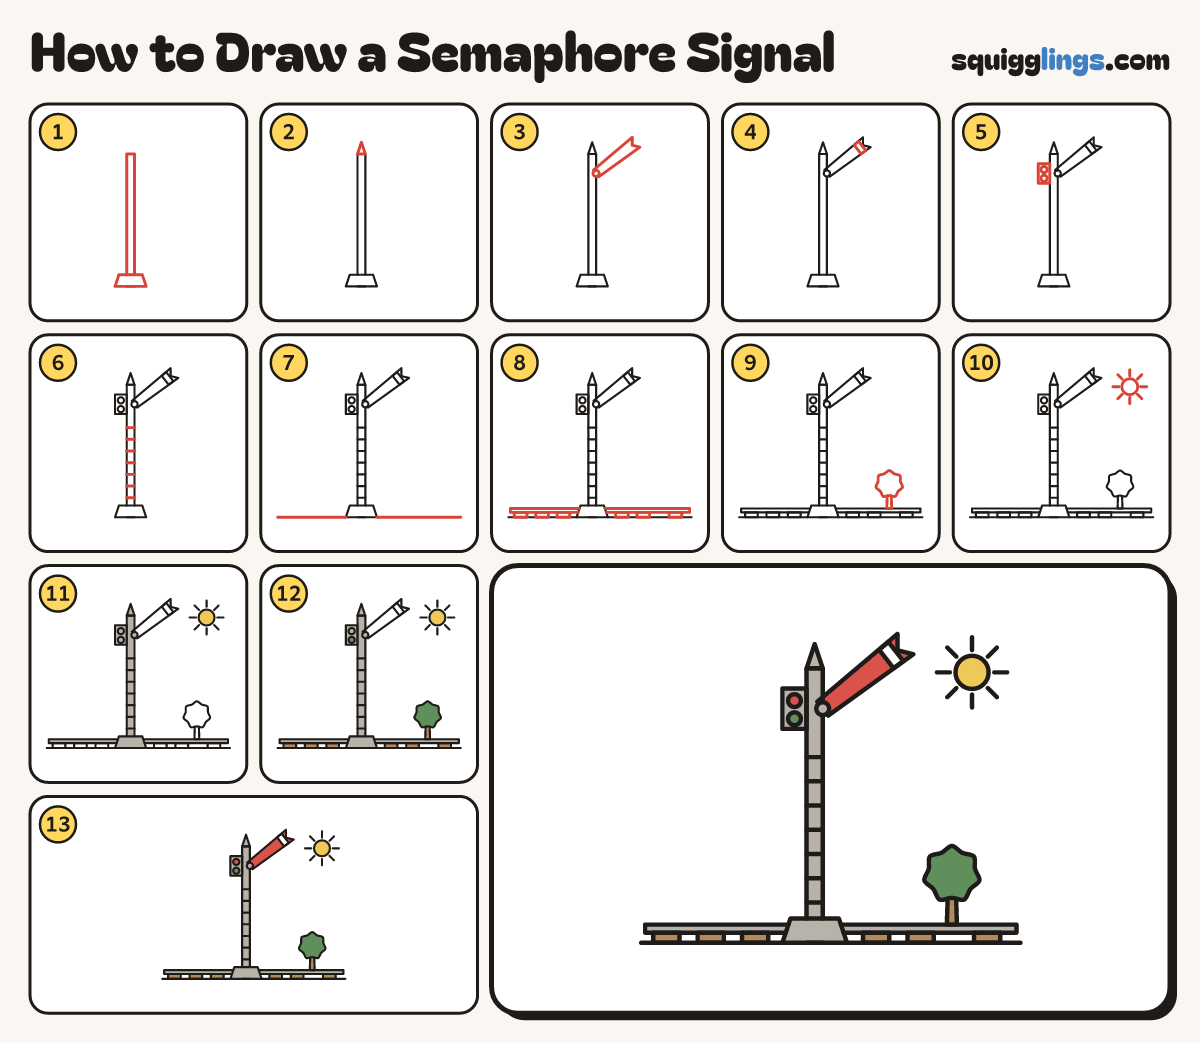
Each picture adds one red line. Draw that line, then scroll to the next picture. Rub out any dashed helper lines at the end. First up: the tall post.
Step 1: The tall post
In the middle of your paper draw a very tall thin post standing on a wider base.
Tip The arm tells the train driver to stop or go.
Step 2: The pointy cap
On top of the post draw a small pointed cap.
Step 3: The arm
Near the top draw a long fishtail arm sloping up right, with a round pin where it meets the post.
Step 4: The band
Near the tip of the arm draw 2 short lines across it for the white band.
Step 5: The lamp
Left of the post, level with the arm, draw a small box lamp with 2 round lenses stacked inside.
Step 6: Ladder rungs
Draw short rungs across the post, from a little below the lamp down to the base, for the ladder.
Step 7: The ground
Draw the ground line from the base out to each edge of the paper.
Step 8: The tracks
Along the ground draw 6 flat sleepers. On top draw a long thin rail, going behind the base.
Step 9: The tree
On the right draw a small round tree standing behind the rail, its trunk stopping at the rail.
Step 10: The sun
Draw a sun with short rays in the top right corner.
Step 11: Yellow sun, grey post
Colour the sun yellow. Colour the post, cap, base, pin, lamp and rail grey around the lenses.
Step 12: Brown and green
Colour the trunk and sleepers brown. Colour the treetop and the lower lens green.
Step 13: Red arm, white band
Colour the arm and the top lens red, leaving the band white. Your semaphore signal is done!
Your finished drawing
Follow the steps above and this is where you end up: a semaphore signal, drawn by you.
Every step in one picture