Watch it draw itself · tap to replay
How to Draw a Seed of Life
Draw a seed of life in 11 easy steps, about 8 minutes. Free, with a printable worksheet.
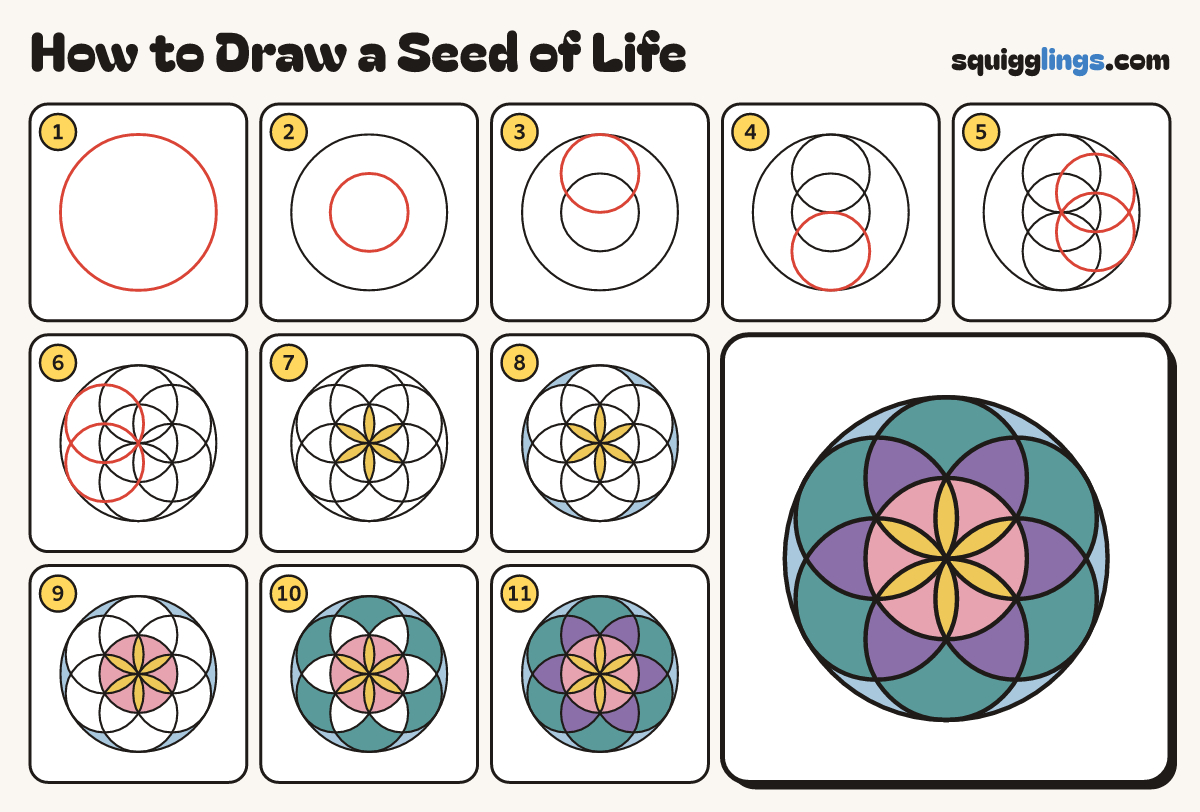
Each picture adds one red line. Draw that line, then scroll to the next picture. Rub out any dashed helper lines at the end. First up: the big circle.
Step 1: The big circle
Draw a big circle that fills most of your paper. Everything goes inside it.
Tip A seed of life is 7 circles, all the same size, that make a flower.
Step 2: The middle circle
In the very middle draw a circle half as wide as the big one.
Step 3: The top circle
Draw the same circle higher up. It touches the top of the big circle and crosses the very middle.
Tip Its middle sits on the top edge of the first small circle.
Step 4: The bottom circle
Draw the same circle lower down. It touches the bottom of the big circle and crosses the very middle.
Step 5: Two right circles
Draw 2 more circles on the right, one higher and one lower. Each crosses the very middle.
Tip Each one touches the big circle and passes through 2 corners you already have.
Step 6: Two left circles
Draw 2 circles on the left to match. Now 6 circles sit round the middle one.
Step 7: Yellow petals
Go over your lines. Colour the 6 thin petals in the very middle yellow.
Step 8: Sky blue edge
Colour the 6 gaps between the flower and the big circle sky blue.
Step 9: Pink triangles
Colour the 6 little triangles between the yellow petals pink.
Step 10: Teal outside
Colour the 6 big round shapes at the outside teal. Each one is the end of a circle.
Step 11: Purple petals
Colour the 6 pointed petals that are left purple. Your seed of life is done!
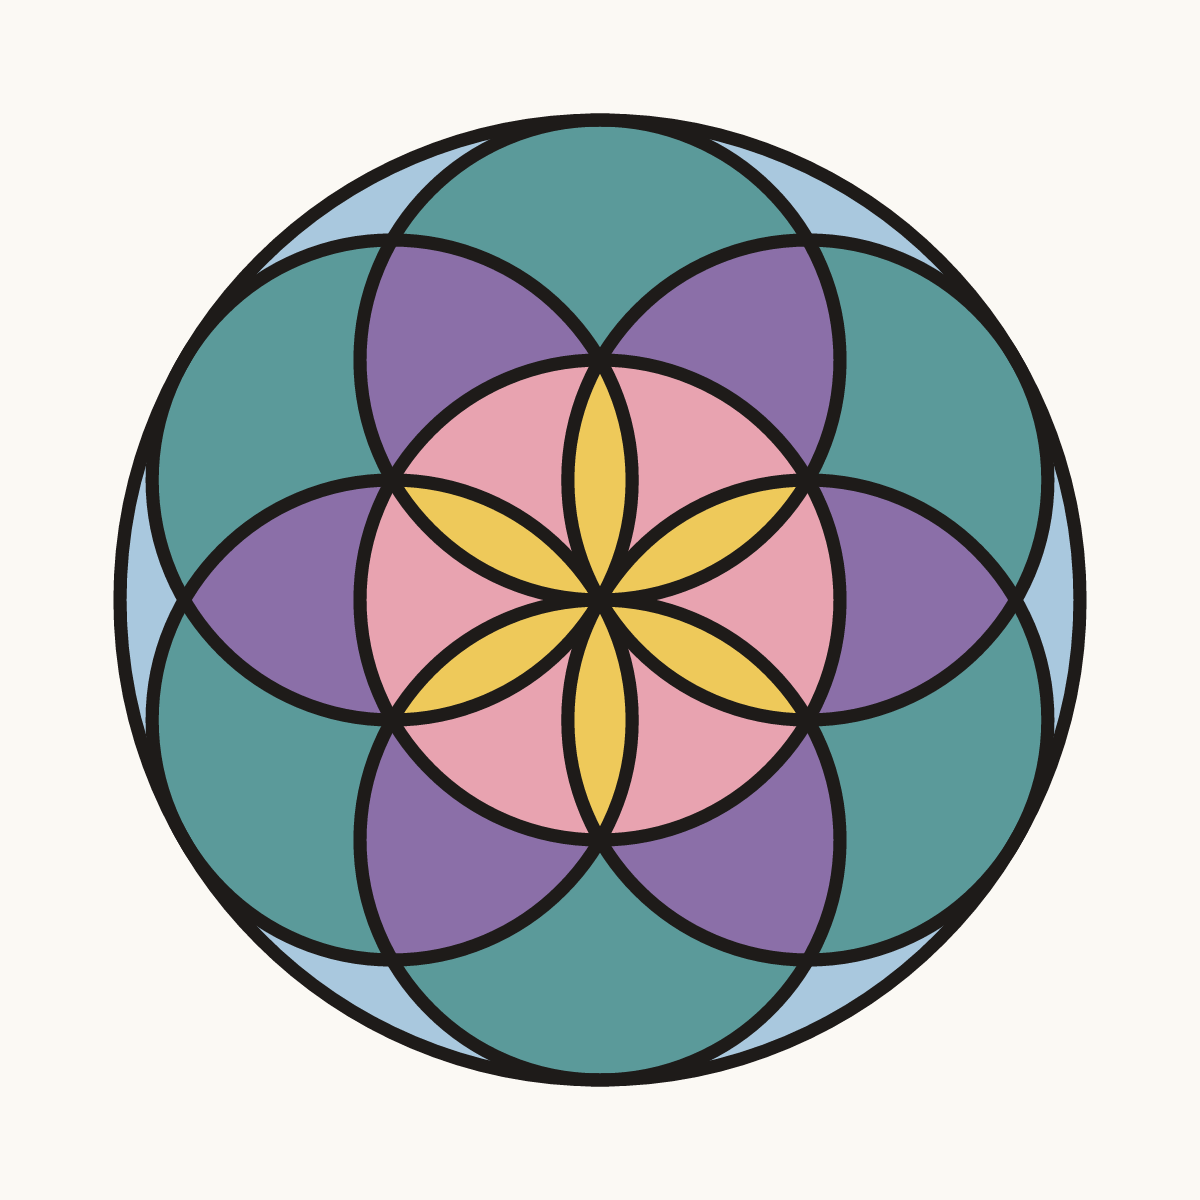
Your finished drawing
Follow the steps above and this is where you end up: a seed of life, drawn by you.
Every step in one picture